by Great Joy Studio | Apr 27, 2020 | Quilting & Fabric
•
Hello to everyone at home. And sewing?
If you ever thought of making one of our large scale
She Who Sews
series for your studio, now would be a good time. Patterns are
half price
in the shop through May!
And we have fabric kits (limited supply) for
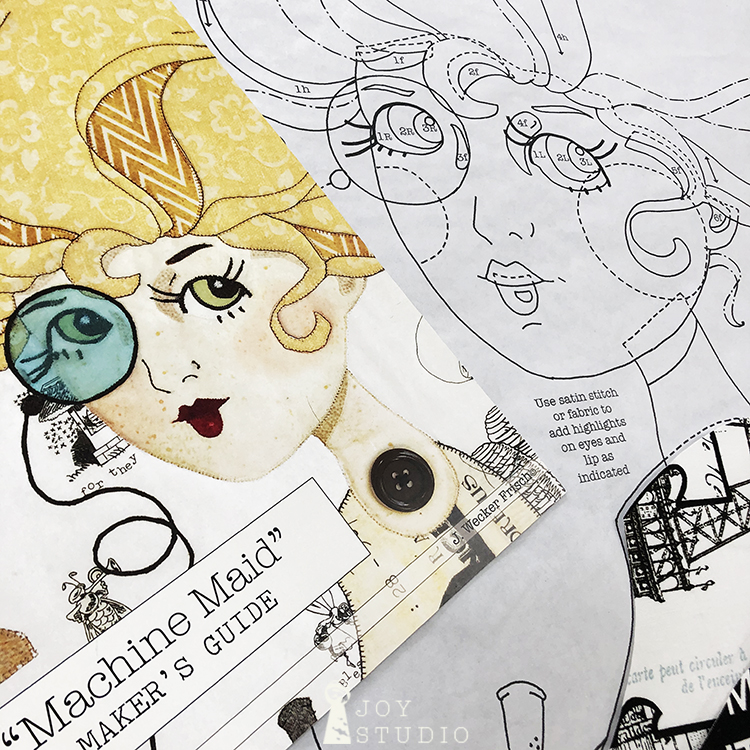
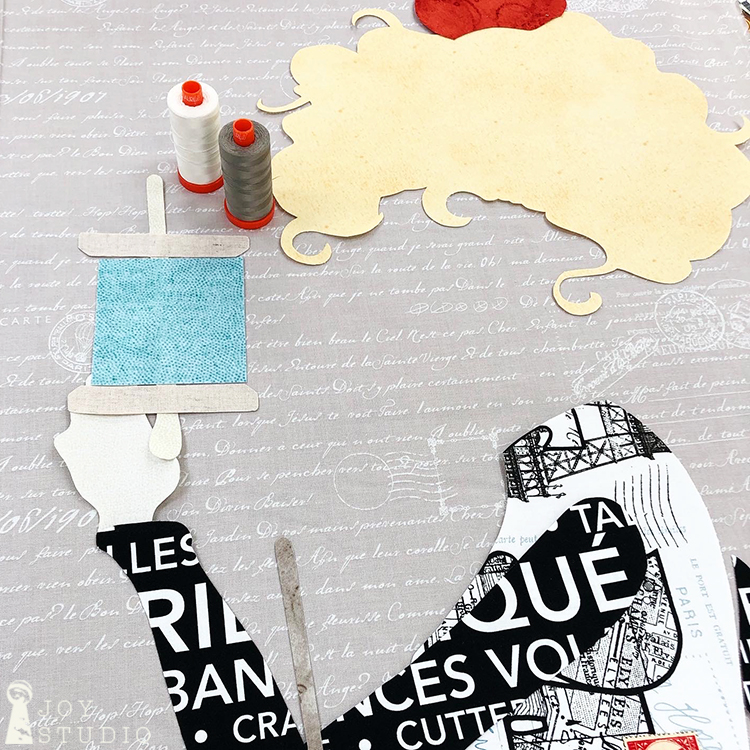
“Machine Maid”
as she originally appears on the pattern cover using our
Painters Palette,
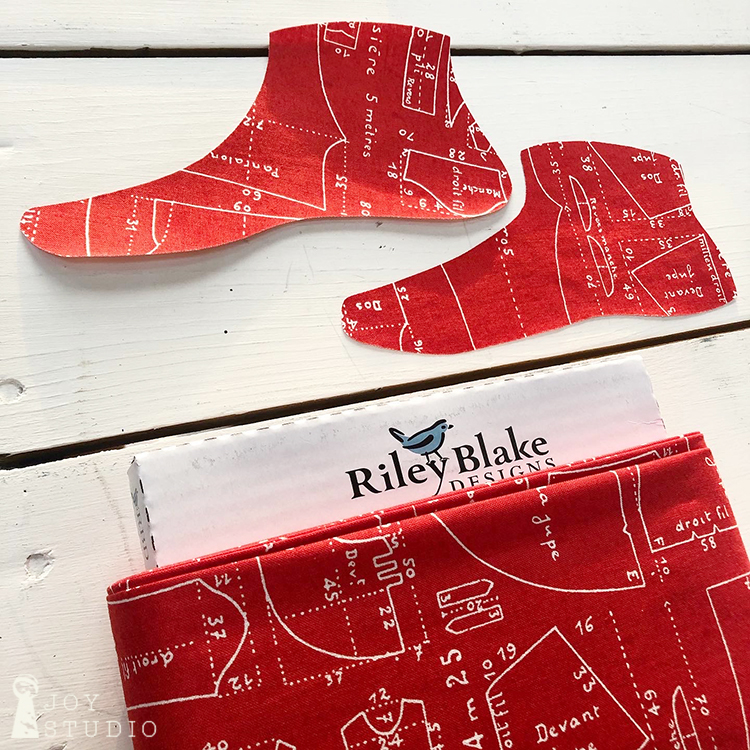
and a few basics plus a Paris version using my
Couturiere Parisienne
fabrics from Riley Blake Designs. Both collections are available in shops now.
I am making her up in the later currently and for the first time ever actually and, I’m liking!!
Fabric background back story below.
•

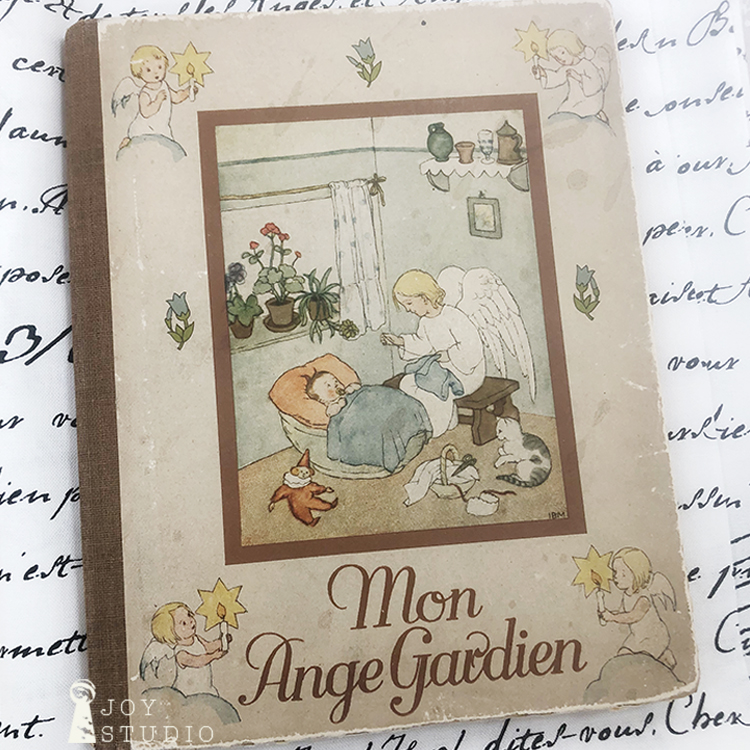
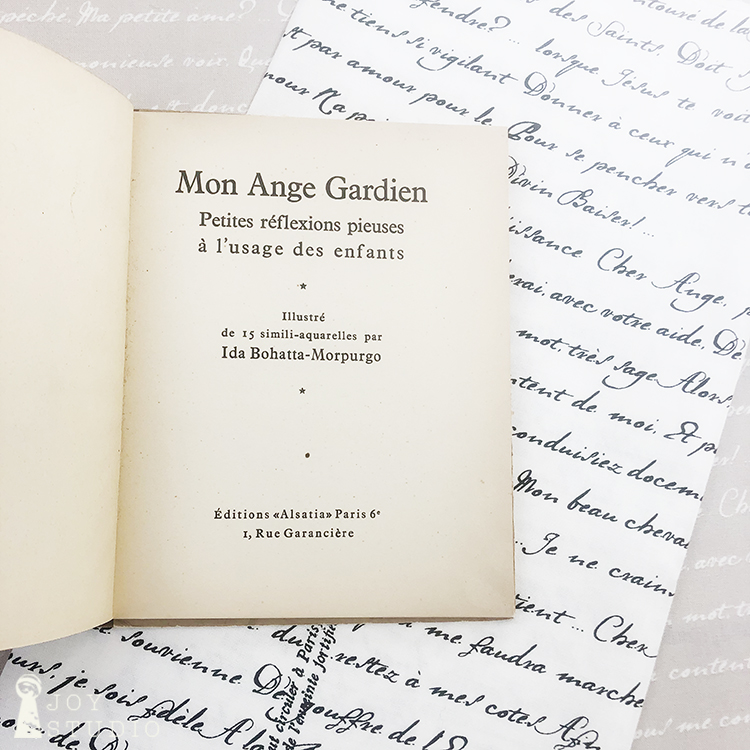
• Back story on the background text fabric is that the text was inspired by a little antique children’s book of prayers, in French! Sew sweet. Although I cannot interpret them, I was pleased to make this a part of the Couturiere Parisienne collection in lieu of my standard snippets of scripture. Parfait!
•
I’m sure we all agree that we are still in such a strange time but keep creating is my plan. And praying. It helps, right?!
•

Au revoir mon ami!
by Great Joy Studio | Apr 10, 2020 | Quilting & Fabric
Freedoms taken away.
•
•
Freedom of speech. – My first (stronger, more specific) saved draft of this post suddenly and mysteriously disappeared, unretievable.
Freedom to worship. – I can no longer attend my local church.
Freedom from want. – I cannot purchase basic needs but rather in some cases decided for me.
Freedom from fear. – The daily news reports are terrorizing.
•
I am a licensed artist, not a strong politically minded person, not a conspiracy theorist. However, I am compelled to post this expression of my anger and a career decision. My (& yours) freedoms for the moment and foreseeable future have been taken away. In America!! Coincidence or intentional? What does your common sense tell you?
- Aside from numerous inconveniences, I am angry that I will not be spending this Easter holiday with my immediate family. I am angry that I cannot attend my local church. Two of the most important freedoms that were enjoyed my whole life, in America.
- Despite the costly personal loss, I will no longer license my art/Images and name to manufacturers whose product(s) are made in China. I should have addressed this several years earlier when my conscience was merely bothered. Now I take it personally, as though I have been attacked. My sincere apologies.
•
I have never expressed any political views and make it a point, but rather I stick to art and creativity only in my content up to now.
Please understand and again pardon me, I am deeply angered at WHO caused this attack on my country, and the world.
Would have never believed or conceived.
Wake up o sleeper? Eph. 5
by Great Joy Studio | Mar 7, 2020 | Quilting & Fabric
March,
National Quilting Month,
means it’s time for the #IGQuiltFest2020 hosted by Amy Ellis @amyscreativeside on Instagram!
Most likely you’re familiar with the event that works around a daily quilt related post prompt, plus opportunities to win a variety of giveaways!
Ours is Day 8, Reduce, Reuse and Recycle. Perfect, since I have been ‘upcycling’ for a very long time.
You can view my IG post on Sunday, March 8 @jweckerfrisch
•
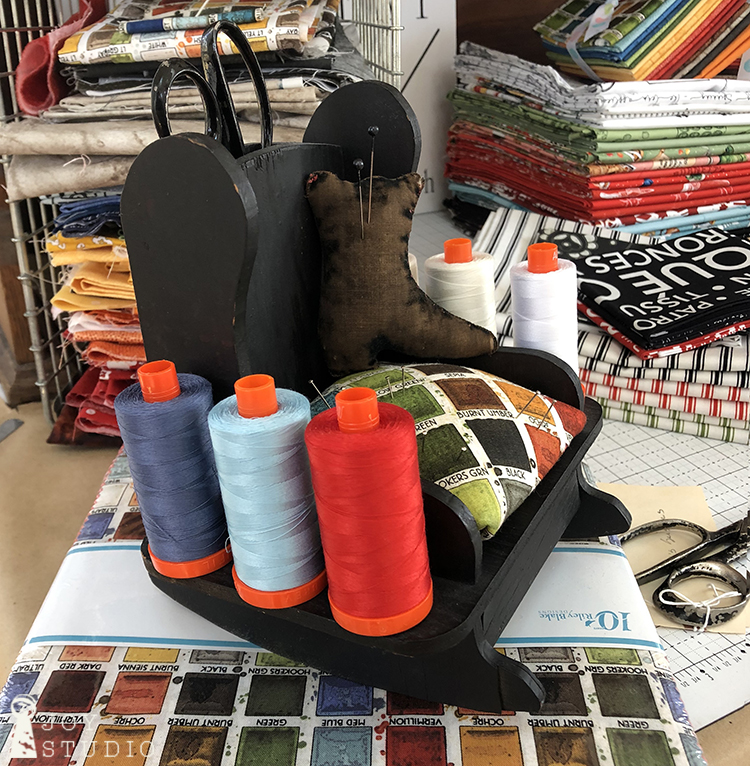
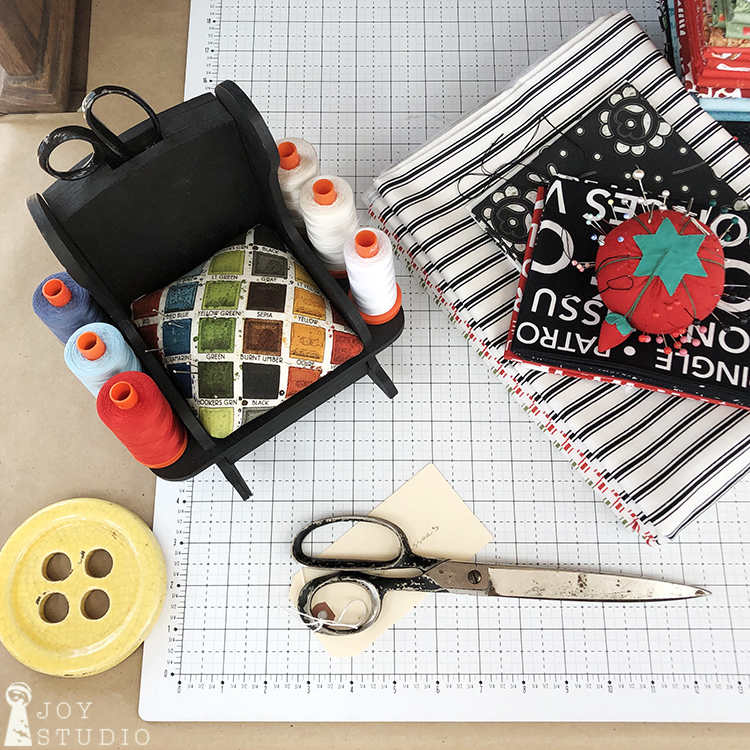
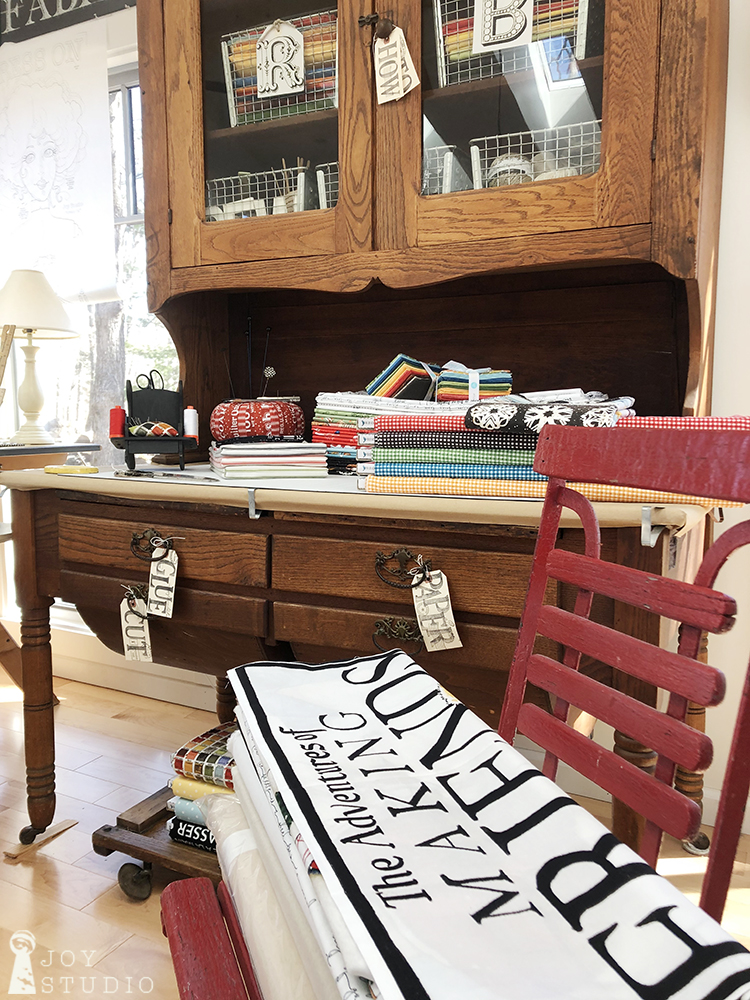
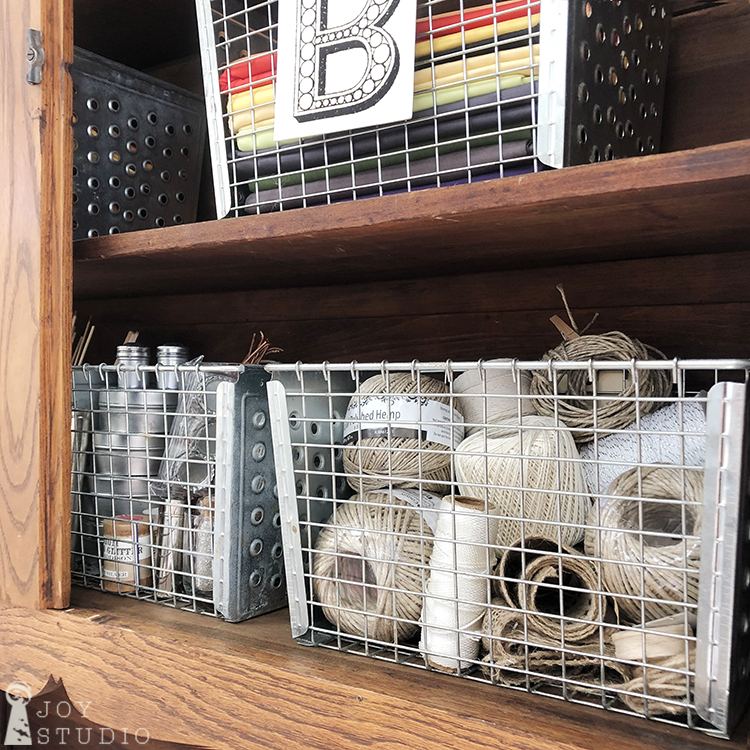
One can quickly tell from looking at anything I create that I am crazy about antique and vintage EVERYTHING! This influence is apparent in my art, fabric and interior design. Not only a collector but as a maker I always see a potential use for anything typically discarded so, the studio is always full of possible medium for future creations. And, if it’s not being used to make something, an item may double for creative storage or organizing.
The shots below are some of the reuses of items picked up along the journey and my post focus.
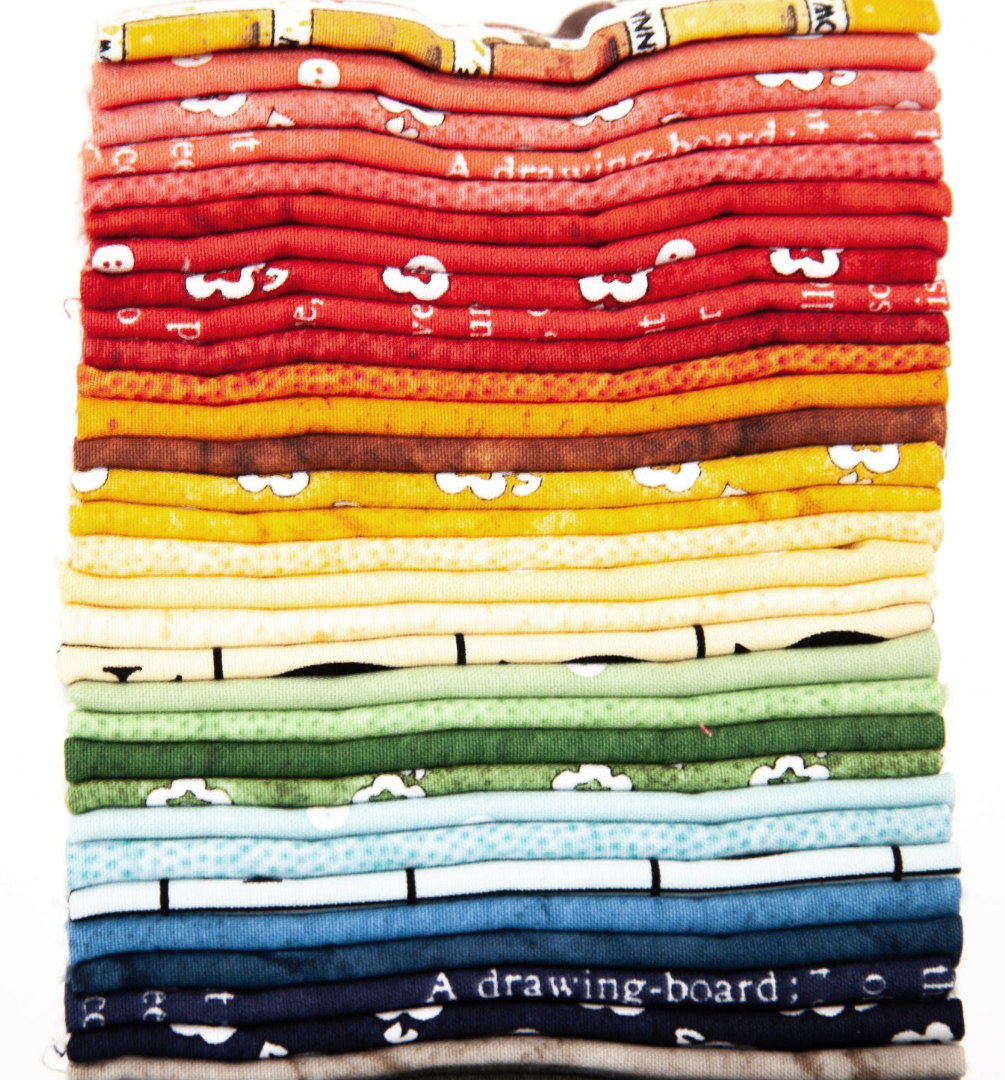
1) Antique Pre-Hoosier cabinet, red bistro chair and locker room baskets make great sewing supply storage. Fabrics shown are Painters Palette, Couturiere Parisienne (in shops) and a sneak peek of Snow Sweet (delivers in June) both from Riley Blake Designs.

•
Maybe you will notice the three year old studio shift since I began learning to quilt. It’s true! The turn of the century pre-hoosier cabinet once housing all of my art and crafting supplies is beginning to fill up with the current fabric collections that can clutter during sample making for markets and event preps. Sew far Paperdoll, Costume Makers Ball, Painters Palette, Couturiere Parisienne, Goose Tales and Snow Sweet collections from our fabric partner, Riley Blake Designs, have passed across the tables, filled the cupboards and been stacked on every flat surface available in the Joy Studio at one time or another.
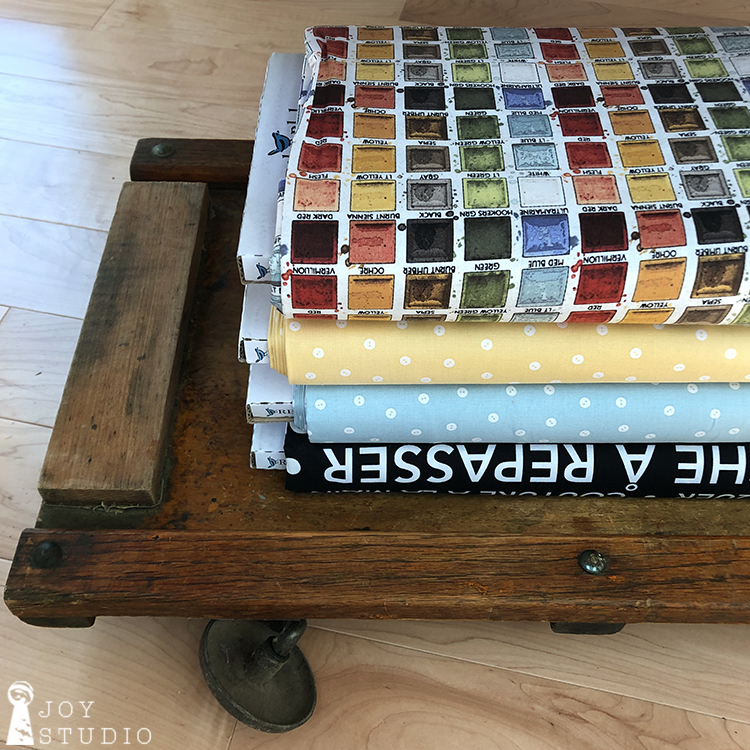
2.) Auto shop ‘Creeper’ rolling cart under the cabinet is the perfect size for fabric bolts.

•
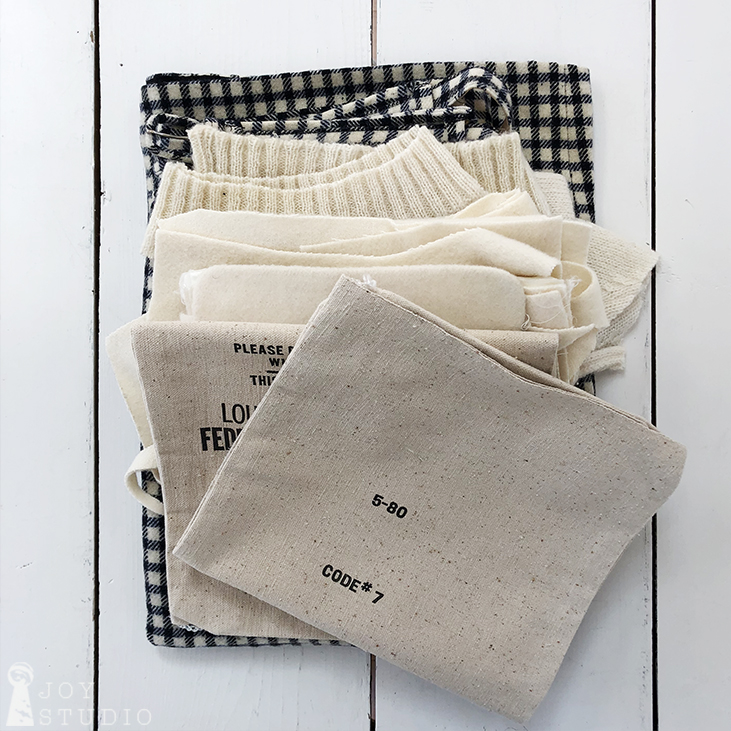
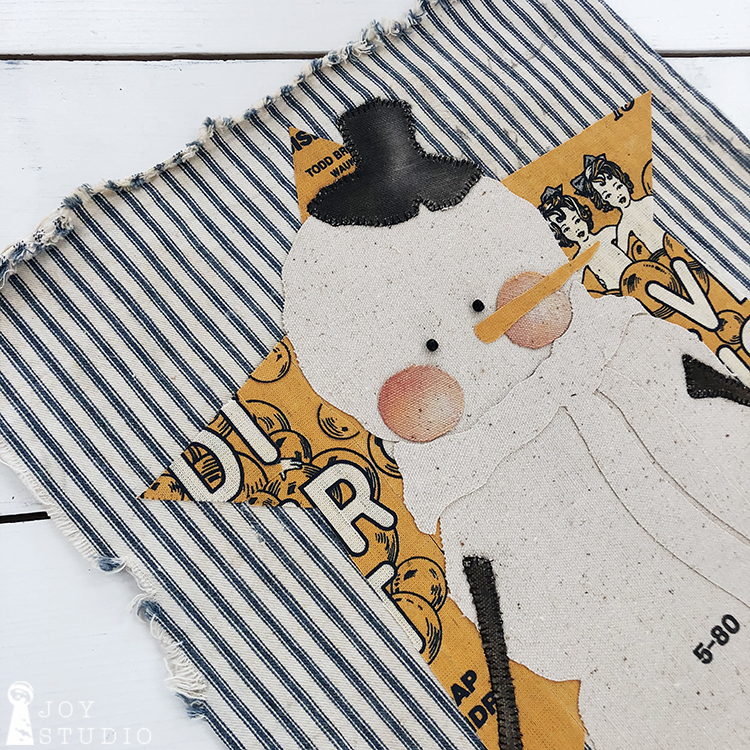
3). Saved vintage canvas bags and select clothing items have found their way into our appliqué quilt project testing. The upcycled materials snowman below is included in our quilt pattern for this summer’s Snow-A-Long which features “Snow Sweet” fabrics from Riley Blake Designs.

•
Thank you for the visit!
Please leave me your thoughts in comments and . .
ENTER to WIN Painters Palette RBD Fabric Bundle GIVEAWAY @amyscreativeside on Instagram Sunday, Day 8!
•
Happy National Quilting Month and thank you Amy for hosting #IGQuiltFest.
G R A T E F U L,
to be living the abundant life. John 10:10
by Great Joy Studio | Feb 25, 2020 | Quilting & Fabric

•
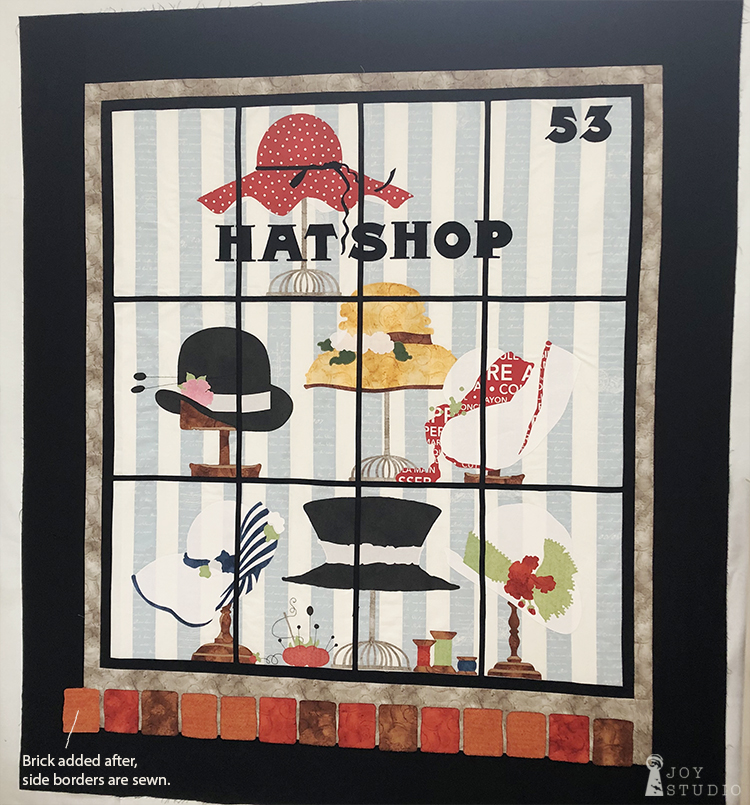
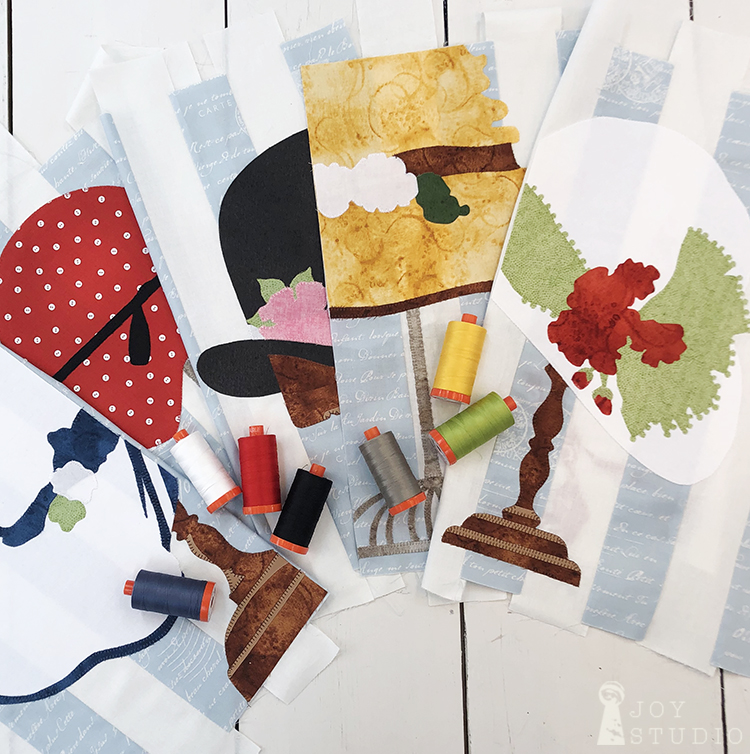
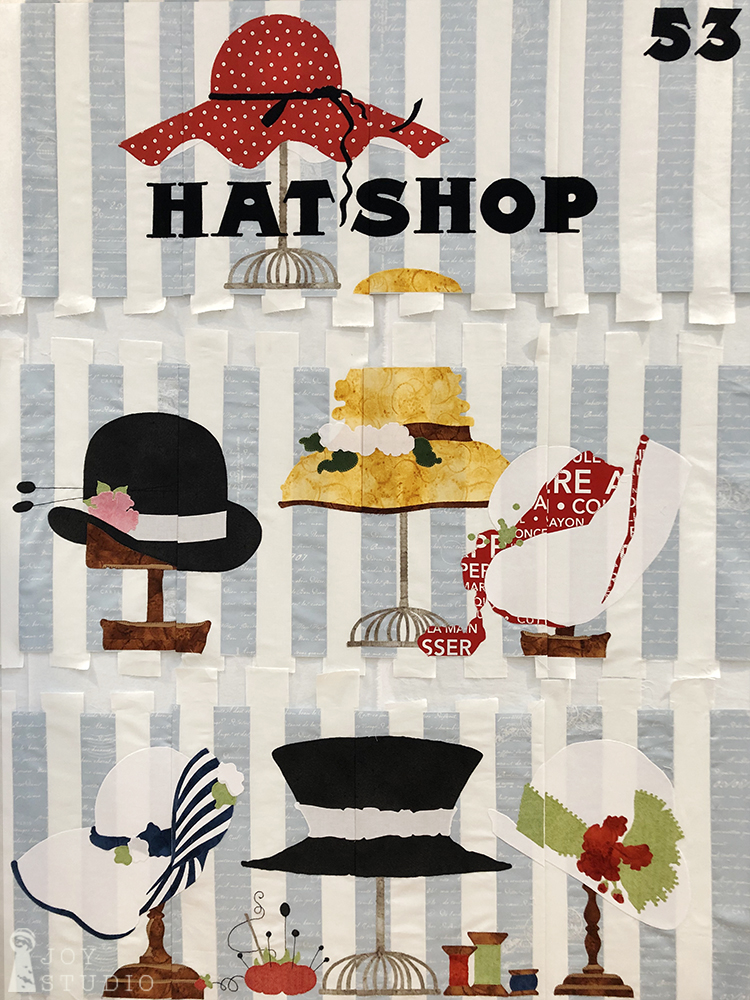
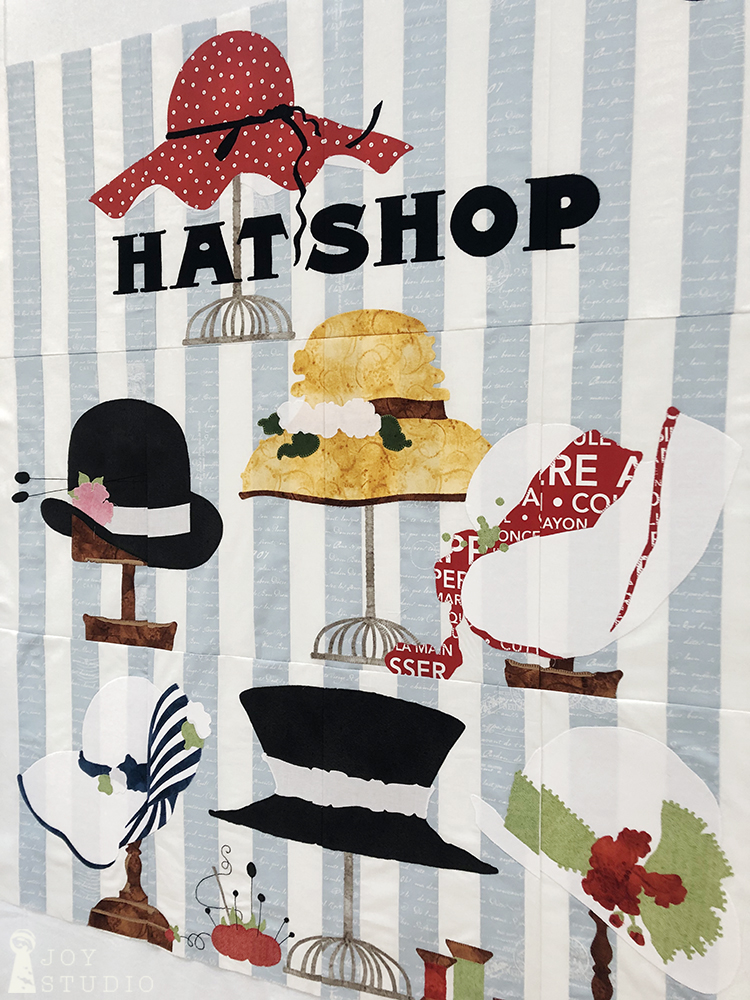
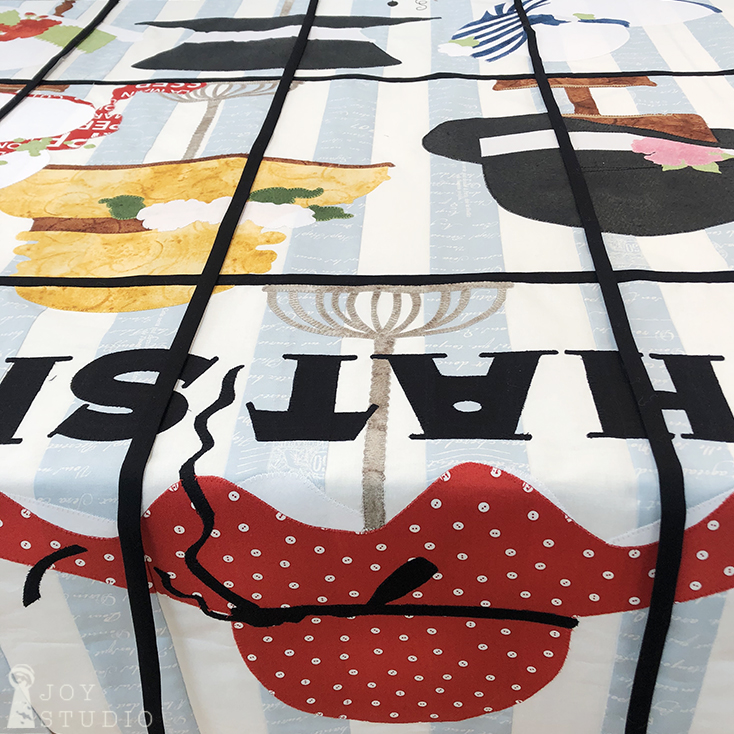
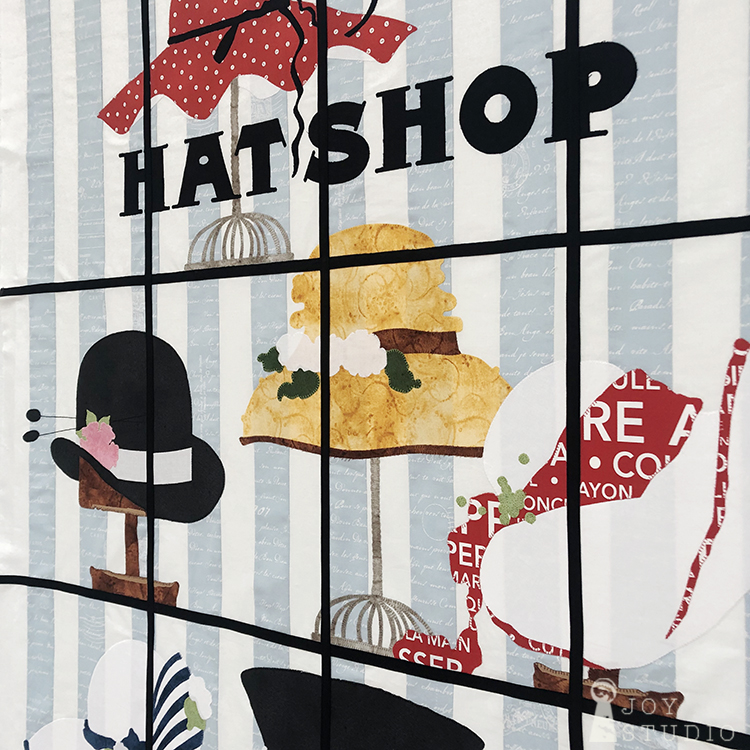
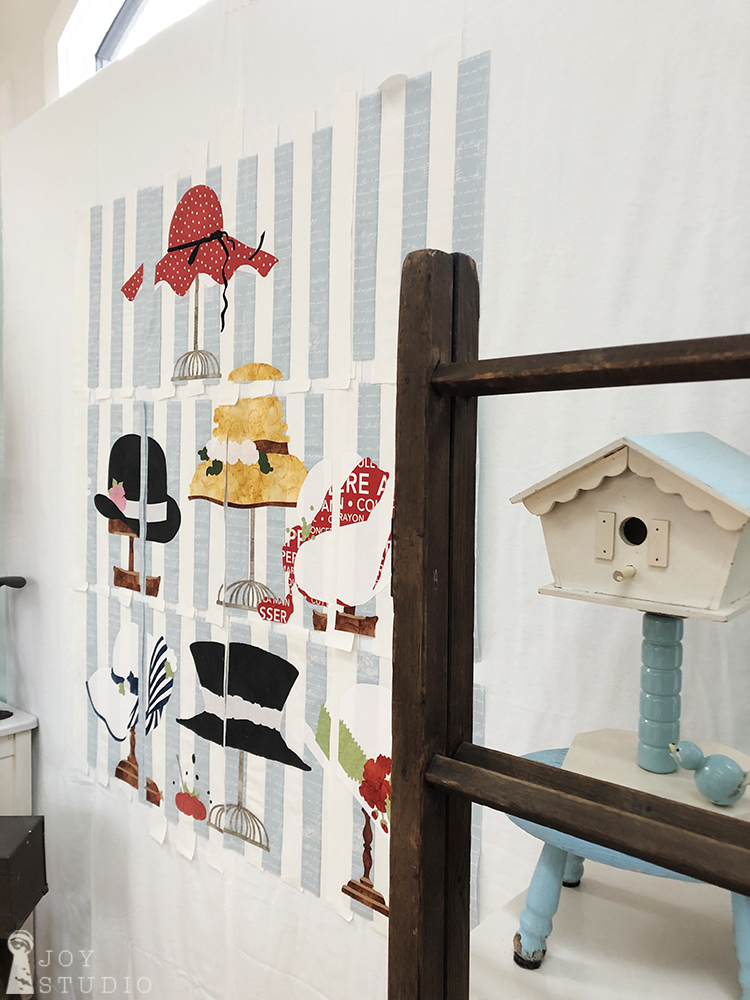
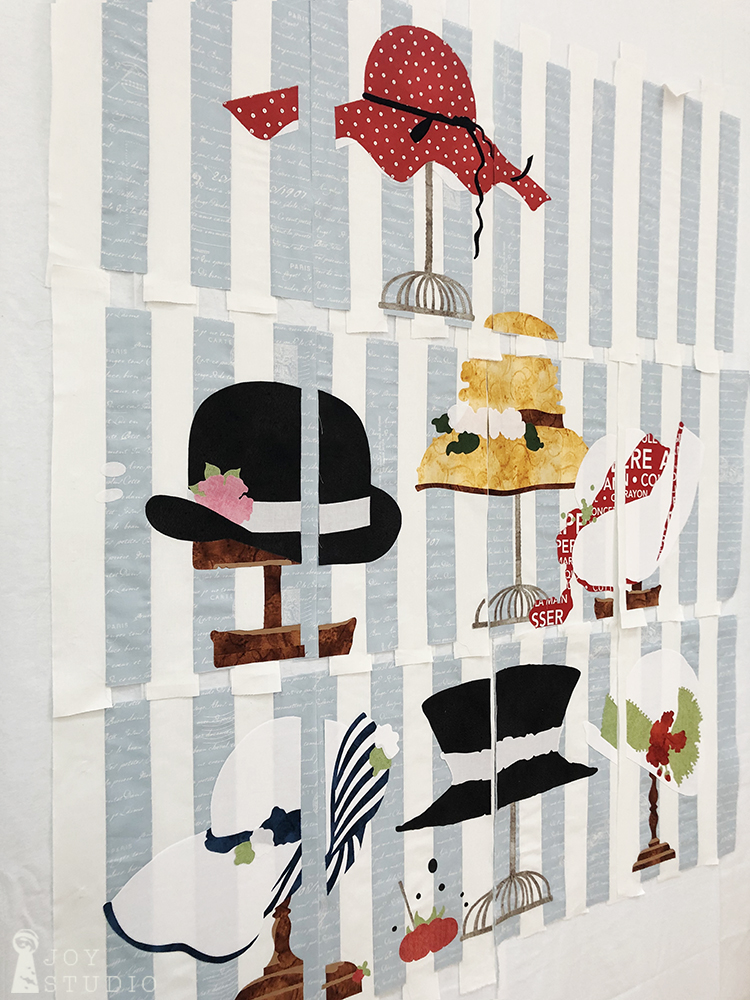
Hat Shop Sew-A-Long, last post.
Adding your borders is all that is left to do!
This can be done in a couple of different ways however, I will only be describing how I actually, chose to finish this quilt.
Borders.
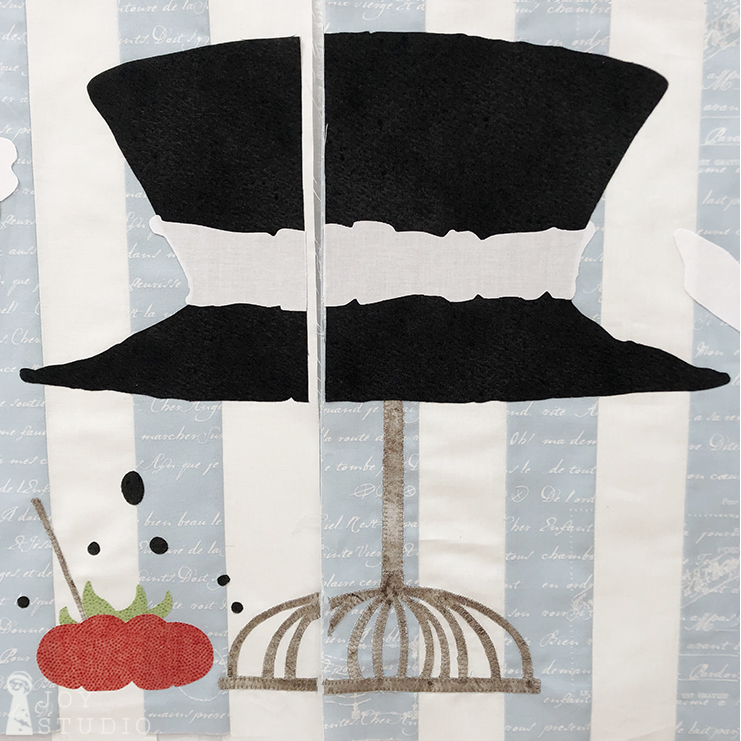
First up, the inner 1″ (finish size) black border. Make sure that your window blocks are squared up by trimming, measuring and placing your tracings over them before you add this border. Pay special attention to you last row of blocks so that all of the items will appear to be sitting on the bottom shelf of your window. It was necessary for me to trim mine about 1/2″. Then pin and sew with your 1/4″ seam.
•
Secondly sew on your gray borders to three sides. Top, right and left. I cut them 2″ for an inch and a half finish.

•
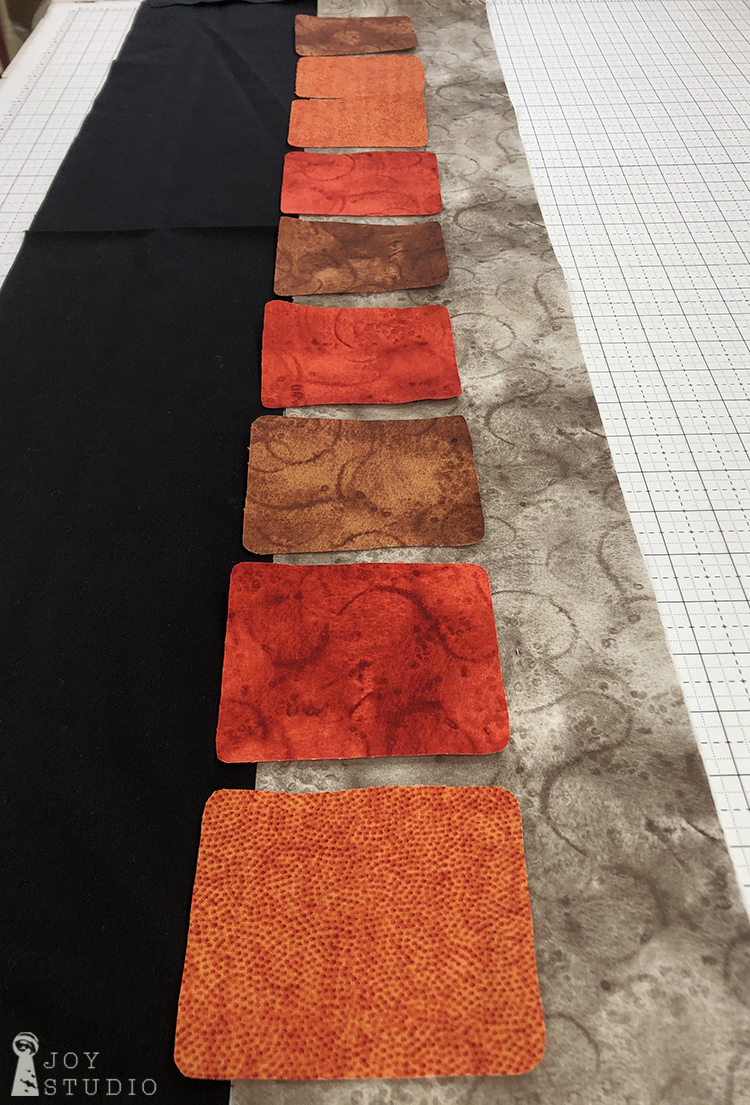
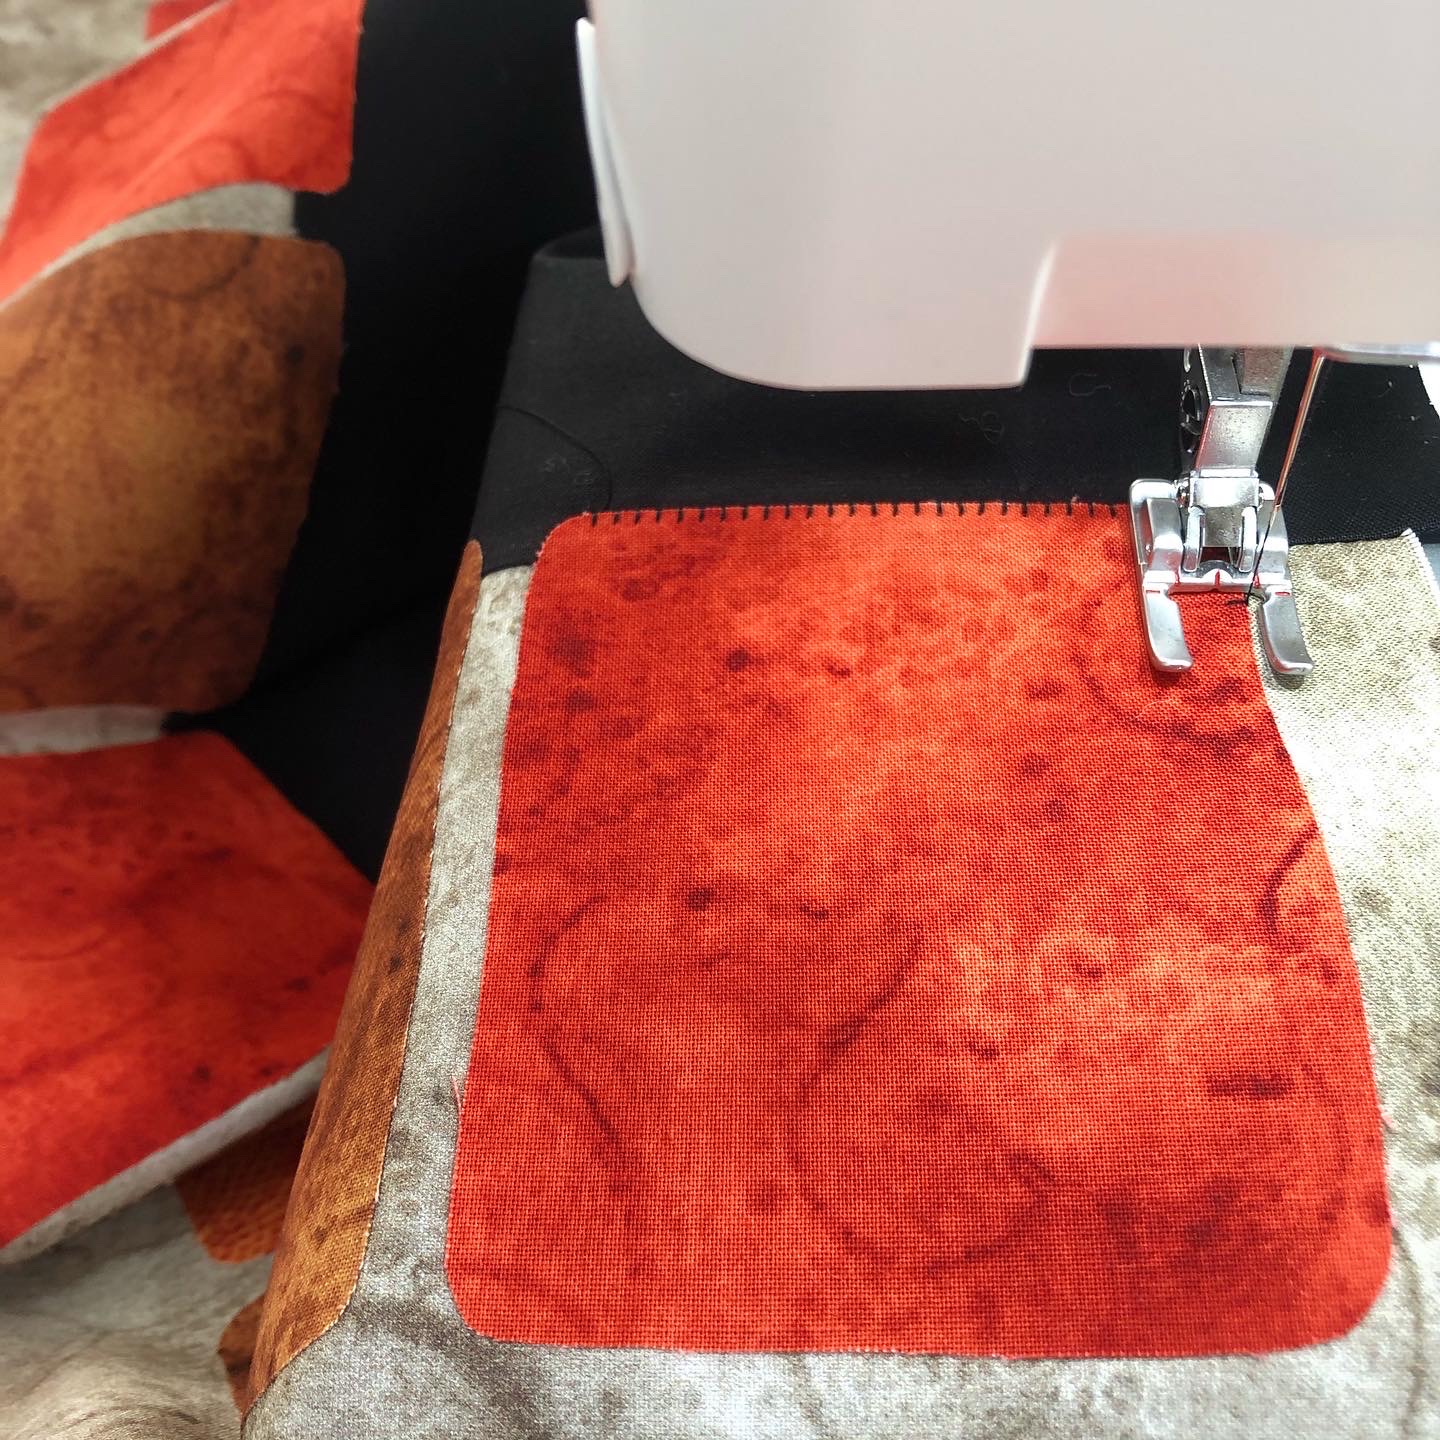
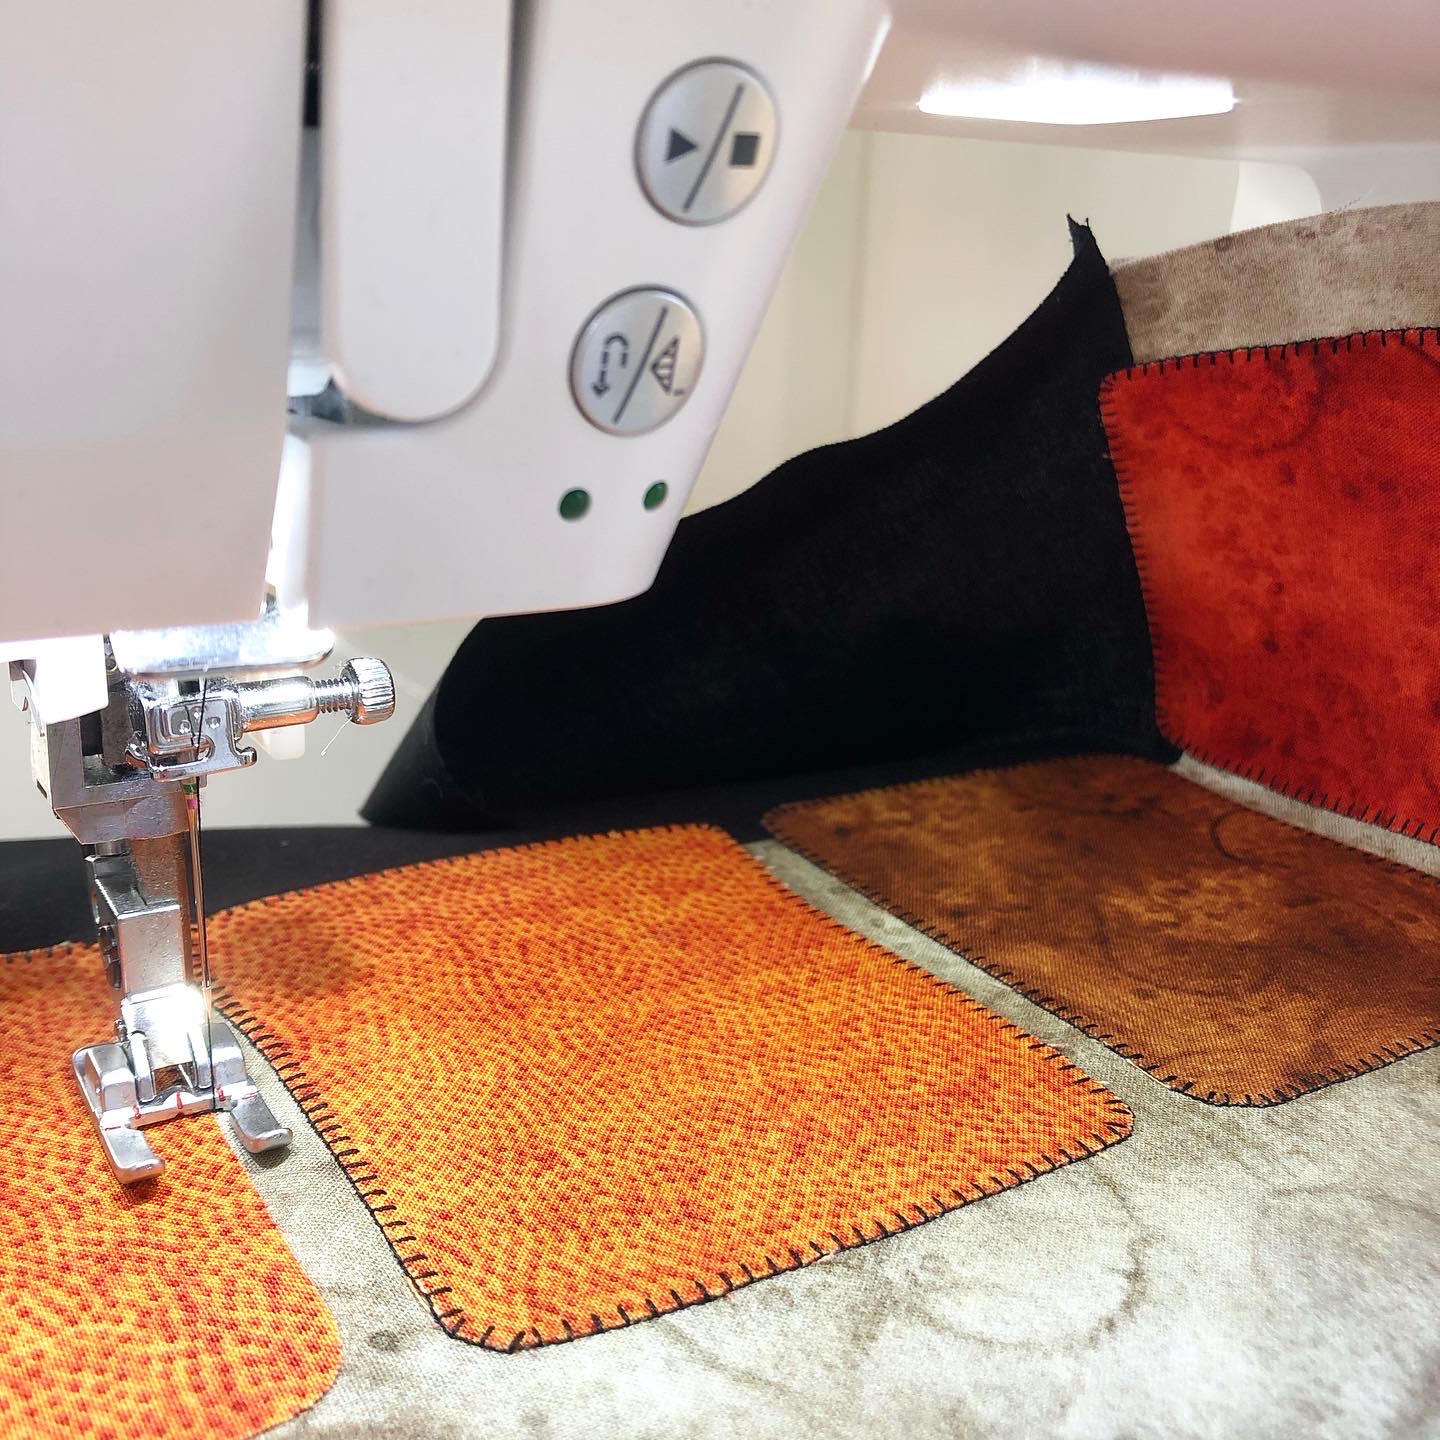
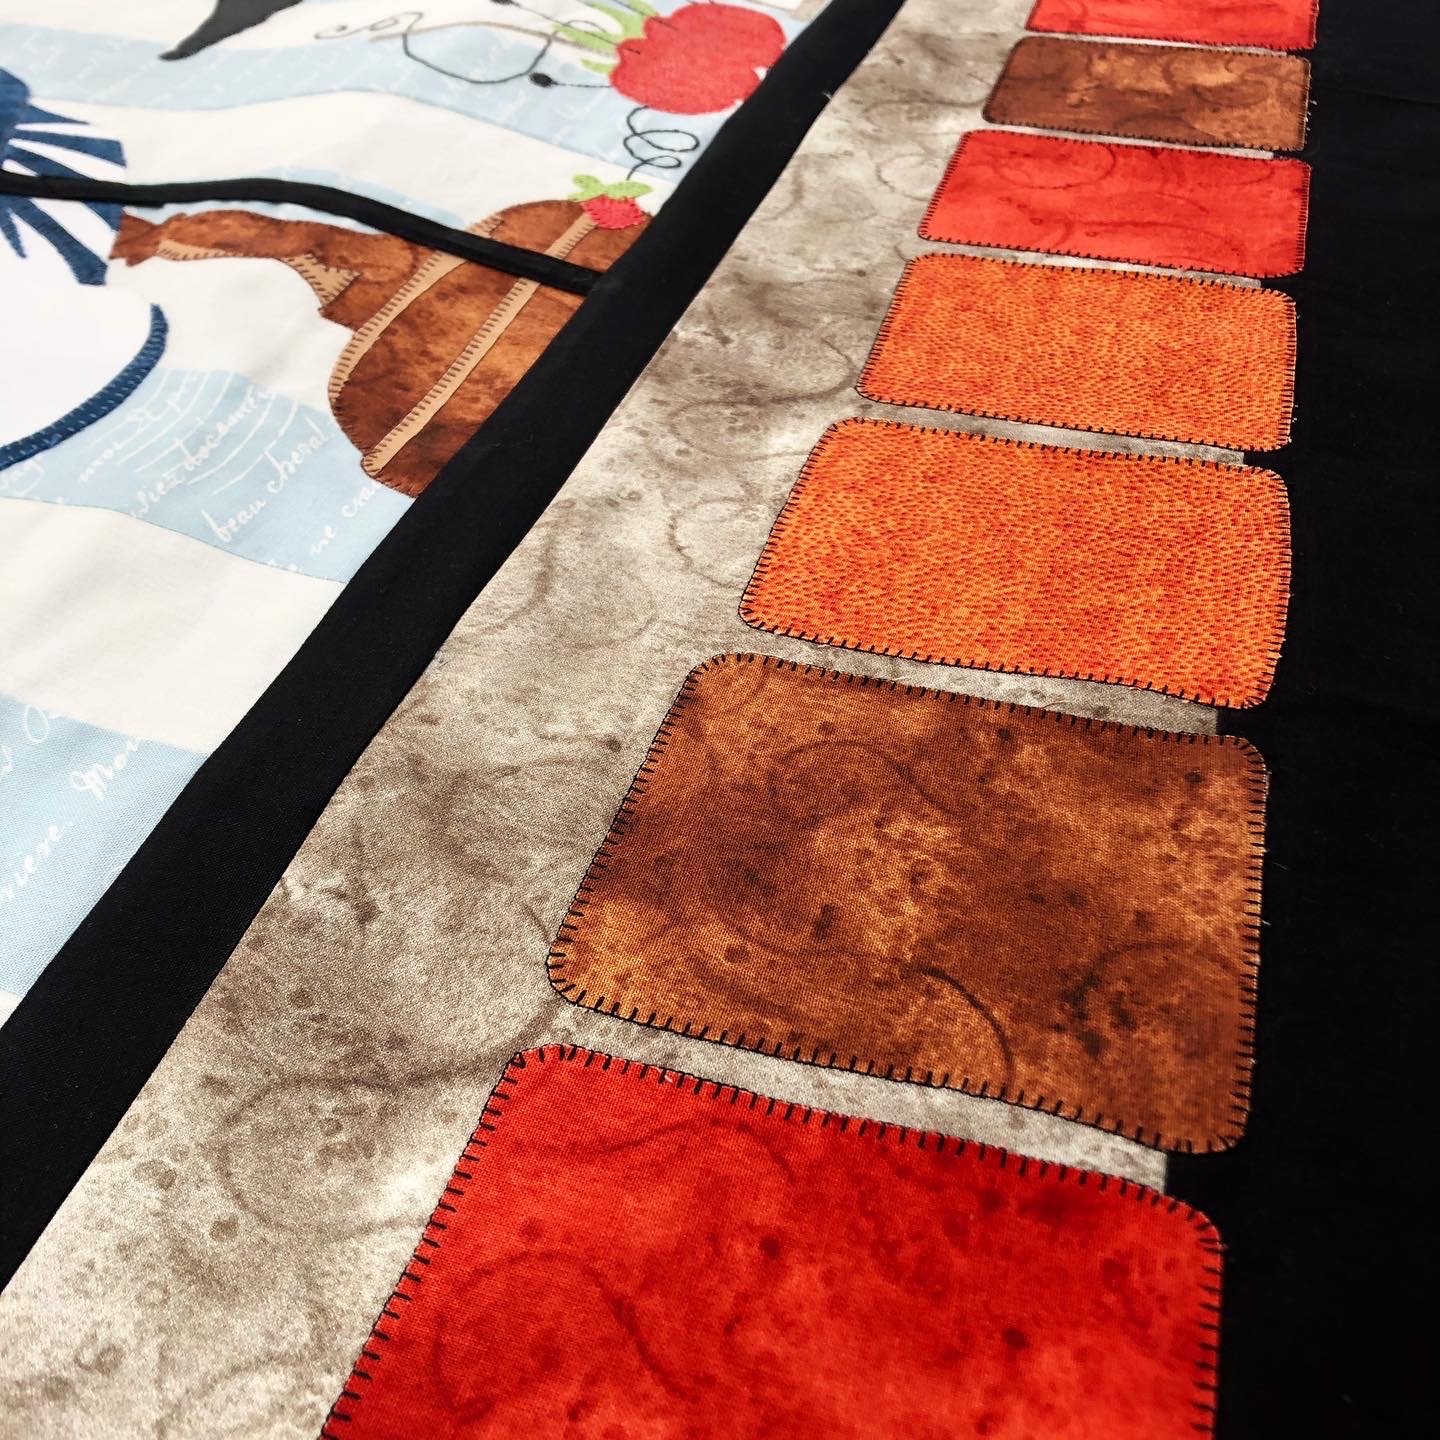
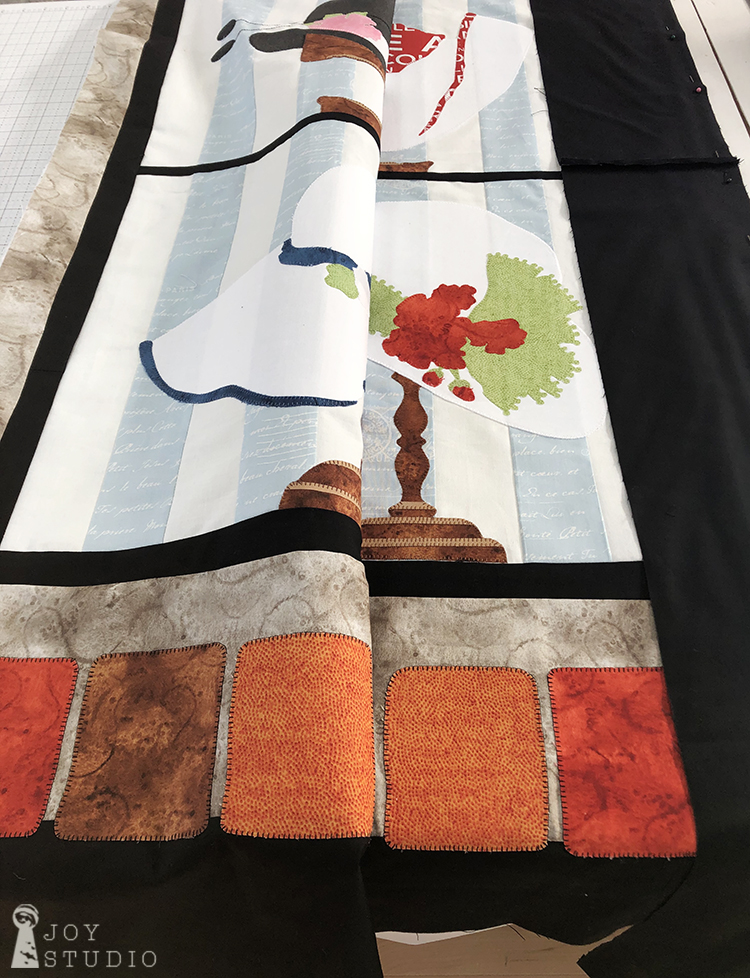
Bottom border.
Because I did not want to stitch around the appliquéd bricks after the borders were added to the quilt top, I simply strip pieced both of the borders together to treat the entire unit as the bottom border. Then I arranged the bricks (omitting one) making up the window sill approximately 1/4″ or so apart, evenly to fit directly under the black inner border. When I was satisfied with the placement, I fused the bricks to the gray and black unit, overlapping the seam slightly. This made stitching down the bricks much easier to manage than turning the entire quilt. I did however, stray from the pattern a bit. As you can see, the brick window ledge was confined to the bottom border only. You can choose to add two more bricks, one on each end after you add your side borders. I plan to do this as I show in the last photo in the segment below.
•
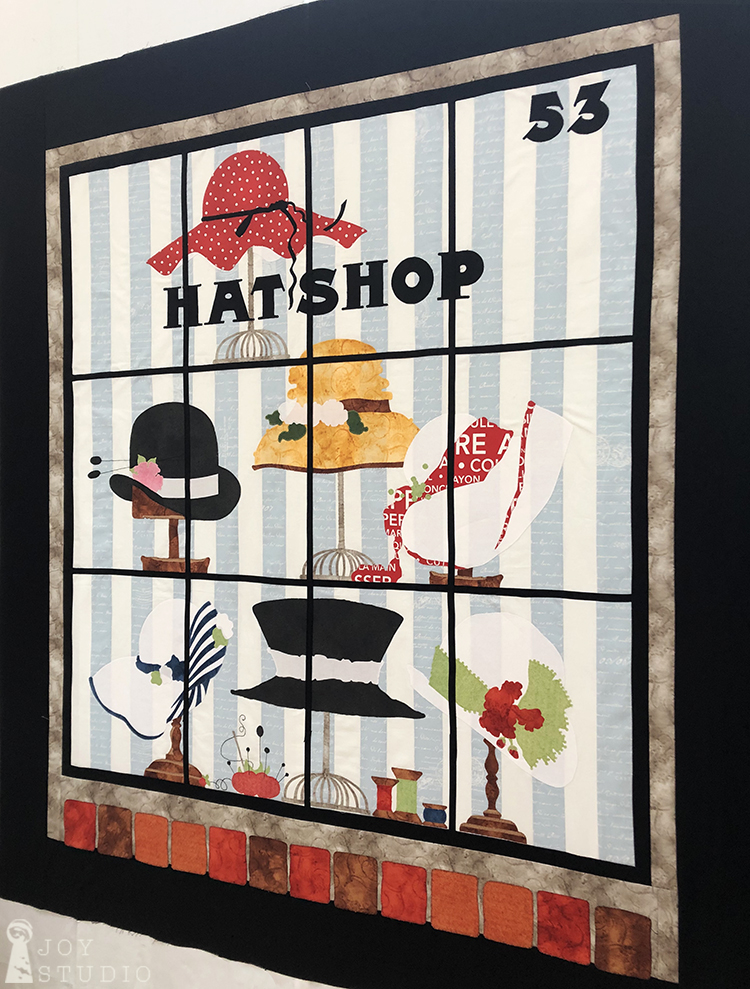
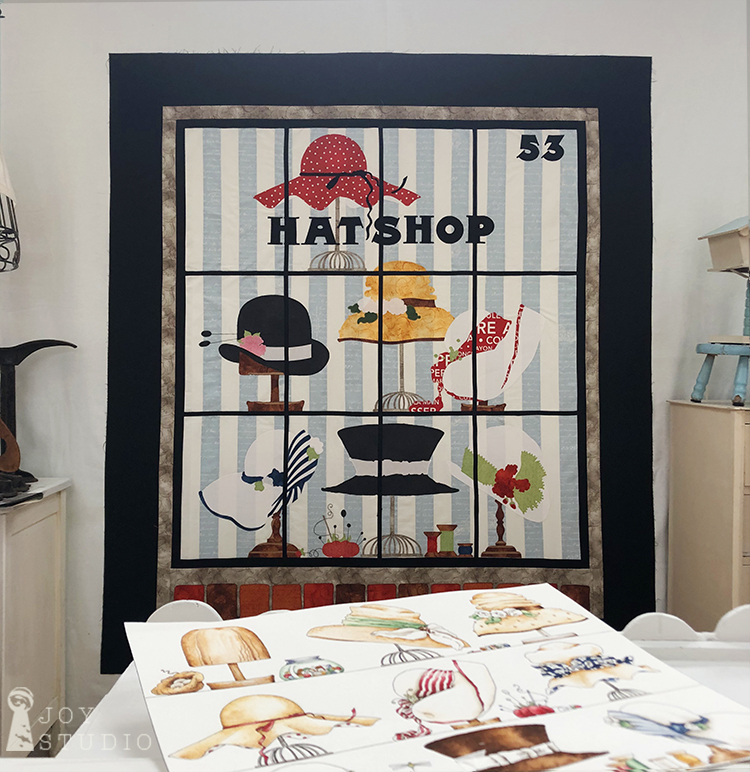
If you made it through the Hat Shop SAL, be proud of yourself! I was, and also quite surprised. This was a very intimidating challenge for me but I pushed through and learned much by making this project. Now my top is off to the quilter and I will share the finished piece with you soon.
Instagram @jweckerfrisch
Facebook Joy Studio
From ART to APPLIQUÉ.
Thanks for following and hopefully, sewing-a-long.
So long, for now.

by Great Joy Studio | Feb 18, 2020 | Quilting & Fabric
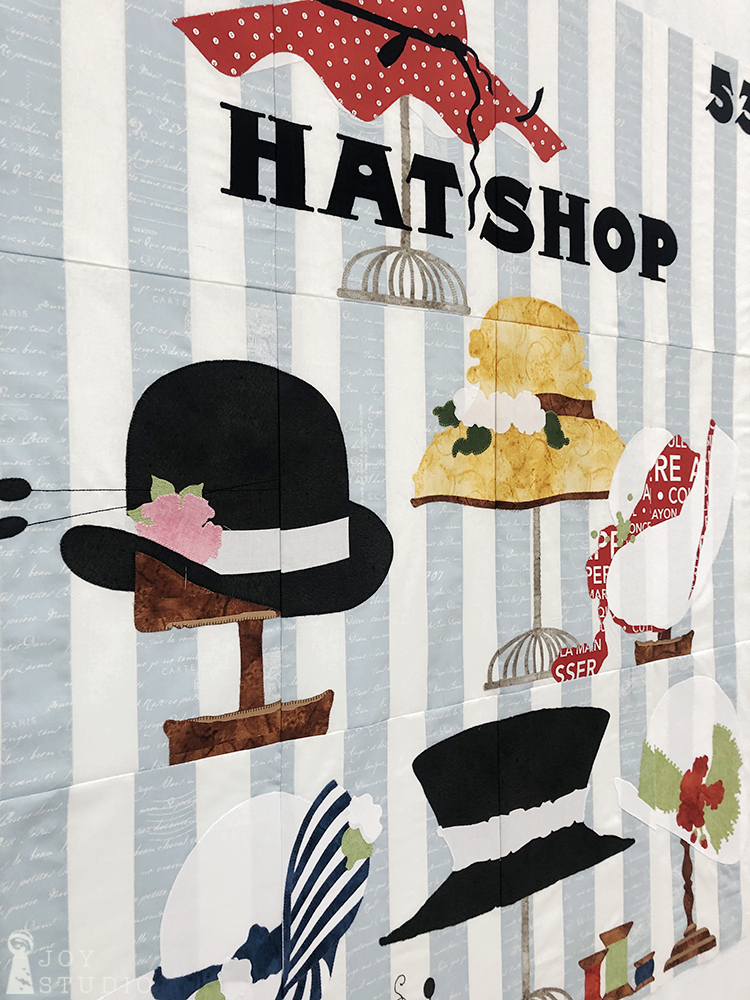
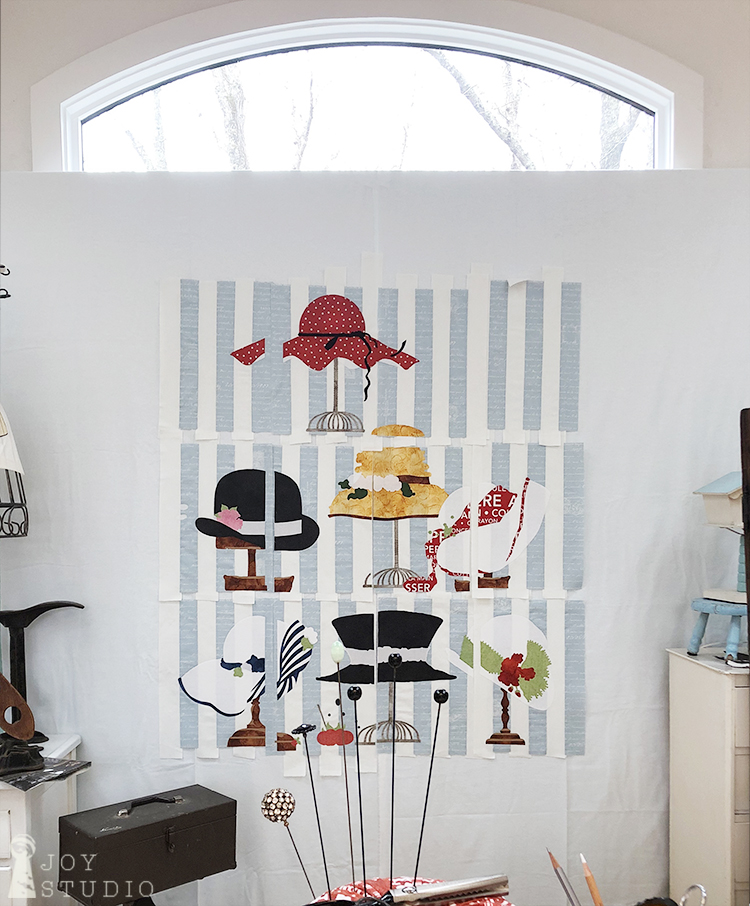
Hello Hatters!
We are coming into the Hat Shop home stretch now!!
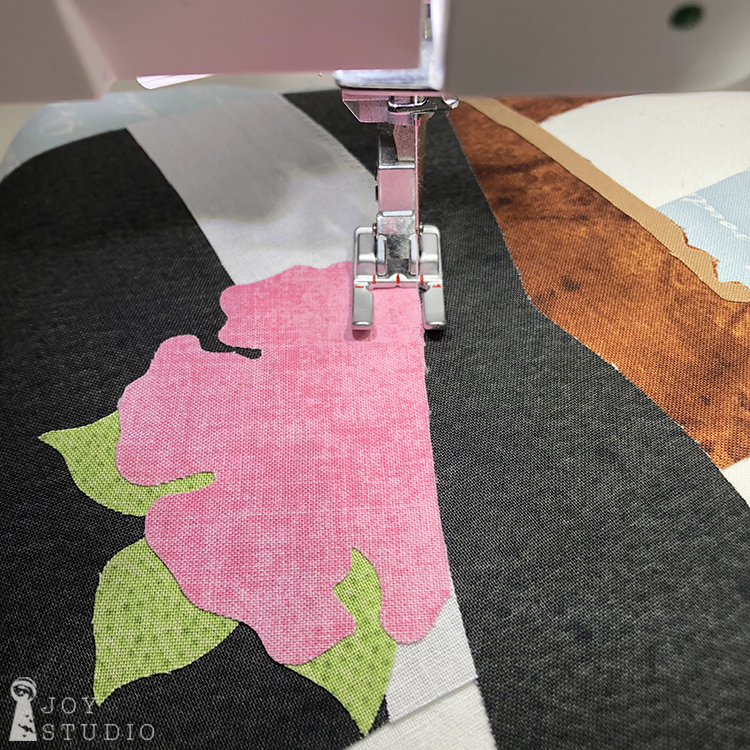
Hopefully all of your blocks are fused, sewn down to secure your appliqué and you have added any embellishments or fancy stitching details that you care to create. Assuming this is the case, lets assemble your blocks.
•
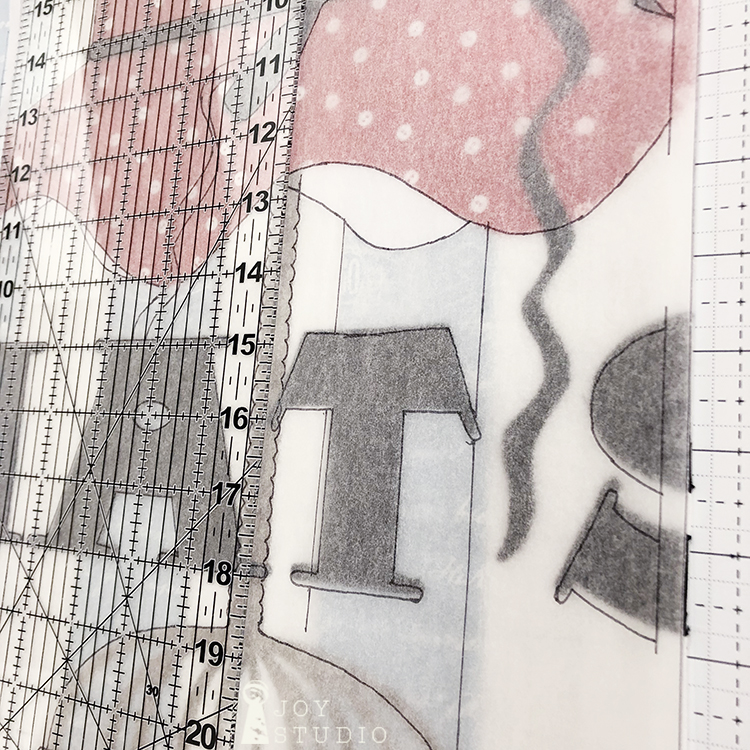
Trimming the windowpane blocks.
Using your tracings that we made in Week 2, lay over each block one at a time. I started in row one and worked my way down. Carefully match your line drawing to your appliqué beneath and trim two sides (only) on the solid lines previously marked using the pattern. This was a scary step however, if you followed the pattern closely, items will meet up fairly well. So, trim all of your block sides in row one, then two and finally row three.

•
Sew each row together.
Once all four blocks in any given row are trimmed on each side (only), stitch the blocks together using a 1/4″ seam allowance. Peek underneath each one in an attempt to meet your corresponding appliqué pieces and then pin.

•
Your sewn rows will look something like the photos below.


•
As you can see, mine are not perfect, not even sewn the same on each side however, two things I kept in mind as I pushed forward.
1) The window mullions will cover my seams and conceal any obvious errors.
2) I recently heard or read Jenny Doan remark, “finished is better than perfect.”
•
Next we trim again, top and bottom of each row. I wanted to see how my images lined up horizontally first so this is my suggestion. My rows ended up trimming to 16.5″ high, although the pattern cut line was at 17″. After you trim each row it’s time to attempt to match up the yellow hat appliqué and also the vertical background stripes. My primary focus was on the latter.
•
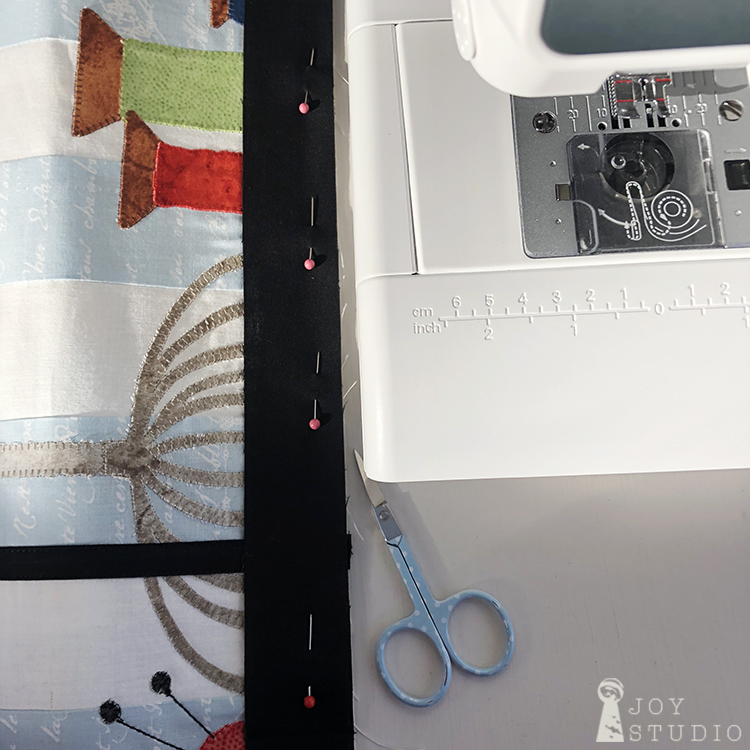
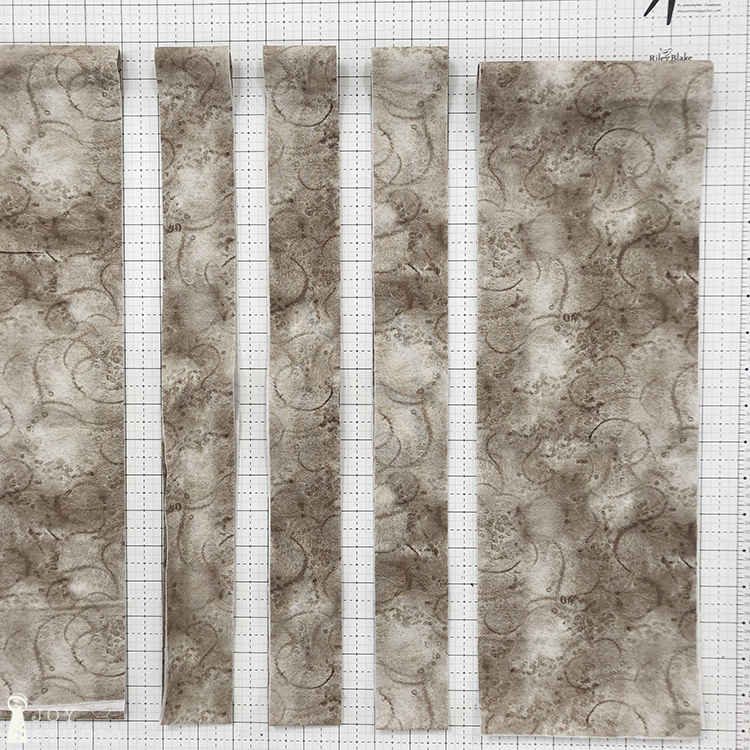
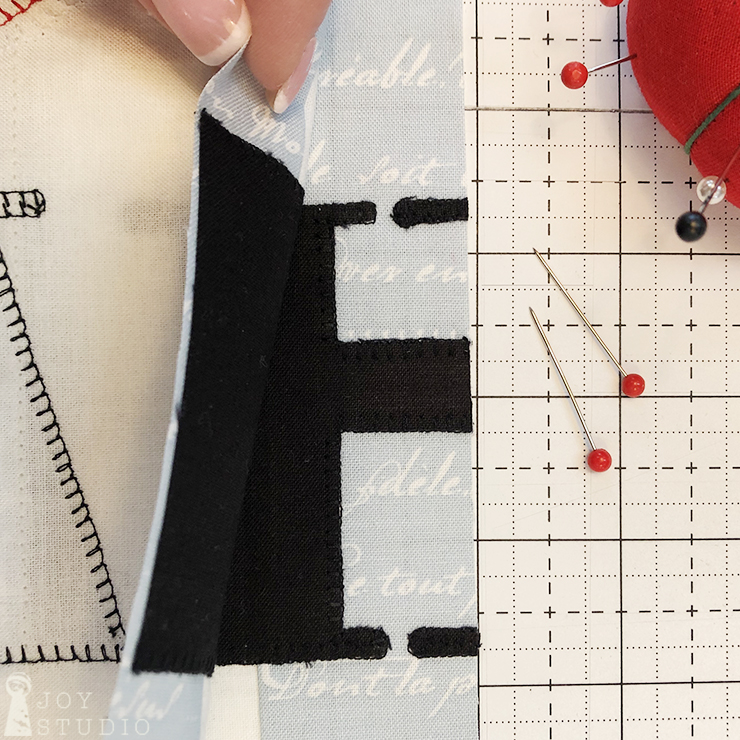
Making the window mullions.
We used Riley Blake Designs Confetti Cotton in black for the windowpane dividers. I did not have a half inch bias tape maker so I used the one just under. I cut six 7/8″ – 1″ strips selvage to selvage, not on the bias! We do not want these to stretch. Then I made my folded strips and pressed a double sided fusible tape on the back in which to cover my seams.

•
Next, press on your strips across the two horizontal seams. Then stitch the edges using a straight or decorative stitch.
Repeat the same for the three vertical dividers. I used the extra strip to piece the vertical strips as they were about 7- 9″ shy.


•
This sounds like a lot but really, it goes very quickly. In fact I’m sure that most of you will complete week 5 in a day! I did!!
•
Next week, the borders and bricks. It will also wind up our sew-a-long.
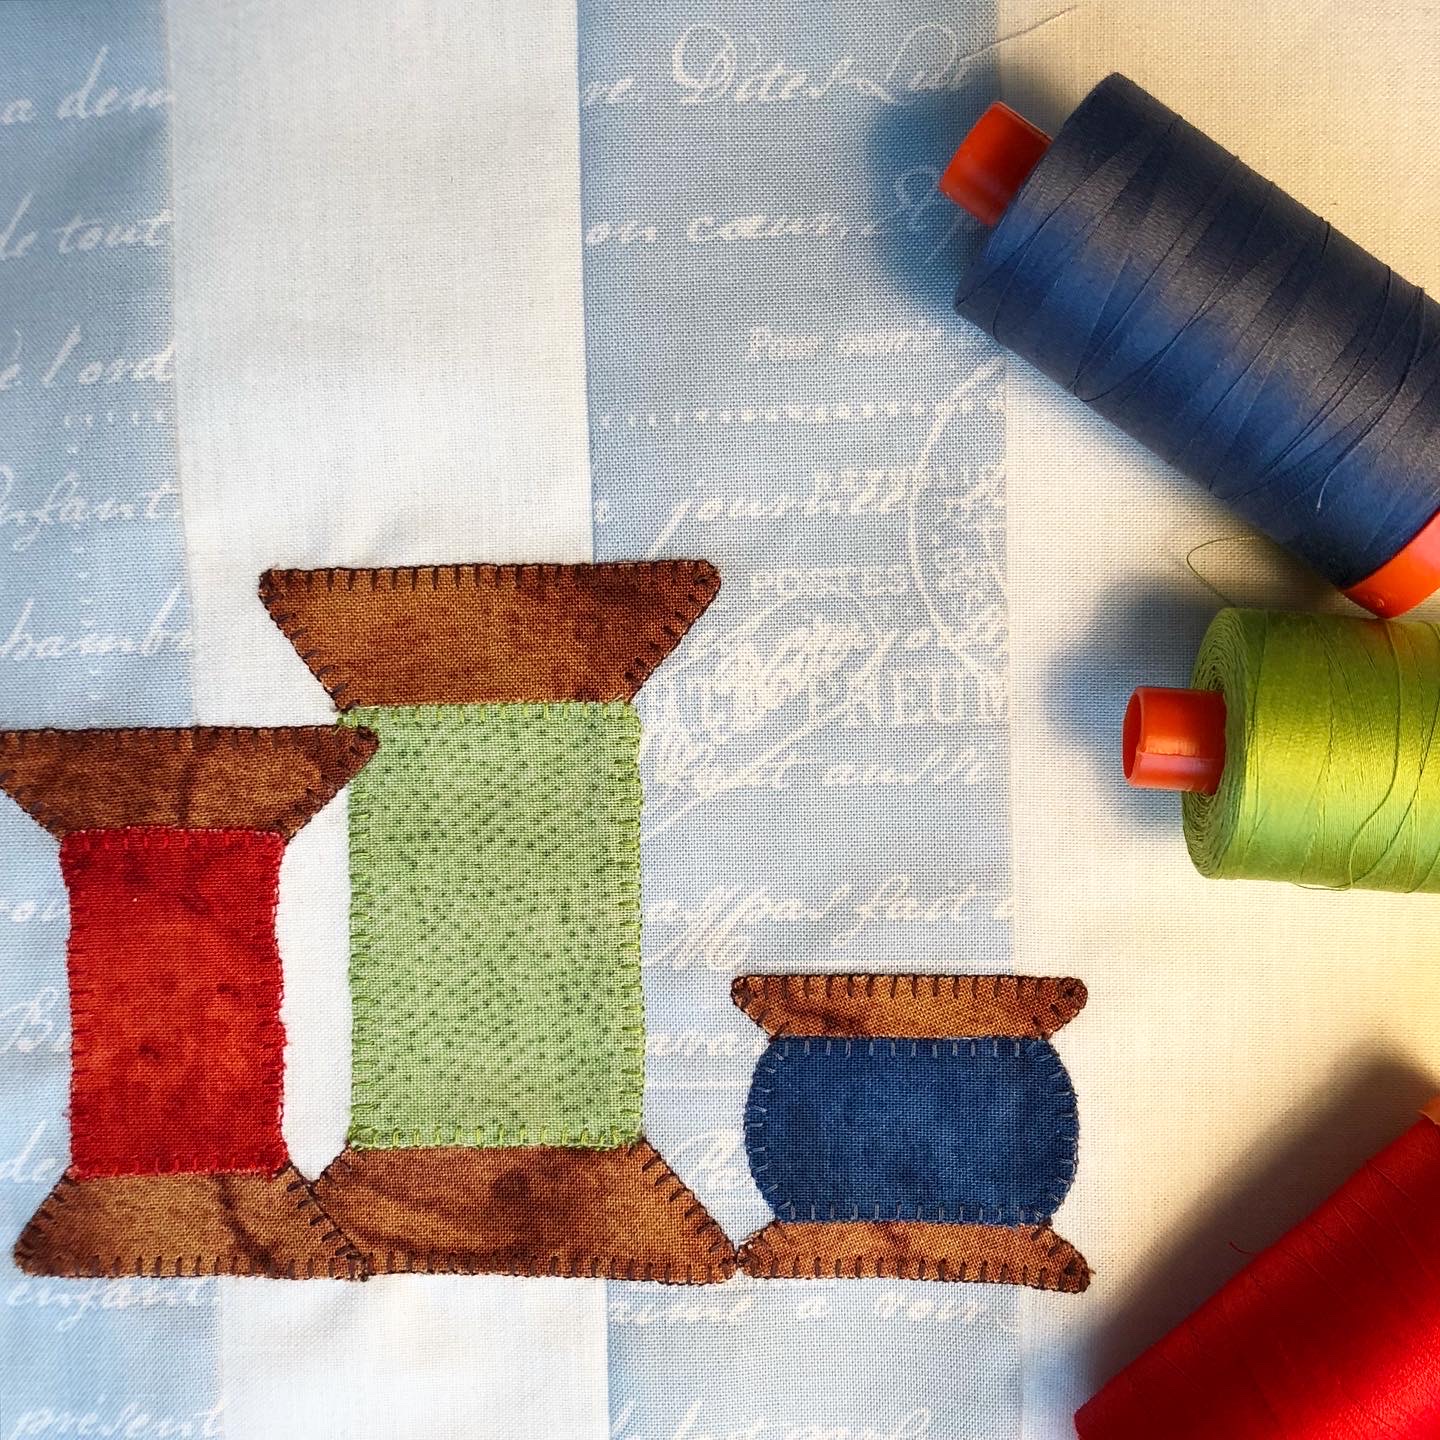
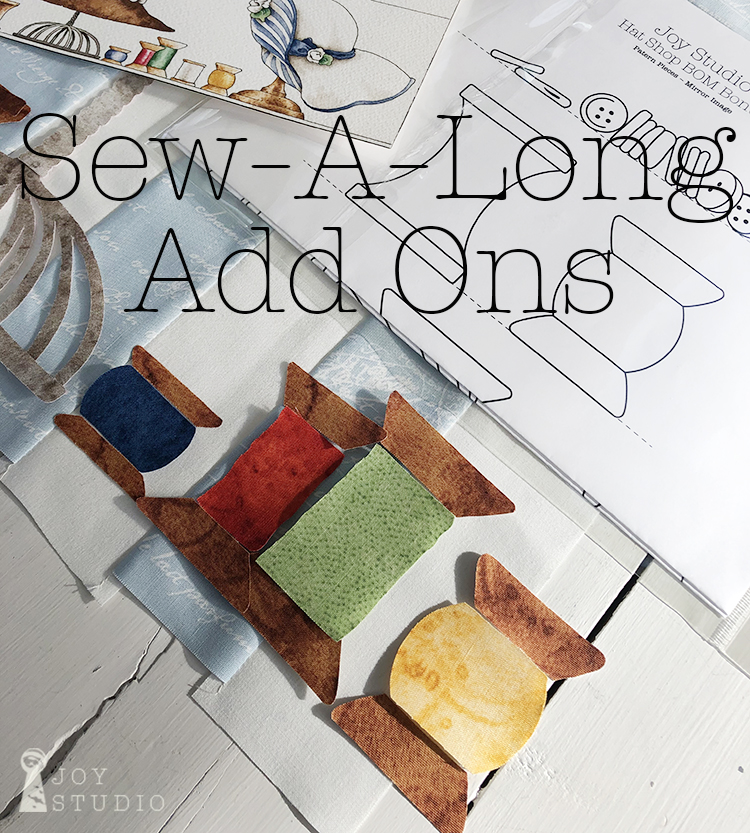
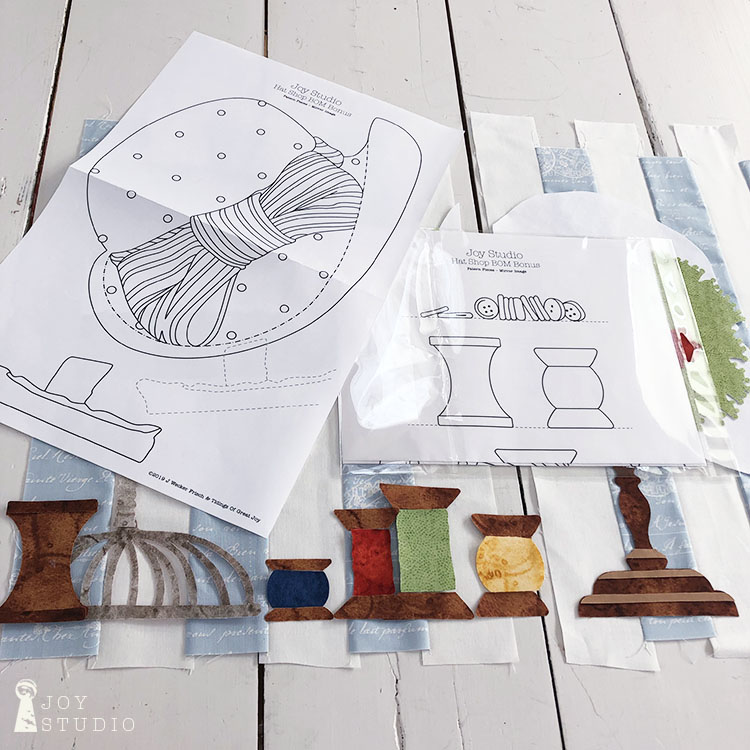
If any of you would still like the BONUS hat, spools and button pattern, SHOW us your progress using #hatshopsewalong on your social media and leave me a comment or email. We’ll send just let us know:
janet@greatjoystudio.com
•
by Great Joy Studio | Feb 12, 2020 | Quilting & Fabric
Week 4, already?!!!!
We have been sewing down all of our appliqué pieces in rows 1 and 2. How about you?! We are still trying to figure out how we can patch our derby form correction so we will keep you posted in case you have the same problem.
To help us get a better view of our progress, we purchased materials to construct a much needed design wall. Refining is still underway but for now, it works. If you have the room I recommend one although I’m sure that most of you are way ahead of me on this already. We purchased 2, two inch thick, 4′ x 8′ sheets of styrofoam from a local building materials supplier and then covered them with flannel.
•
So, this week we finish the last four window blocks. Hurray!
Fusing row 3
Be sure to begin as we did last week by lining up your vertical striped background with the row above as you place your pattern tracing over each of your blocks. Review the images using this link and scroll down to Lining up the vertical stripes.
Likewise as in the week two, use your pattern tracing paper door method to begin placing and fusing all of your appliqué pieces. Review using this link and scroll down to Making an appliqué placement door.
Applique fusing sequence.
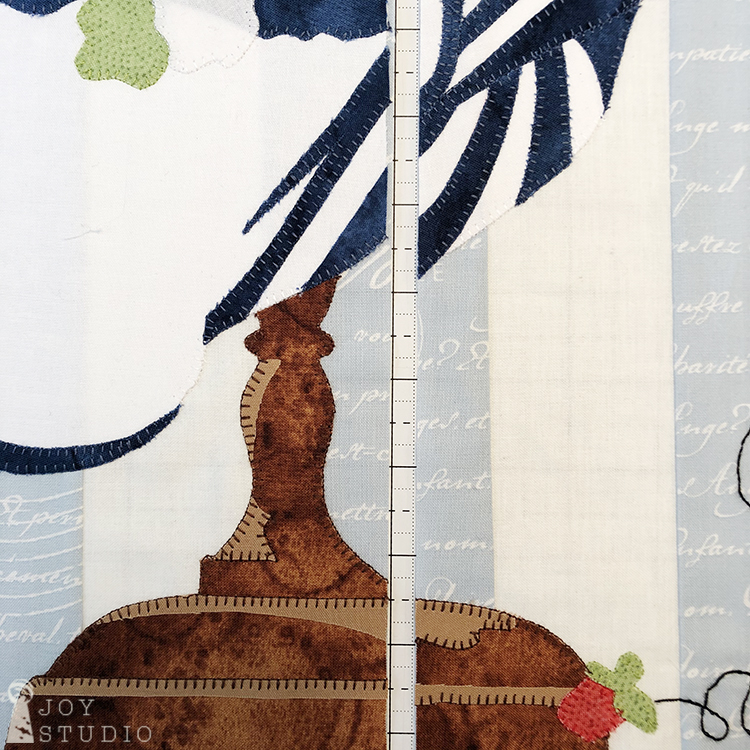
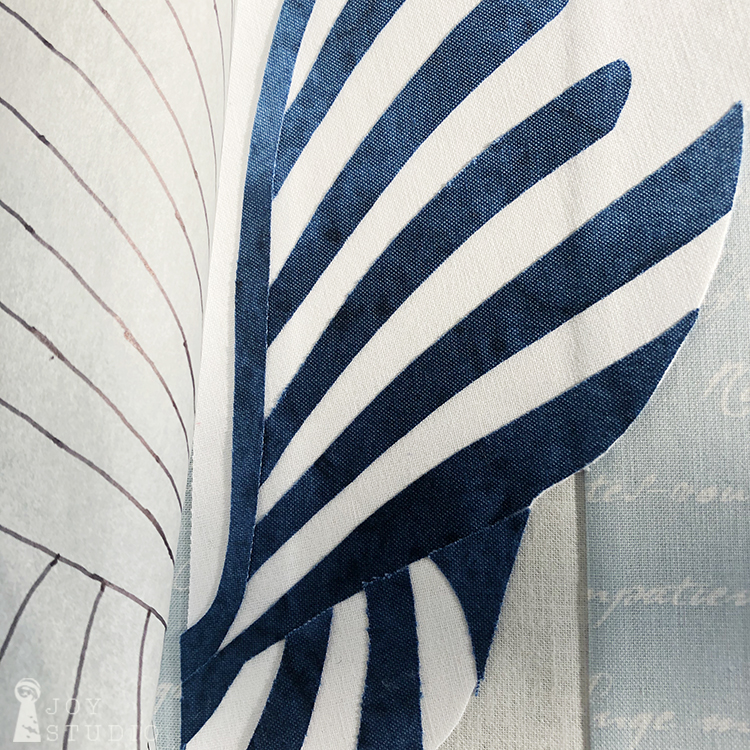
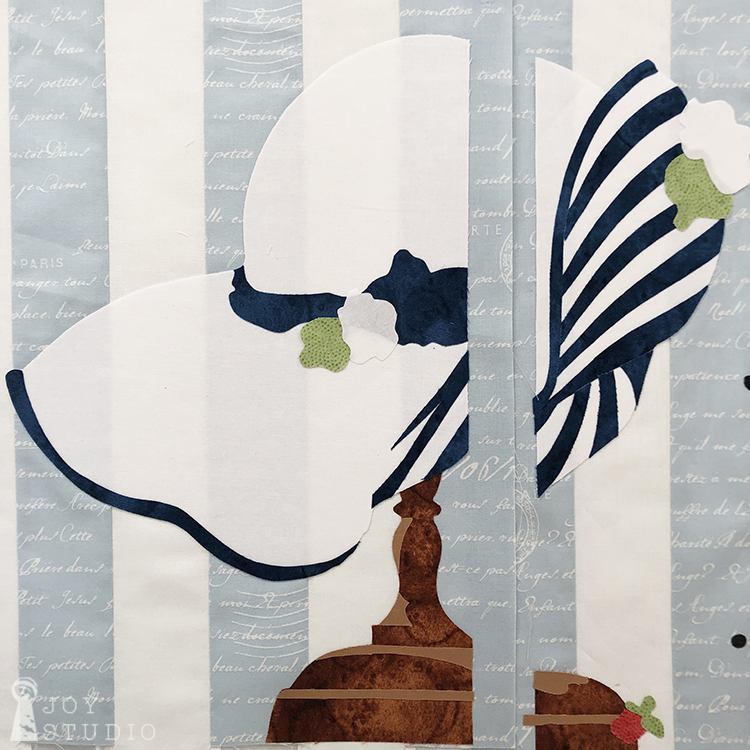
Repeating, the best way to determine what is fused first is by laying out all of your appliqué pieces on their corresponding blocks, underneath your tracing paper rendering, carefully checking with your pattern cover and technical illustration. Much like the red hat described in week 2 and the derby in week 3, the majority of the hats are fused in a similar order. Hat stand parts and then hat parts, However, hat one (left to right) took a bit more concentration figuring out the stripes. We cut a few of these pieces to go under each other, e.g. the hat brim stripe, which we added last. Shown here in these photos, the hat brim stripe covers the other angled stripe ends.

•
Here is how the rest of our row three hats look like before stitching, except for gray. I confess, jumped ahead to sew all like colors to avoid so many thread changes. You can notice that we swapped out black fabric for the pin heads to show up better or you can stitch these if you like.
Also, I cut all the green trim on last hat (below) to include all of the round beading detail. You can eliminate this if you do not wish to do that much extreme cutting and replace with French knots or some other type of decorative stitching or trim.

•
Have I mentioned lately that we are using my two new collections, Painters Palette and Couturiere Parisienne for this project? And we are loving the rich colors and painterly textures of these gorgeous fabrics from
Riley Blake Designs.
I hope you have enjoyed seeing our Hat Shop (Atelier de Chapellerie) windows progress and now, we would LOVE to see yours! So, if you would . . .
post a photo of your progress and use #hatshopsewalong on your social media channels
so we can find them,
FOLLOW here, on the blog:
greatjoystudio.com/blog
And/Or
@jweckerfrisch on Instagram or Joy Studio on Facebook
We will be happy to send you these CUTE add on appliqué and bonus hat pattern GIVEAWAY! Vintage spools, buttons and button jar.
•
Drop me a line if you have any questions or comment here. janet@greatjoystudio.com
Happy hatting this week!

