by Great Joy Studio | Dec 6, 2025 | Art News, Quilting & Fabric, Spiritual, Studio

Late career just starting out. J Wecker Frisch
•
Hello Everyone
Many of you have followed, supported and encouraged me throughout the 25 – ish years that I have pursued an (late) art career. And I do mean MANY of you. At first there was so much I needed to learn and you generously shared experiences, your expertise, emotion and just about everything. The memories that came from meeting all of you and those in the industry and are fresh as when they happened. It has been my great pleasure and privilege connecting with fellow creatives, makers and entrepreneurs. Thank you!
This is the first time ever that I may be organized enough to give you my 2026 schedule of events and workshops in advance. Even some of these do not have all of the details worked out however, for planning purposes I wanted to provide what I could.
As I consider the opportunities that I’ve said yes to for next year it occurred to me, hope I can do all of these and is this my first and final tour? Let me put it another way. Those of you who have written to say, “One of these years I’m going to meet you, attend one of your work shops, guild or quilt shop events,” etc., I wouldn’t wait! That is, if we’re to ever meet and have a chat, maybe the time is now? You know what they say, we’re not getting any younger?
2026 Schedule:
• Valentine Workshop January 15 – 16, 9:00 to 4:00 both days at The Maker Studio Space Eureka Mo
• Shop visit at Oh Sew Personal on March 7 at 11:00 – 12:00
• Shop visit – Apple Tree Quilt Shop March 13
• Americana Semiquincentennial Workshop April 16-17, 9:00 – 4:00 both days at The Maker Studio Space Eureka Mo
• Bit N Pieces Quilt Guild speaker spot April 28 6:00 – 7:00 pm
• Sew Journal Workshop to be determined
• Christmas In July Workshop July 9 – 10 9:00 to 4:00 both days at The Maker Studio Space Eureka Mo
• Garden Of Quilts at Thanksgiving Point in Utah, Artist Special Exhibit begins September 18 – 19
• Artist Special Exhibit continues The Maker Studio Space Eureka Mo
• October Workshop Oct. 8 – 9:00 to 4:00 both days
• Artist Special Exhibit ends November 1 9:00 to 4:00 The Maker Studio Space Eureka Mo
God willing these are the events I have committed to and will do my best to honor and be in attendance!
Something new you may have noticed on social media is The Maker studio space in Eureka, MO. This is a one year endeavor that I took on in late September. It is in addition to the Great Joy Studio office around the corner. Makes little sense I realize but I am trying to walk in the limited light that God has given. The outcome is (Part of my exit strategy?) unknown to me but I am trusting that He sees the BIG picture. Stayed tuned, I sense something exciting.
•

Fourteen years in, home studio. J Wecker Frisch
•
So, if you are local please come by and tell us how we can serve your MAKER dreams and if you’re able to travel here to Missouri I would love to meet you and hear about the art journey that you are walking thus far. Or please use our calendar schedule under Maker tab at top.
Btw – The most recent head shot can be viewed on the RBD Storyboards and it is as recent as I agree to post. Lol
Sincerely, Janet.
Great Joy Studio, 16 Dreyer Ave. Eureka Mo
The Maker Studio Space, 137 S Central Ave Eureka Mo
by Great Joy Studio | Sep 30, 2025 | Quilting & Fabric

•
Hello everyone!
I posted this project originally with “Costume Makers Ball” fabric when it was offered from Riley Blake Designs in 2019. Owner, Cindy Cloward thought it was so fun that she is sharing hers as a YouTube tutorial at Riley Blake Designs – YouTube.
•
We borrowed these instructions (below) from our original step by step post which pairs seamlessly with the new “Costume Makers Act II” fabric collection! However, you will want to follow along with Cindy as she creates her version of this festive fall favorite.
•
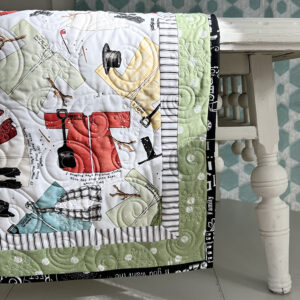
BIG SCARY BOOK!
Featuring,
COSTUME MAKERS Act II
fabric by me, J. Wecker Frisch
from Riley Blake Designs
•
So many of you have asked if this fun fall project was a pattern so, we decided to share the easy process here!
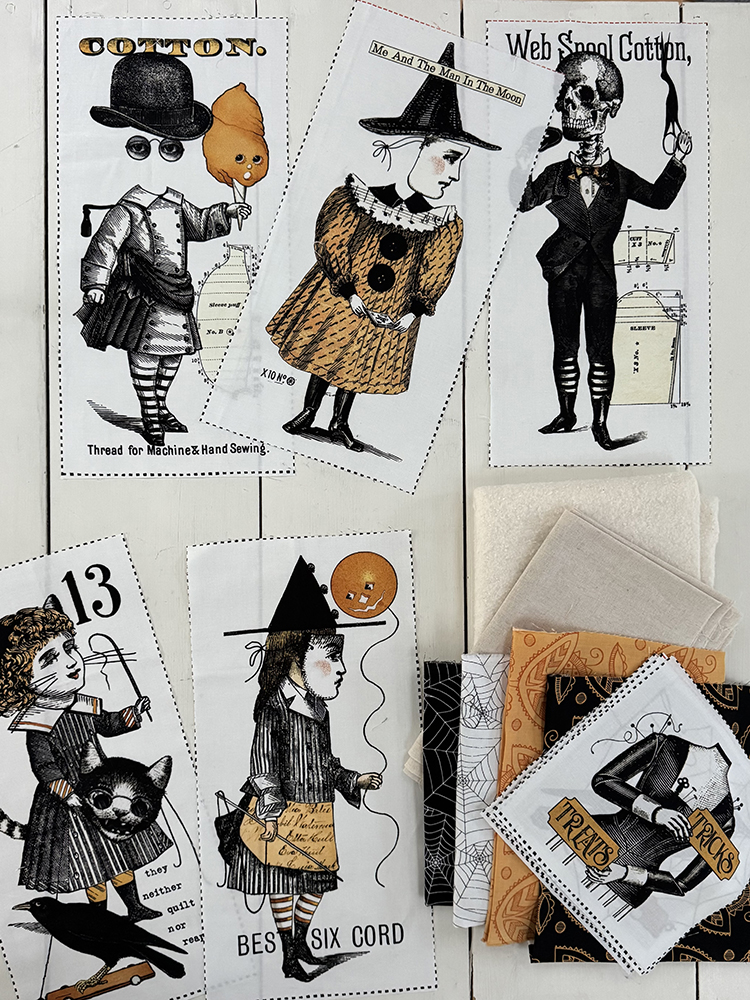
I pretty much made this up as I went along and it was truly so easy. I’m still learning on the sewing front so, if you see anything that can be improved on, I’m interested to hear from you. Of course we love the images on the patch panel and they were the perfect sizes for the pages and pockets to hold whatever spooky items we found around the studio. Choose anything you like in your stash of old photos, tags, charms and trims to personalize your scary book.
•

What you’ll need, beginning with Costume Makers Act II fabric:
• One – Patch Panel for pages and pockets.
• One repeat – Border Stripe for a few fun tags to slip inside and attach.
• Fat quarter – Black Text for cover.
• 1/2 yard – Jac O Lantern Balloons on Black for inside of cover plus one page background.
• Fat eighth – Measure Tape Stripe Blk n Wt for one page.
• 1/2 yard – Riley Blake Linen in Natural for inside pages.
Optional:
• Quilt batting, 1/2 to 3/4 yards based on preference. We used a light weight fusible behind page patches and cover.
• A medium weight Interfacing for a stiff cover cut to 17.5″ x 17.5″
• Measuring tape ribbon, buttons, decorative string, one cargo tag, old key & vintage notions or game cards, etc.
• Fabric only kits available exclusively at greatjoystudio.com/shop/
•
Pictures worth a thousand words?


Pages six & seven with quilted tags made using the CMB border stripe.
•

Sandwich each of the individual cover and (18″ square) page layers as you like. I chose batting between my cover fabrics and under each of the fabric patches. I then used a variety of sketchy stitches around each the page edges to create decorative borders and attach to the linen pieces. Using your skill level and imagination there are no limits to what you will create with these fantastic fabrics! Again, my stitching experience is short and some of these are my first attempts but I was pleased with the results. So remember, have fun, no rules, anything goes and you can’t make a mistake.
•
Here are the the page layouts:

Inside front cover & page 1

Pages 2 & 3

Pages 4 & 5

Pages 6 and 7 are pictured at top of post and are holding the border stripe kid tags.

Page 8 and inside back cover.
Not pictured is the outside cover! We used the CMB black allover text.
•
Complete Scary Book fabric kit available on the Shop page.

•
More Scary Book photos and fun projects on IG @jweckerfrisch and FB Joy Studio
&
Please share your scary book eye candy with us!!

•Be sure to follow us on Instagram @jweckerfrisch & Facebook Tidings Of Great Joy.
by Great Joy Studio | Jul 23, 2025 | Collectables, Getting Started
The
Great Joy Studio
•

•
Summer Porch Sale continues,
despite the very wet and steamy weather conditions we have been experiencing this season!
Update on our dates:
Our antique and vintage collectables sale will remain a constant, summer long effort to raise money for Samaritans Purse disaster relief. Every Thursday through Saturday between 10:00 and 1:00 at our shop location in Eureka, Mo. 16 Dreyer Ave., you can (SHOP) check us out.
•

•
Items are marked with a suggested donation tag that you can leave/donate with us inside or placed in the after hours box located at our back door.
•

•
Thank you!
by Great Joy Studio | Jul 16, 2025 | Art News, Studio
•

Office Space
•
Artist/Designer J. Wecker Frisch
is looking for the right fit to share her studio/office space
Inquiries:
janet@greatjoystudio.com
•
by Great Joy Studio | May 19, 2025 | Quilting & Fabric
Hello again from Great Joy Studio.
We have an update regarding a series we are planning of
Summer Porch Sales!
This summer we are hosting three Porch (garage) Sales of vintage and antique items. All proceeds will go to our favorite charity, Samaritans Purse and designated to their disaster relief efforts.
•
•
Porch Sale No. 1
is scheduled for the Eureka Concert on Central event.
Friday June13, 2025
10:00 – 6:00
16 Dreyer Ave
Old Town Eureka, MO 63025
Please come browse the antiques and vintage collections and tour our
Open House,
online quilt shop and office.
•


•
See you on Central/Dreyer!
by Great Joy Studio | Apr 8, 2025 | Quilting & Fabric
•

•
Spring Fling
&
Spring/Summer Tag Sale!
•


•
Our returning summer hours will be Thursday, Friday and Saturday 10 am -1 pm.
We are currently transforming the quilt workshop studio to include a collection of curated vintage and antique items for sale/donation. The Spring Fling, hosted here in Old Town Eureka, Mo. (April 15-17th) will kick off a summer-long Tag Sale event at the Great Joy Studio shop, 16 Dreyer Ave. All proceeds for this will be donated to Samaritans purse to help their disaster relief efforts.
Mendy from Missouri Stitcher will also be offering long-arm quilting services for any projects you may have.
Watch our IG Great Joy Studio account for updates on the pop-up Tag Sale and IG and FB J Wecker Friscg account for all fabric details.
•

•
See you soon!
by Great Joy Studio | Dec 20, 2024 | Quilting & Fabric

•
From Our House Sew Along, last block!
You made it! Welcome to your last week of the From Our House sew along hosted by Riley Blake Designs highlighting their Hush 4 low volume designer’s collaborative collection. And if you’re just getting started and want to learn more click here for the details.
•

•
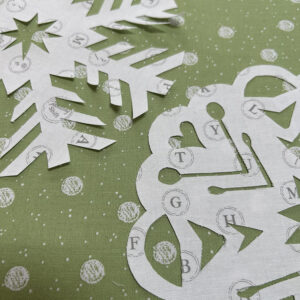
Here is Great Joy Studio’s contribution to the Hush 4 low volume fabric, vintage button illustrations of a warm gray on a soft white ground.
•

•
We are making our blocks for the sew along using some Basics from Riley Blake Designs, Watercolor Swirl and Journal Basics. Our designer alternative block center is SEW easy. It is a raw edge fused appliqué button using our chunky button template.
•


•
Featured blocks were made by Mendy Russell from Missouri Stitcher
•

•
To round out your RBD designer’s tour, please pay us a visit for a tour of our NEW tiny house, shared sew space and office on Instagram and/or Facebook. Built in 1916 and located at 16 Dreyer Ave., Old Towne Eureka Mo.
I hope you have enjoyed sewing along!

•
by Great Joy Studio | Dec 10, 2024 | Quilting & Fabric
•
Whew and hello!
We are grateful to be completely moved into our new office and workshop location at 16 Dreyer Ave., in Eureka, MO.
Not only moved but managed to make some repairs and dress up the tiny ‘play’ house with a brand new coat of white paint! It is quite the transformation and most of the reactions have been positive. It took a lot of work but at the same time very fun project to watch. All the while as local folks stop by and share quilt related stories I can’t help but wonder . . . where is all of this leading?
For instance, does anything change regarding our office, online shop and workshop space routine now that we’re in an actual retail location? It’s very tempting to invite the community in however, we are still suppose to be working here and we do still have deadlines to meet. The location is right in the heart of Old Town’s hustle and bustle (and noise) so it’s taking a bit of adjusting. In a good and interesting way so far.
Another very positive change that took place over the summer is a connection that we made with a few young energetic high school students from the home school community. They are eager to learn what we do and have been extremely willing to help us get in and organized no matter what the task.
•


•
As promised we are posting our plans and tentative schedule as we know it, to date.
These are the dates in mind for the 2025 workshop schedule and featured fabrics we will be using. Note, there are no firm decisions on each specific project yet. As many of you know our intimate clubhouse setting only allows us seven spaces comfortably or 10 if we hold them at the Eureka Chamber of Commerce as before and these do go quickly. Here are some to consider if you need to make travel plans:
Workshops – Quarterly
• January 9th – 10th – All My Heart Project
• April 10th -11th – Project to be determined
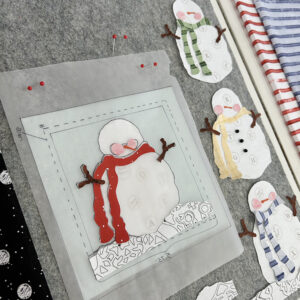
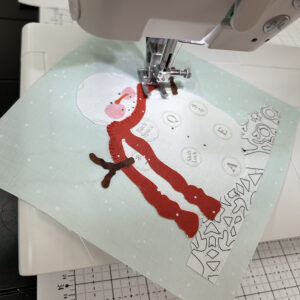
• July 10th – 11th – White As Snow Project
• October 9th – 10th – Queen of We’en Project
Note: These are not listed under Eventbrite and are only available with an email to me direct to reserve a spot: Write to janet@greatjoystudio.com We are working on a google doc and will post this week.
Thursday, Friday and Saturday – open studio hours (10:00 – 1:00)
• Thursday’s we will be working with our Home School workers and students.
• Friday and Saturday offerings will depend on interest:
A.) Introduction to quilting and appliqué. B) Work with volunteers interested in creating charity quilts. C.) Intro to watercolor and drawing
Visitors will need to let me know your thoughts in the comments please. The open hours will allow for short visits with me, Janet and customer’s purchases pick up upon request.
These are subject to change as we learn the interest of our new community.
Closures in the coming weeks/months:
December 6, 26 – 28
January 2 – 4
February 13 – 15
April 17 – 19
July 3 – 5
October 30 – 31
November 1, 27 – 29
December 25 – 27
The hope:
With a little more prayer and consideration over the next couple of months I trust that a sound direction for the coming year will come to light. We would appreciate hearing your interests and suggestions.
•

•
Upcoming events will post:
On Instagram @jweckerfrisch and Facebook Joy Studio-tiding of Great Joy
Great Joy Studio Office
Old Town Eureka, Mo
16 Dreyer Ave.
Parking is available in back.
Please use front door access.
•
by Great Joy Studio | Aug 16, 2024 | Quilting & Fabric
Hi Friends!
I’m going to be honest, summer is not my favorite and this one has been has been a little scary. And hot of course. It has been exciting but nerve wracking, a lot of hard work but fun and all the while fulfilling, as I complete the last steps of my entrepreneurship.
•

•
On a happier note, I’m still going! Here’s the latest:
We are nearly moved into our new office and workshop location at 16 Dreyer Ave., in Eureka, MO. Our new hours for visitors are
Thursday – Saturday from 10:00 am – 1:00 pm.
Follow us on Instagram @jweckerfrisch and Facebook Joy Studio-tiding of Great Joy for upcoming mini classes this fall.
•


•
My three NEW fabric collections from Riley Blake Designs, “Pumpkin Patch”, “Old School” and “Press On” are in quilt shops now! Check them out at your favorite local or on line location.
Our Wonderland Workshop for October 4th is sold out. Next one is scheduled for mid January so stay tuned.
Upcoming events:
This weekend it’s off to Hamilton, Mo. and on August 19 – 20 we will be visiting our friends at Missouri Star Quilt Company! Watch for me on Jenny’s Tuesday Newsday and my interview with Misty Doan on her Homespun channel, in an upcoming episode. I am quite excited about this as you can well imagine!
Studio Class: Fused Applique Fall Place Cards – Details to come on IG and Facebook
Studio Class: Vintage Watercolor Color-Mixing Chart – Details to come on IG and Facebook
Fall Quilt Market in Houston TX is Oct. 26 – 28 where Riley Blake Designs will be introducing my new fall collections, one of which is, “Costume Makers Act II” .
•

•
Well, I think that has us all caught up. I hope to see you soon at one of these events or just drop in to say Hello. We have been enjoying meeting folks, swapping quilt stories and sharing creative journeys. We would love to know yours.
•
by Great Joy Studio | Jun 21, 2024 | Quilting & Fabric
HELLO!
•
•
We are pleased to announce our 3rd Great Joy Studio workshop. This will be our first in the NEW space!
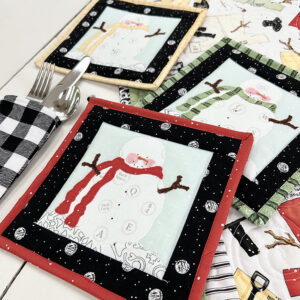
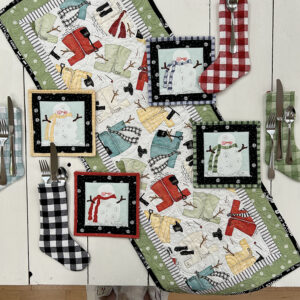
On July 19th we are hosting a Christmas In July event, from 9:00 am. to 4:00 pm.
The projects feature the “White As Snow” fabric from Riley Blake Designs. The table runner and mug rugs projects can be found in the Wintry Project Booklet in quilt shops now if you want to follow along.
•
•
You can sign up with the Workshops tab to participate in person.
Kits for your projects, gift bags and a light snack are provided.
•
•
Your choice of several lunch options are within walking distance.
Agenda and a list of things to bring will be sent to participants previous to the event.
Workshop will be held in Eureka Missouri 63025 at 16 Dreyer Are.
Recommended accommodations Wildwood Hotel in Wildwood, MO
•

•
See you soon!


