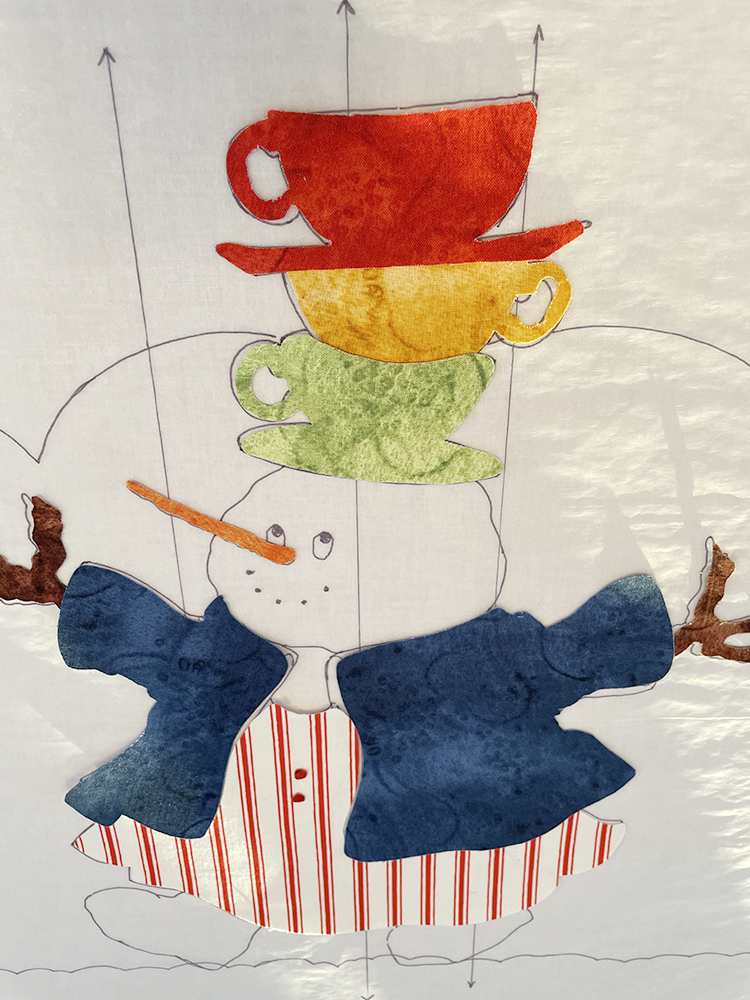
I hope everyone enjoyed their 4th. We were quite busy building a porch on the Joy Studio, putting me behind on my Fabric Journal project! Hopefully I am not holding anyone up but if that ever happens, please move forward with yours at your own pace.
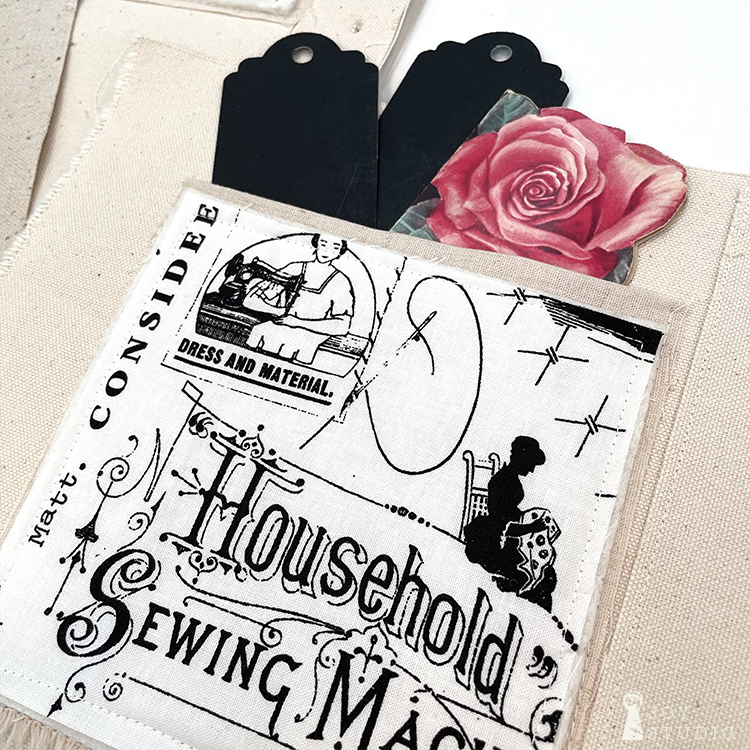
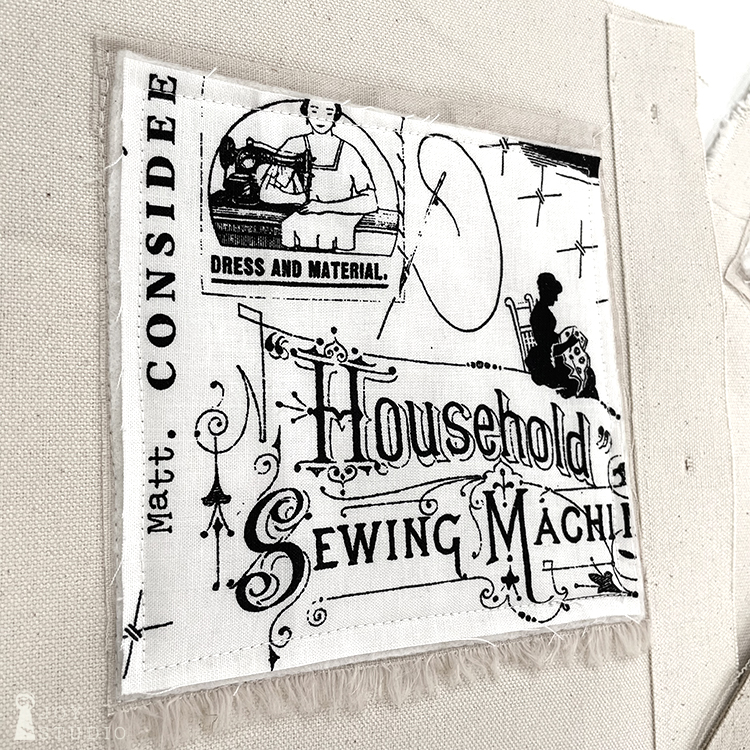
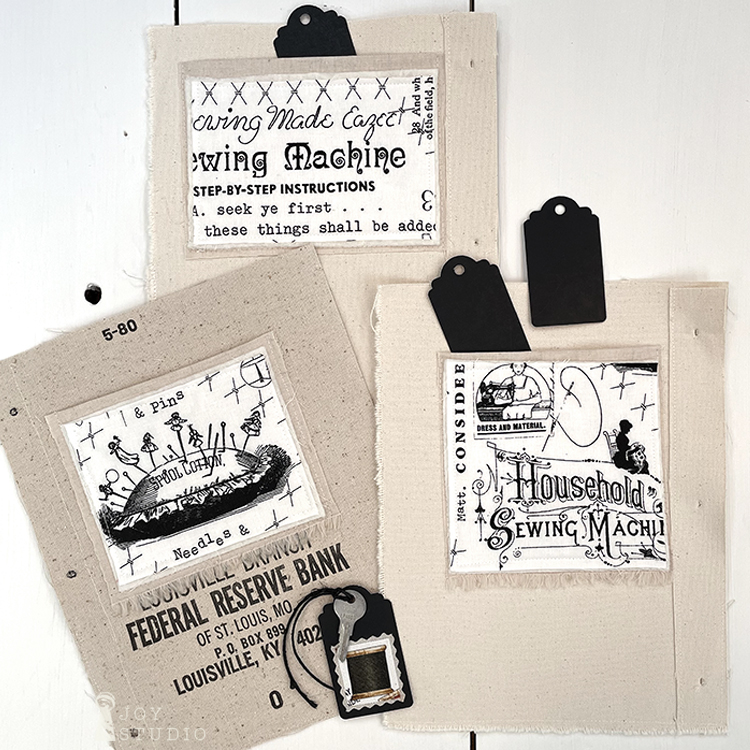
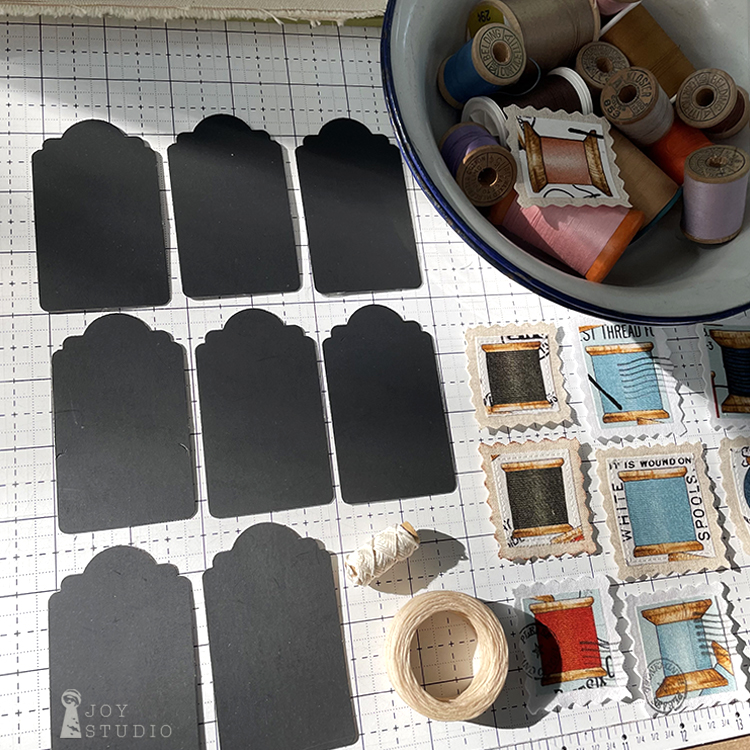
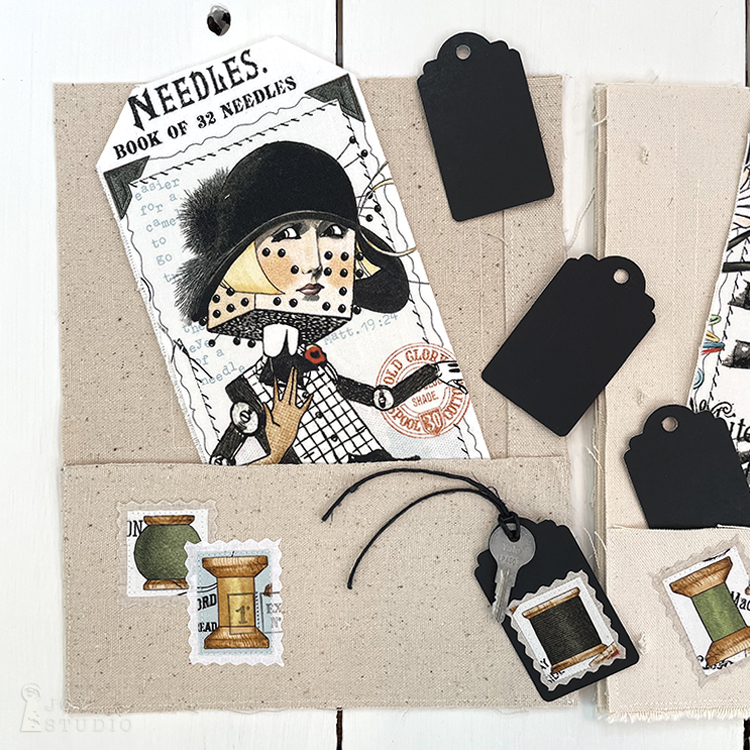
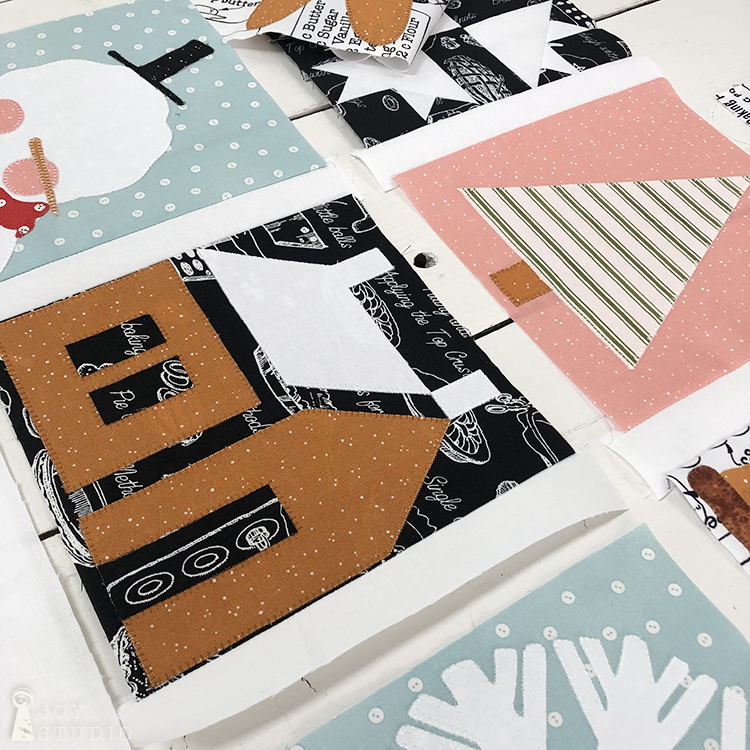
I continued making pockets this week and made some fun die cut tags. The fabric that I used of course is She Who Sews (Best of) from Riley Blake Designs black text on white and also gray. I fussy cut some of the really cool sew-y phrases from SWSs scraps that I had to fit a small size pocket. I then layered those on top of a little larger piece of Riley Blake Natural Linen and batting, leaving raw edges on three sides of the fabric and enough to turn the pocket tops. I then attached them to the back, top of my canvas pages made last week careful not to sew the larger pocket on the pages reverse side. I plan to do a lot more of these when time allows.
•
•
I also decided to cut some small tags out of black poster board scraps that I also had on hand using a large die cut punch. They happened to be the perfect size for adding a few of my spool stamps.
•
•
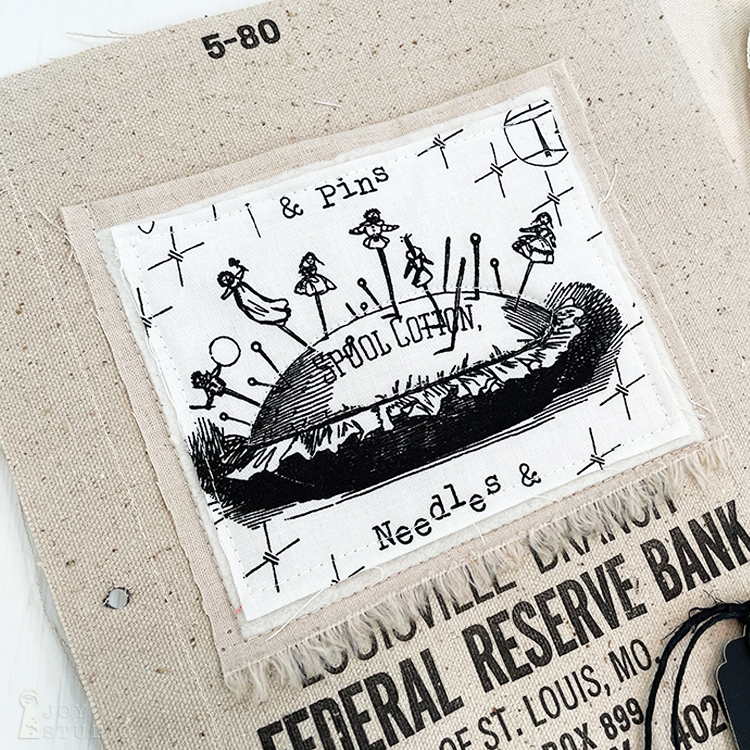
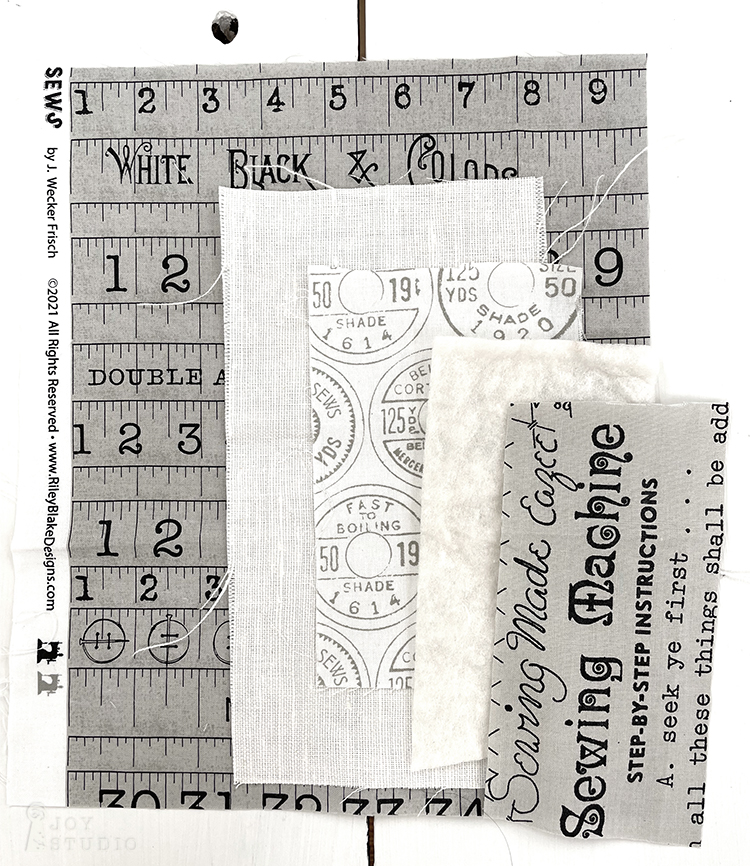
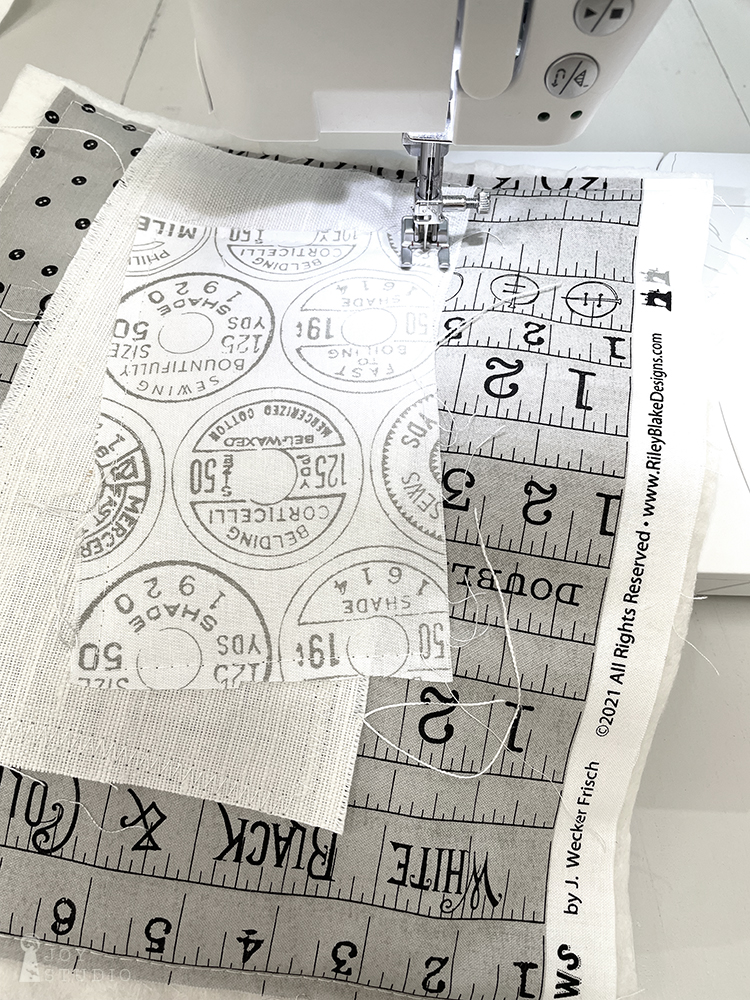
Since I am learning as I go with this fabric journal I decided to experiment with some scrappy layering of SWSs gray measuring tapes, a tiny bit of gray buttons, off white linen, vintage spool tops and Sew-y text, all raw edge scraps and again with batting. This will be one of my quilted pocket pages and who knows, maybe my first attempt at some free motion sewing if I feel brave?!!
•
•
Considering my pace on this project it is likely to be a summer long series!
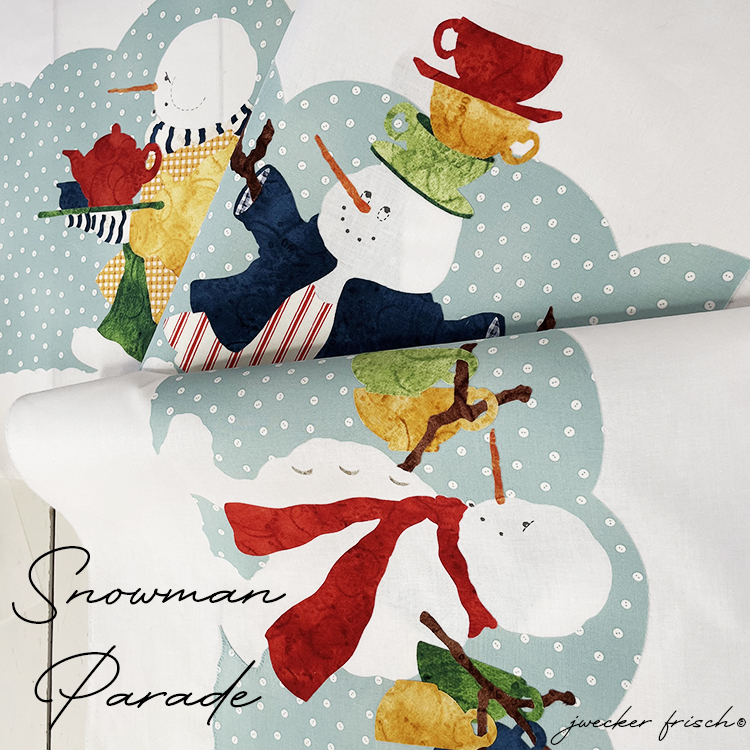
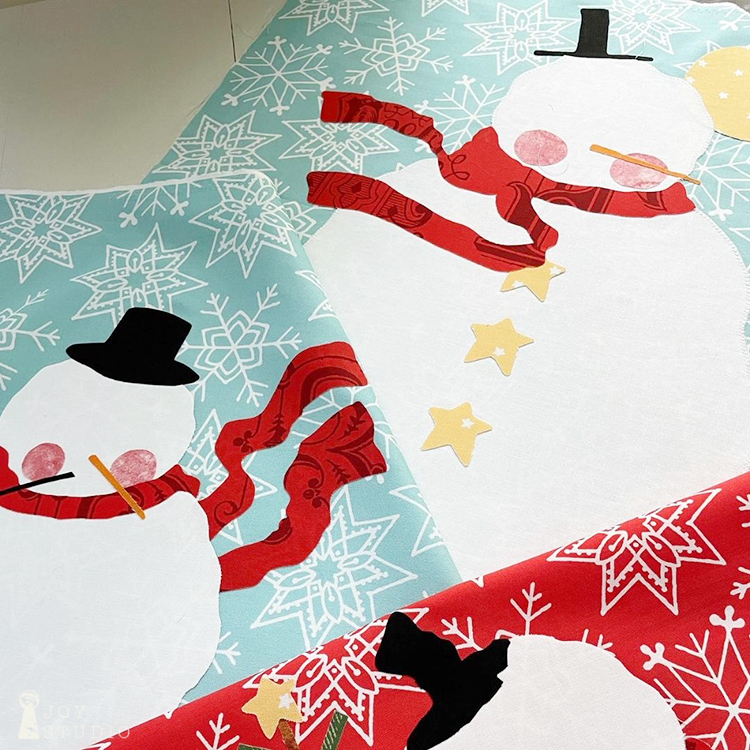
We have a new kit listing called Snowman Parade and are sharing a little bit of the process that we followed to make.
•
•
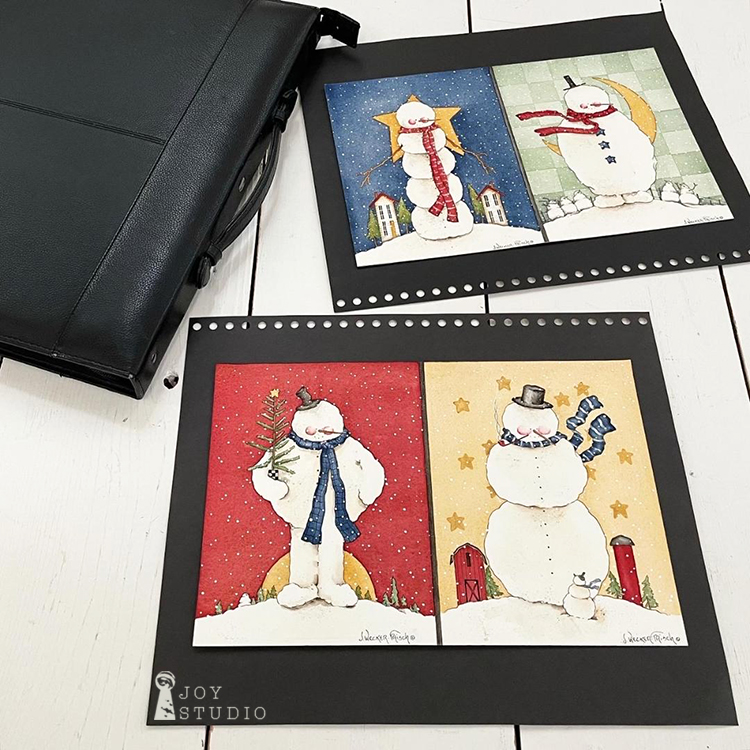
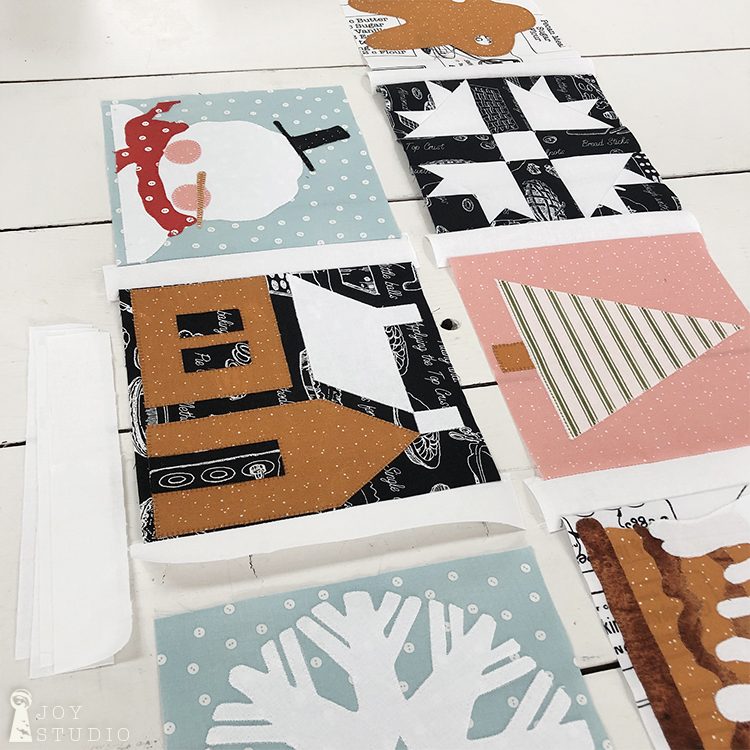
There are three of the snowmen characters from Janet’s Snow Sweet art/fabric collection translated to 16″ – 18″ raw edge appliqué blocks. These can be used for pillows, a table runner or any quilt projects and are simply fun to display throughout the winter months. In addition to the steps/photos posted here, you can view some tips we used, on our YouTube channel.
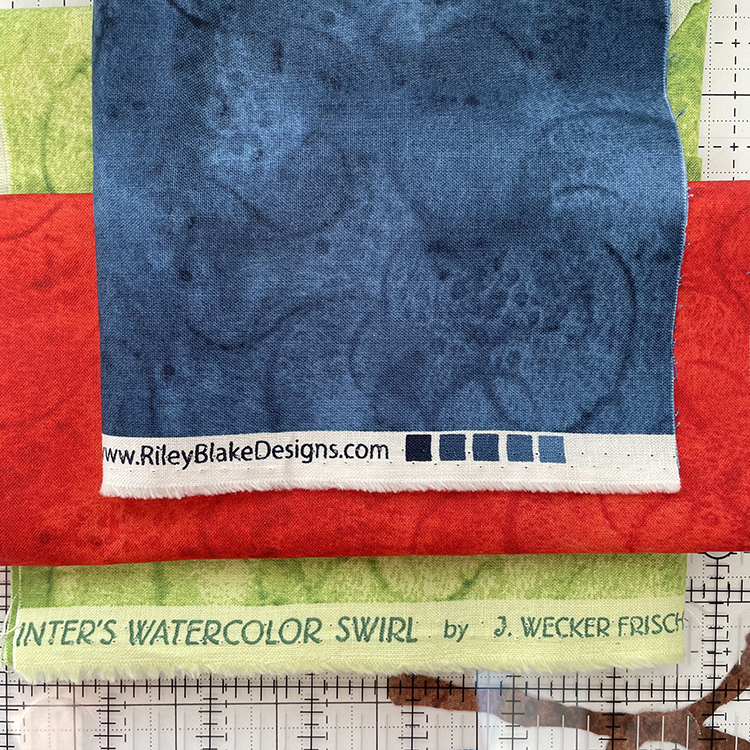
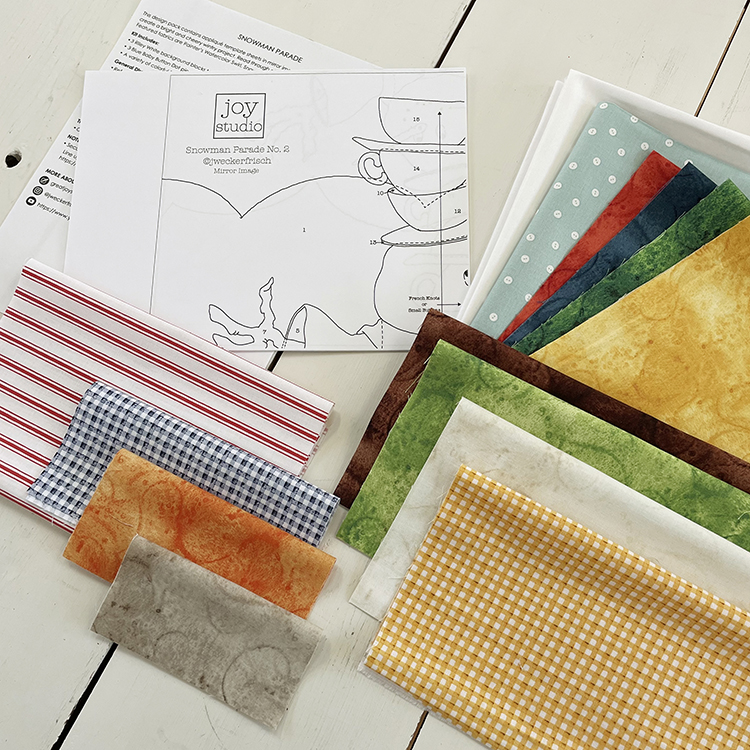
Our Snowman Parade kit can be purchased here in the shop and will contain Painters Watercolor Swirl, Snow Sweet, Blue Button Dots and basics from Riley Blake Designs. The kit also includes 12, 8.5″ x 11″ sheets to assemble for your templates and a basic appliqué instructions guide.
•
•
In addition to the kit you will need a fusible web product along with the typical sewing supplies. We like to use Pellon Fusible Featherweight 991FFW1 as our fusible web product from a 20″ wide bolt. We also recommend purchasing a large tablet of tracing paper to make a ‘placement door’.
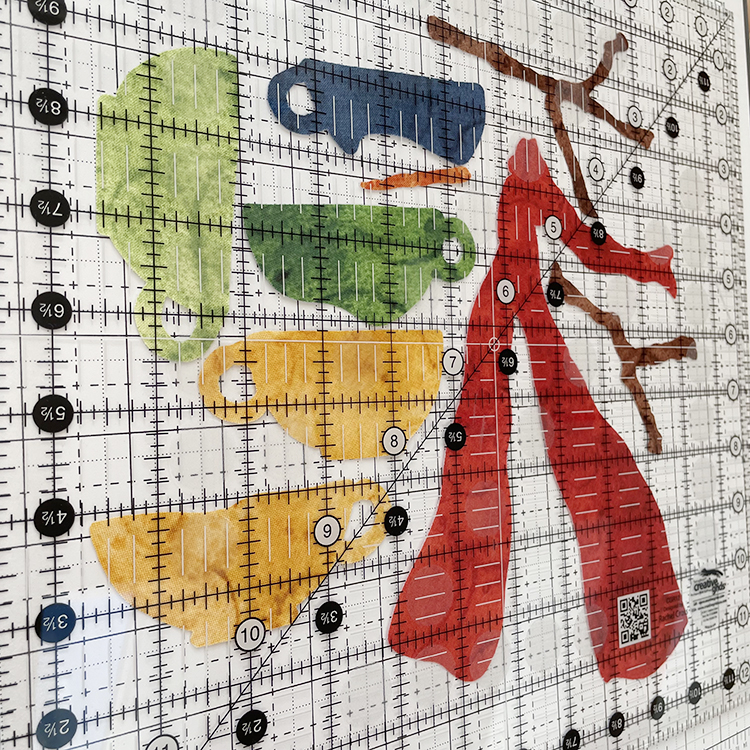
1.) Trace the appliqué templates on the paper side of your chosen product. Our templates are already in mirror and ready to go. A light box is a great help with this step however, taped to a window works perfectly fine. Rough cut them out and fuse each to the wrong side of fabrics. You will have this blog post, YouTube video and our IG posts as a fabric color guide. Sorry, no full color photo comes with the kit. Next, cut all of your appliqué pieces out with a sharp pair of scissors. You may like to place them under something to keep the pieces from curling up.
•
•
2) Assembling each block can be done with accuracy and best results using what we call, a tracing paper door. Appliqué pieces are sitting on top of one of ours in the photos below. However, you simply sandwich your pieces onto your pressing surface, background fabric, blue dots snowman silhouette with the tracing paper outline (traced using templates ahead of time) on top to achieve near perfect placement. This is best demonstrated here and here.
•
•
Next we will get these sewn down using decorative stitches on the machine and assemble into our project. We’re thinking a table runner!
Follow us on Instagram or Facebook for updates.
Thanks for visiting, as always and Merry Christmas!!!
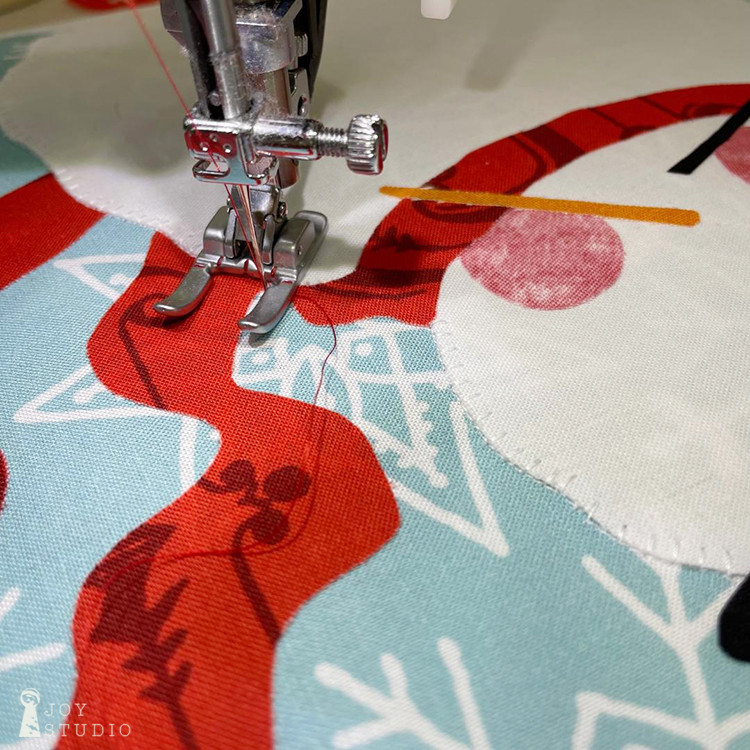
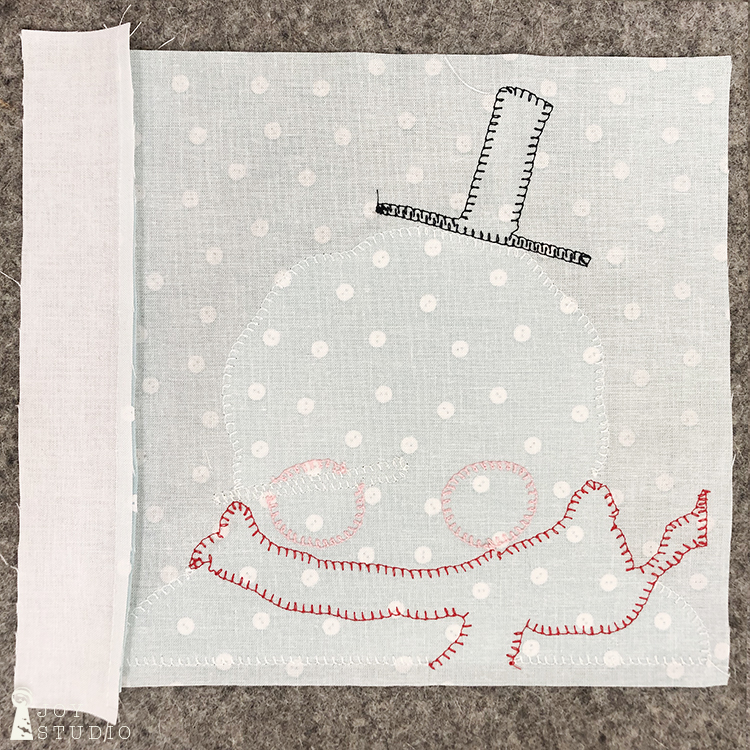
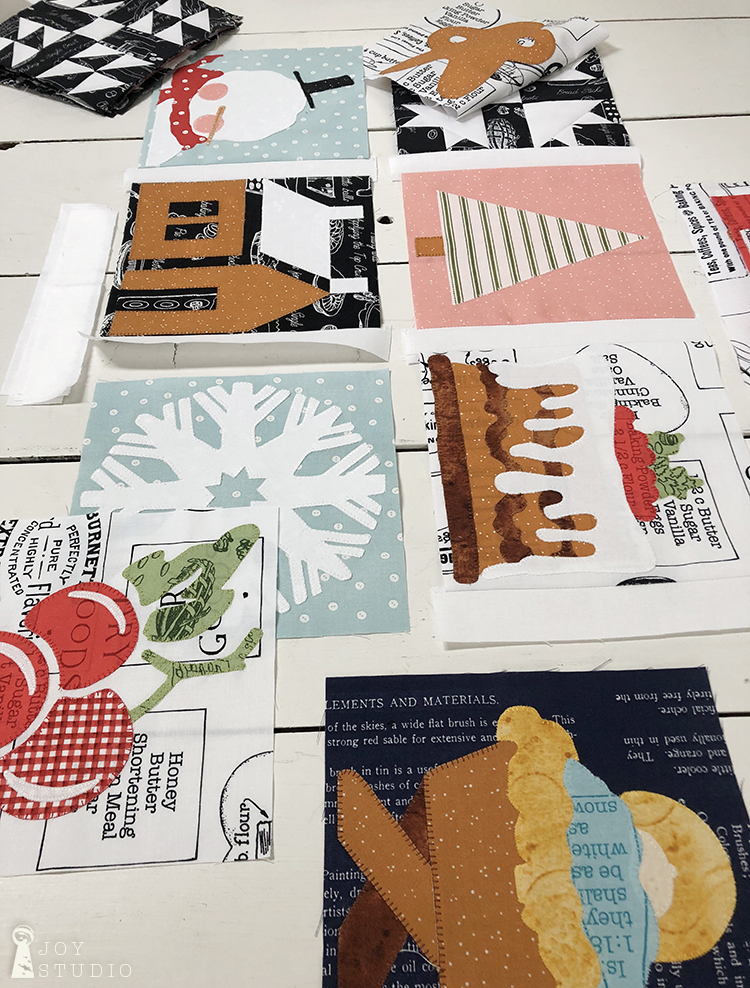
By this time you have your three snowmen blocks completely fused and are ready to sew. If not, as always continue at your own pace. The only thing we have left to complete these blocks now is to secure the appliqué designs to the background fabrics and add any decorative stitching. There are many stitches and styles you can use to do this and the choice is entirely yours, you’re the maker!
•
•
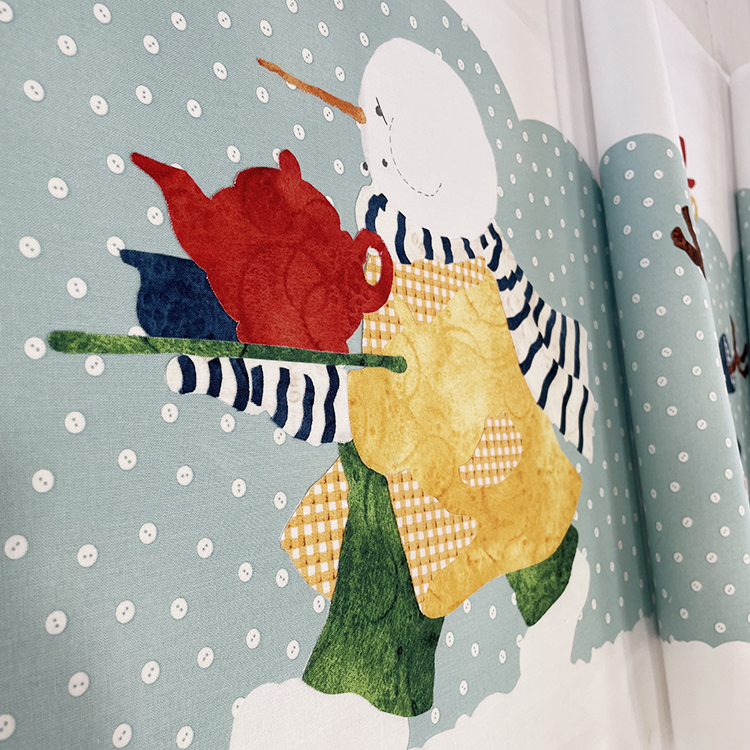
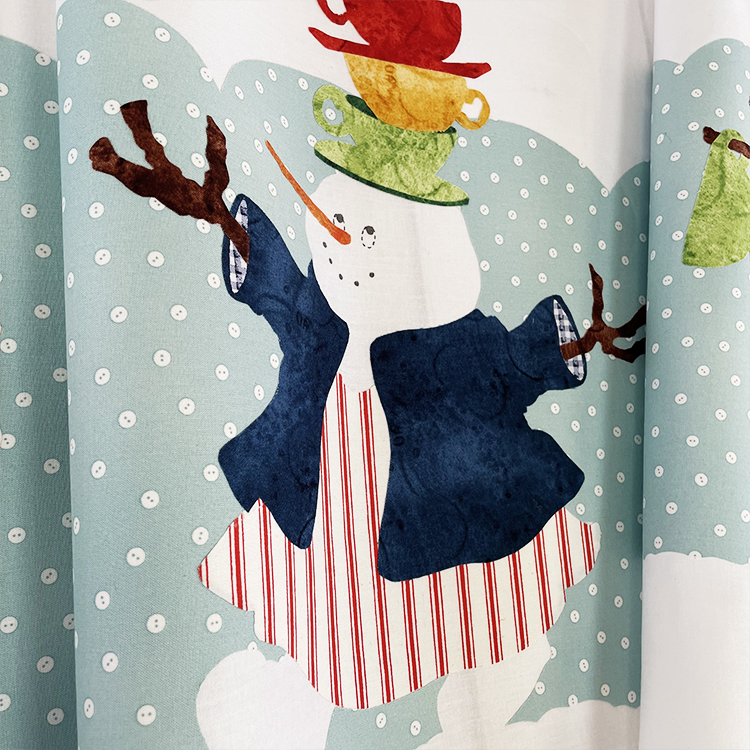
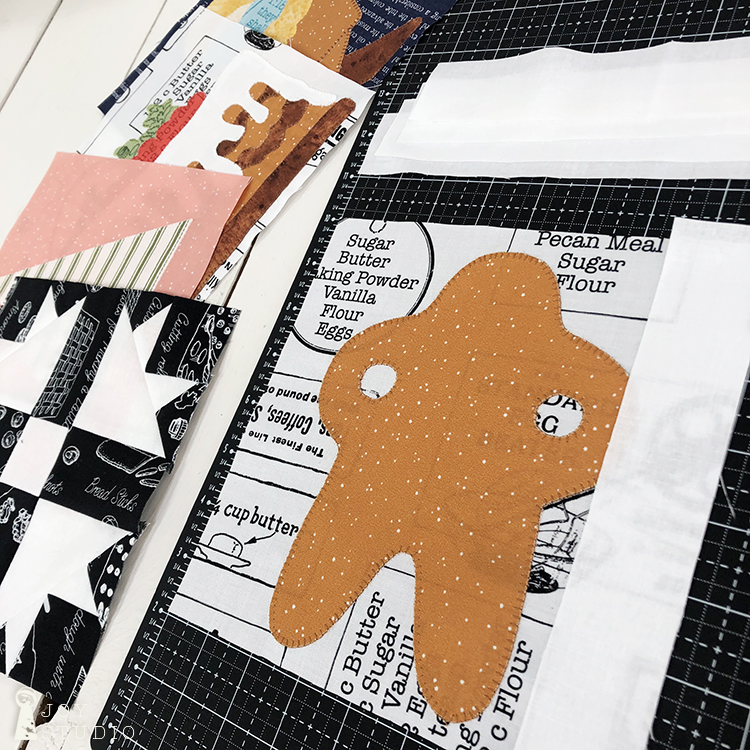
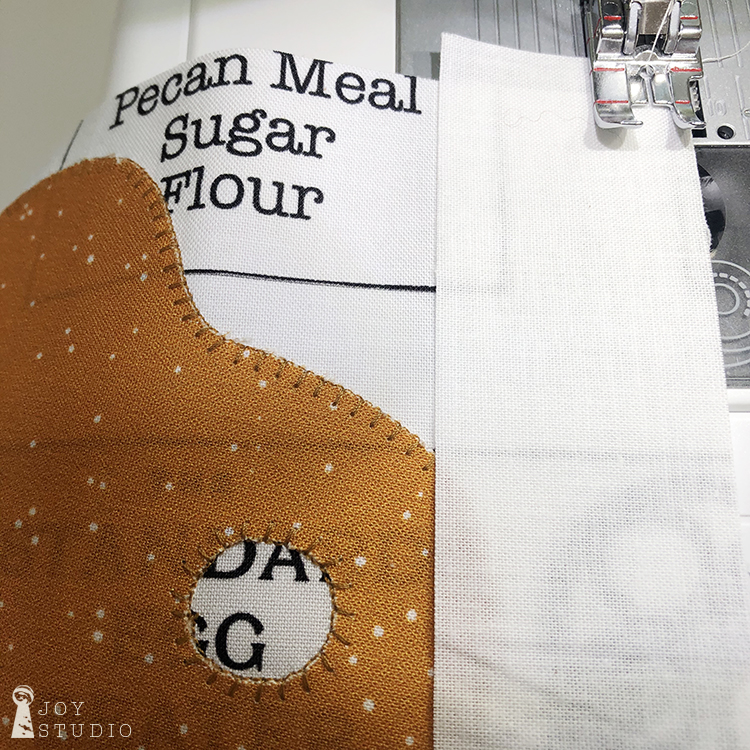
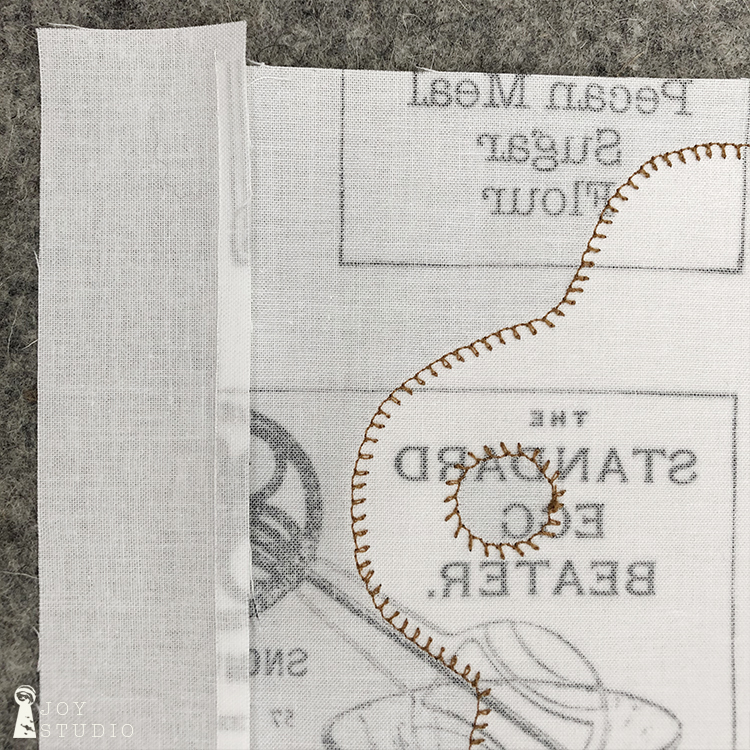
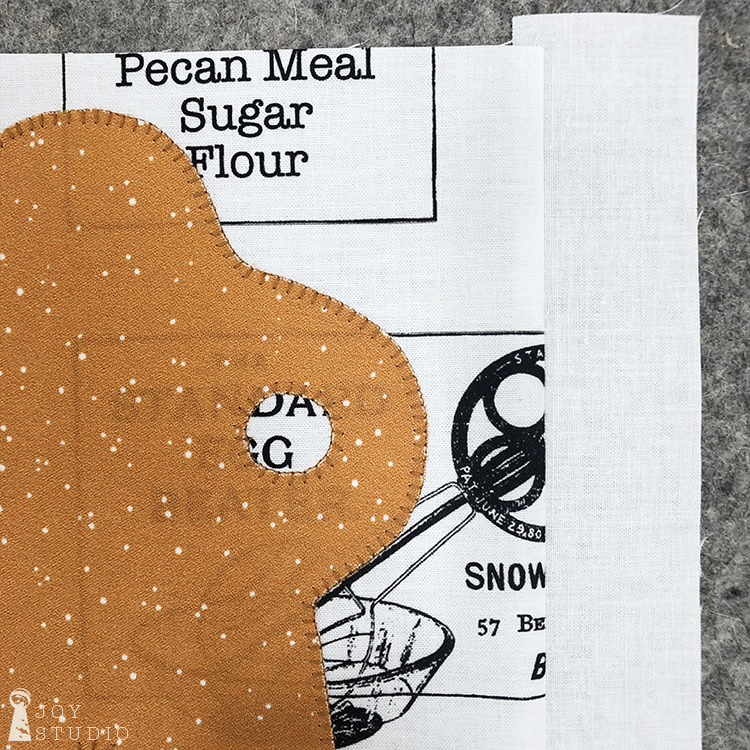
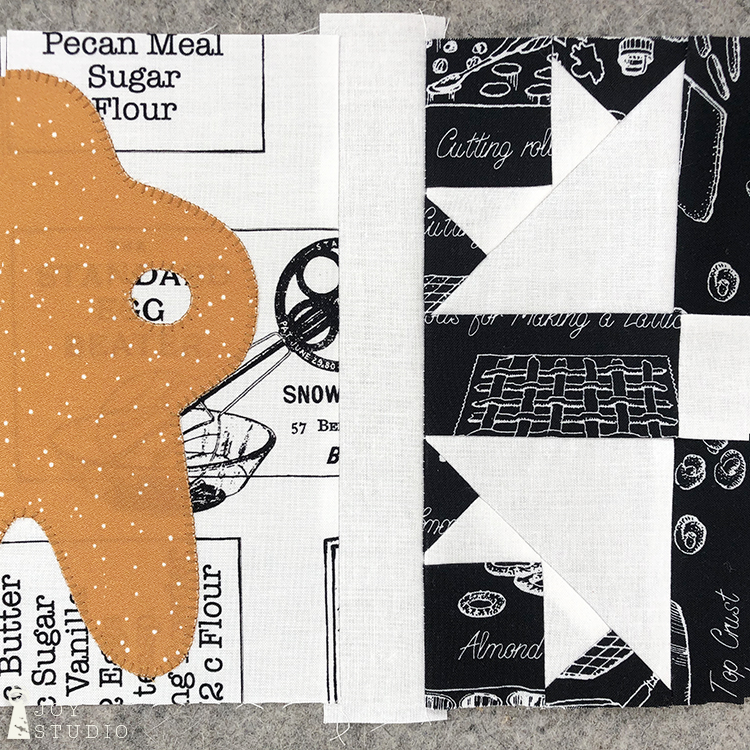
I am most comfortable using one of my (basic Pfaff) machine’s options that is most like a blanket stitch to outline and secure my appliqué pieces to my background fabrics. I started with the large white pieces first. These are a bit stiff since we used an extra layer of interfacing and your appliqué pieces can pull up with handling so be careful to get them well fused. If this happens however, before you are ready to sew simply press over them again to reactivate the fusible glue. If you use this type of stitch you want to lay your needle right beside your appliqué fabric edge close as you can for the running stitches.
•
•
I also chose the same color thread that best matched my fabrics or close as I had on hand. I used 50 weight cotton Aurifil. Both of these choices (blanket stitch and same color thread) seam to make up for any imperfections due to my beginner sewing skills. Of course you can go with any style such as free motion or any number of decorative stitching that you like.
•
•
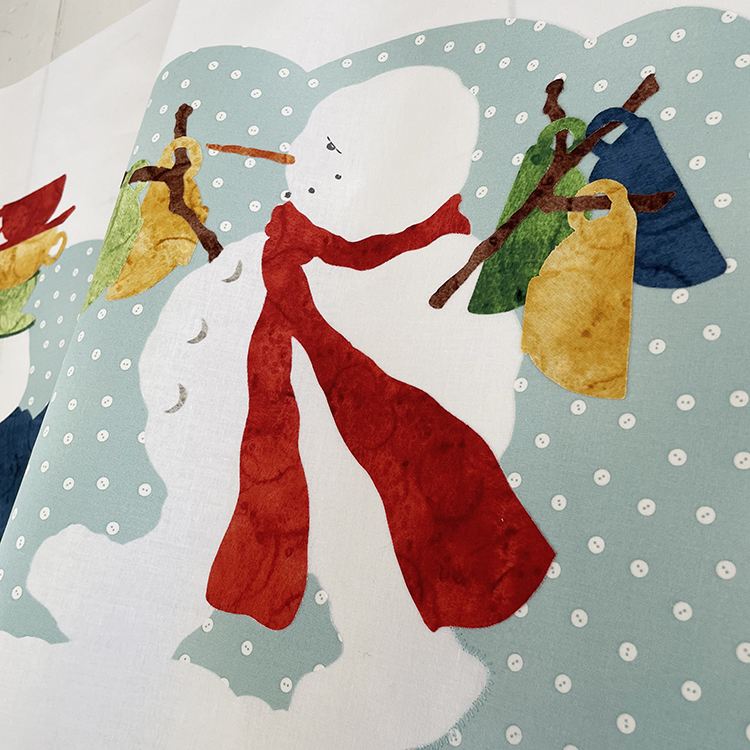
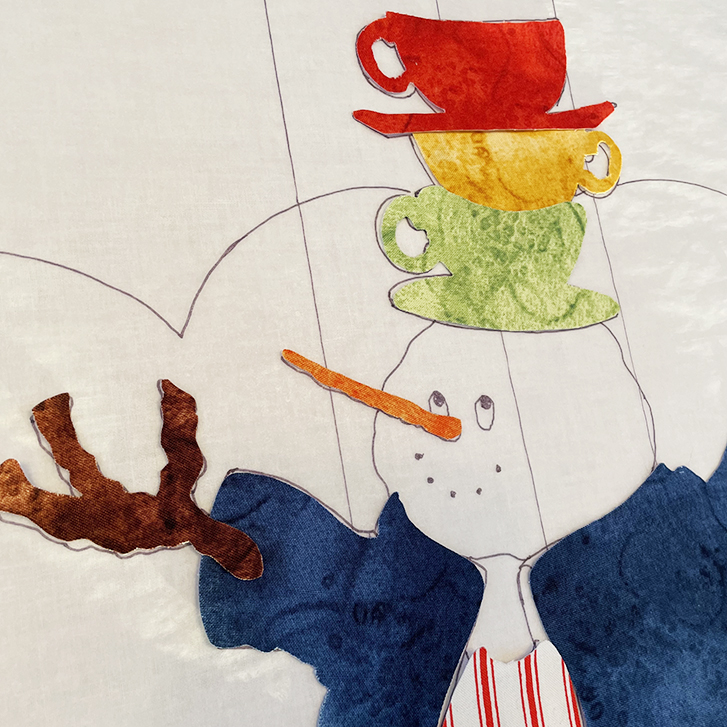
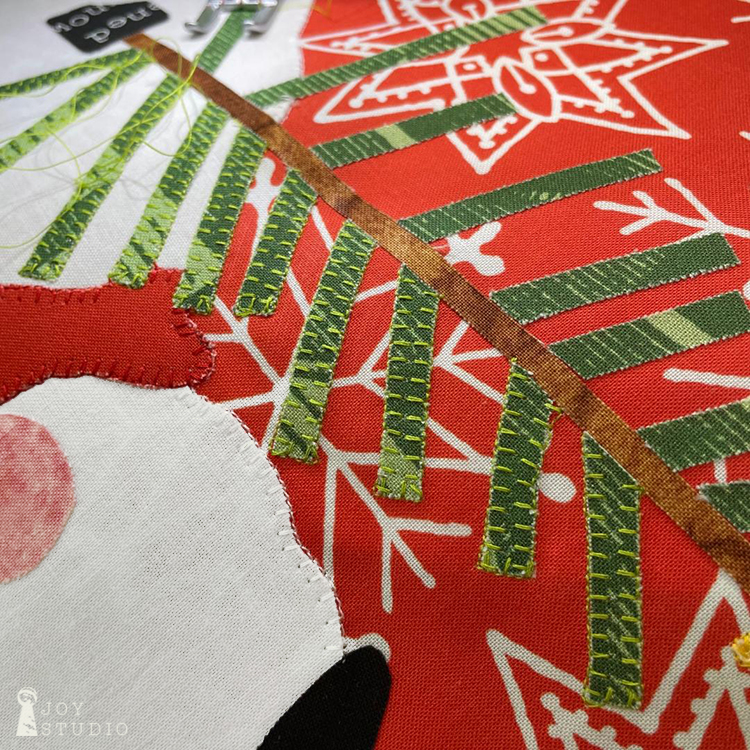
I continued by sewing the next largest pieces first red, then yellow, green and so on until I finished stitching around all of the smaller pieces.
For my green, I only had a lime shade but I think this helped to distinguish the tree branches against the two darker fabrics.
•
•
Remember! These blocks still have to be quilted so, hold off on any 3-D embellishments like buttons or charms, etc. Which explains the blank look on our snowmen faces. Lol! I actually have tiny black buttons for his eyes and mouth and can’t wait to see them finished. 😉
•
•
We will post our finished blocks on Instagram and Facebook so, if you want to see our updates and the rest of our blocks in this quilt, plus anything new, you can follow us here:
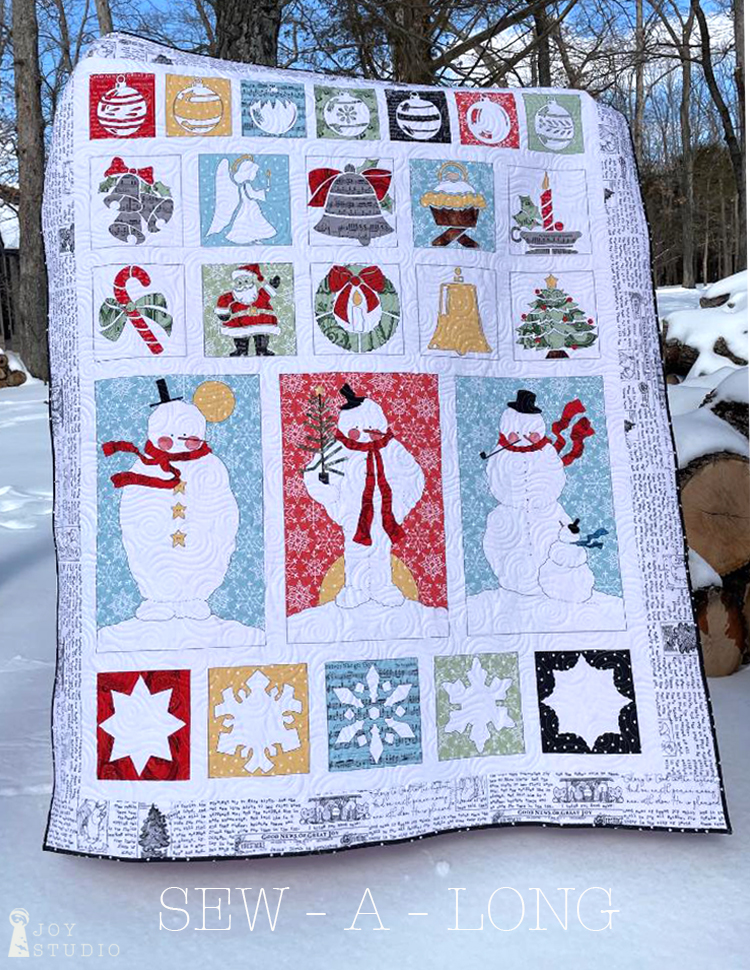
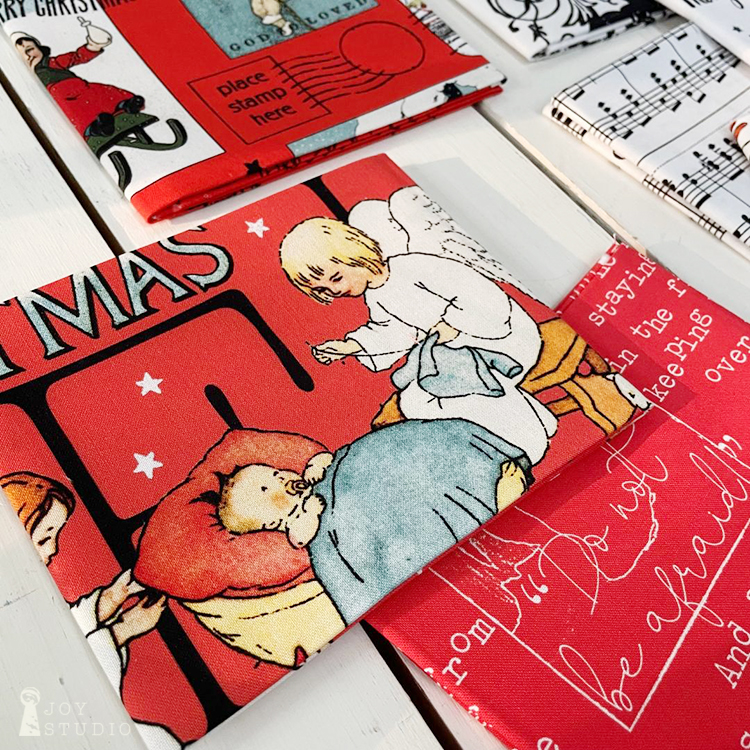
All About Christmas fabric has delivered and is in a shop near you. Find a list of retailers in my last blog post here.
This collection is beautiful! It includes the Christmas story from Luke 2 making it VERY Christmas-y and we especially love those details. In addition, the printing quality is wonderful thank you to our fabric partners at Riley Blake Designs.
•
•
So, here we go with another little Sew-A-Long. This time it will be a mini. The two items that we will be sharing over the three weeks are,
Our three large snowman blocks (row 4)
Reverse raw edge appliqué blocks (rows 1 & 5)
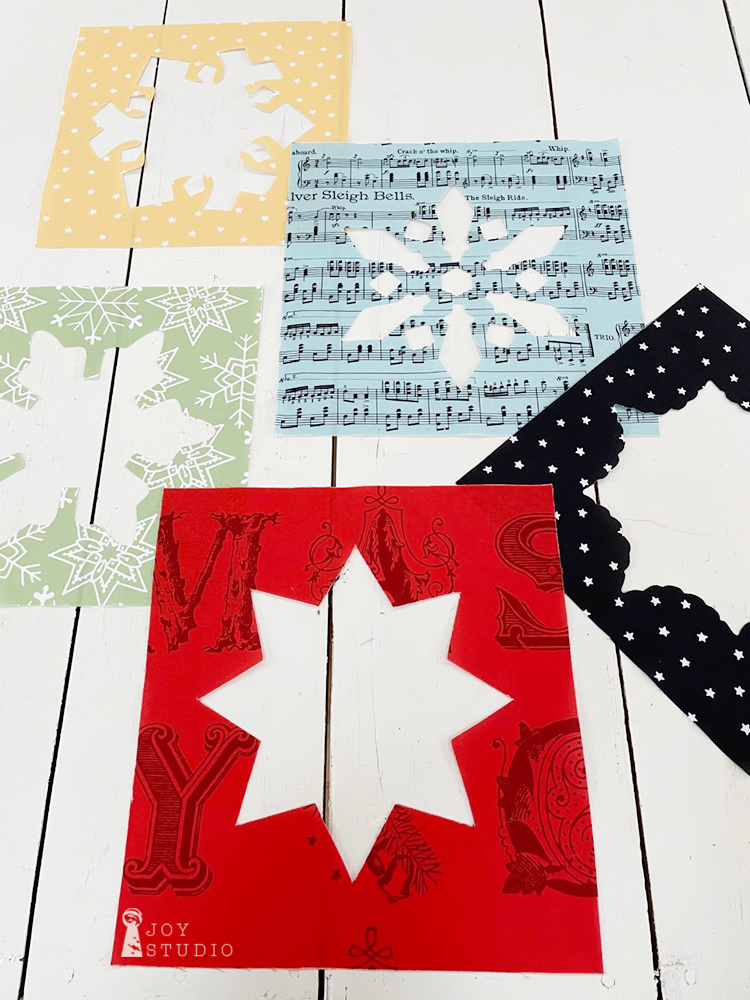
This week we will be looking at number 2, reverse raw edge fusible appliqué for the ornament blocks. The snowflake blocks are done the same way only much less detail so we will be focusing on row one.
Do you have your pattern and fabric ready? If not, visit this link to find a shop.
Are you ready to sew?! Let’s go! According to the All About Christmas pattern instructions, it is important ‘To Get Started’ by cutting fabrics for the large snowmen blocks FIRST. This assures that you will have the larger fabric cuts set aside when you need them. Follow the cover art for the fabric choices and make cuts according to the pattern instruction page(s) and directional fabrics. If you are new to the technique of reverse raw edge appliqué I highly suggest reading the pattern in it’s entirety before starting or cutting into your fabrics.
•
•
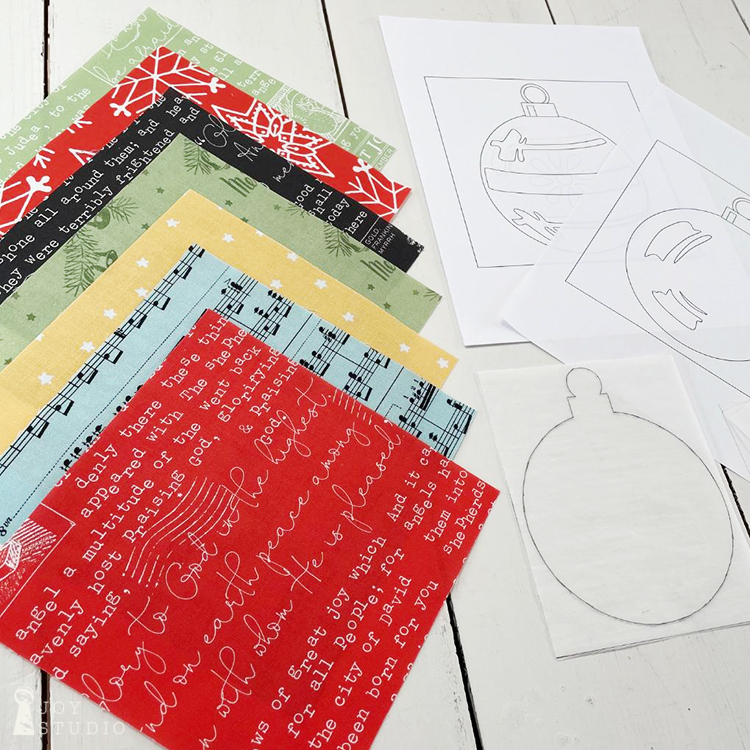
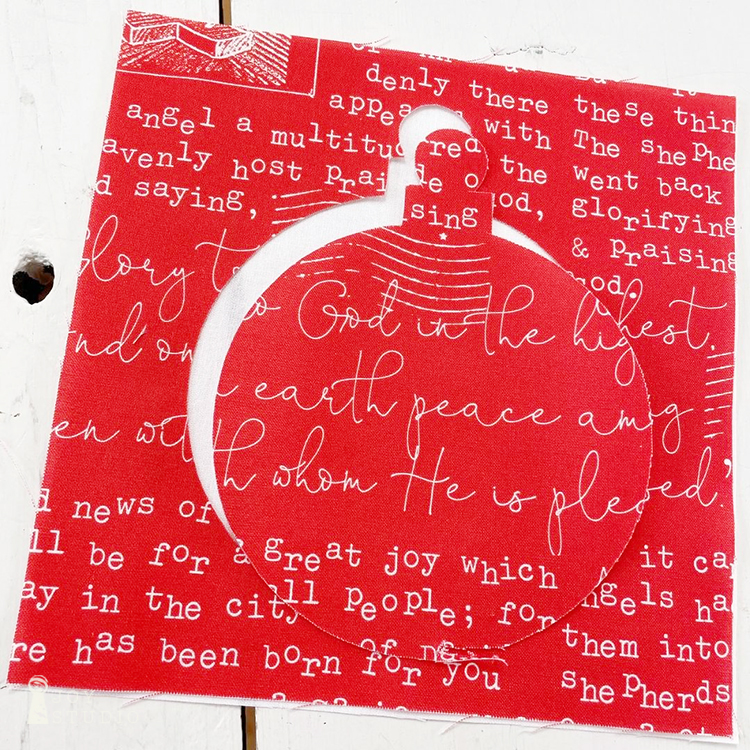
Since some of our designs for this quilt were stencil-like with white as the main center image (see the snowflake and ornament rows), we selected this reverse appliqué technique. Often with appliqué we will use a second interfacing product to mask the background fabric from showing through our white however, we found this to be a better option for the ornament and snowflake blocks on this quilt. The photos below will offer a visual aid so-to-speak to support this explanation.
Once you’ve cut your fabric squares for blocks in Rows 1 and 5, you can begin tracing the designs onto your fusible web product according to manufacturers directions. We like Pellon Featherweight Fusible 805. Be sure to trace all of the pieces that make up the inside ornament designs before fusing. You will be using those to help your fabric remain as a continual image. Fuse to wrong side of fabric considering whether your fabric square will be using a directional print and align accordingly.
•
•
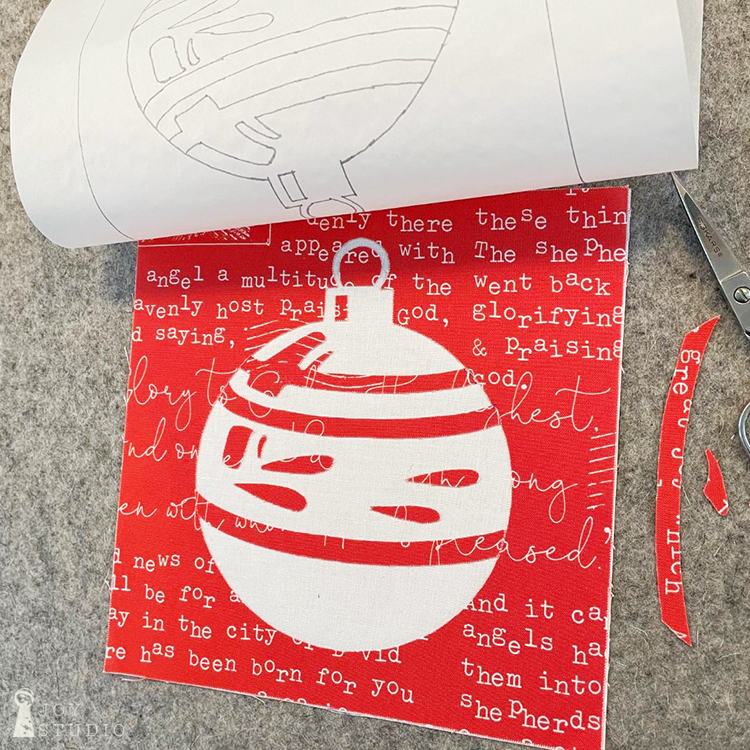
When you go to cut out the ornament rounds, be careful not to cut through the outside square itself or those tiny pieces. You can see at the bottom of our ornament photo below where we began poking the scissors through to cut around the perimeter only. This way, when the traced ornament is removed, your background stays completely intact. Then cut your smaller (traced beforehand) pieces and set them aside somewhat in order, or you can number them if that helps.
•
•
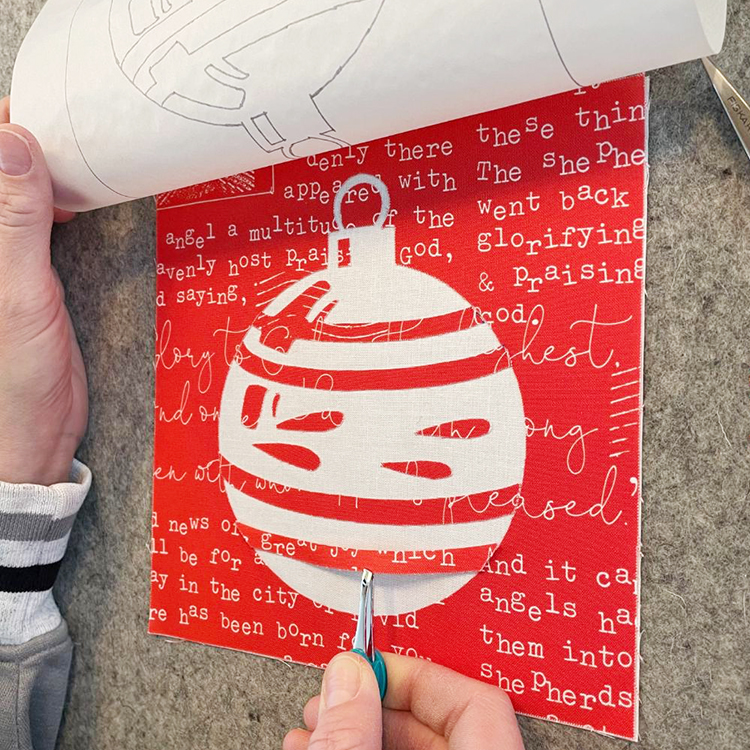
Once all of your ornament pieces are cut out you are ready to fuse. Sandwich the colored fabric silhouette squares on top of your Riley White squares that will show from underneath. You can place the pattern flipped upside down (since already in reverse) beneath your layered fabrics to use as your placement guide. Or, another method that we like to use, is a tracing paper door, as we call it. The photos below plus this link will explain. Simply put, we trace the block template image(s) onto ordinary tracing paper and pin down on one side of your block to help with accurate placement in the event the paper pattern does not show through your fabric. We also found that using tweezers was the easiest way to then nudge the tiny pieces into place. When you get them where you like, fuse!
•
•
Here are our results. Now for the fun part, stitching them down. I will be using thread to match and a blanket style stitch. I find both are somewhat forgiving. You may choose to use any number of decorative stitching to add these details if you prefer over these tiny appliqué pieces. This is where your sewing skills will shine beyond my limited experience so please, send progress photos! And have fun of course 😉
•
•
I hope you had fun sewing along with me! If you have any questions about this technique, leave a comment below! See you next week for the BIG snowmen blocks.
Since there is a lot of info to cover this last week will be in two parts.
Assuming that everyone has all of their blocks completed and trimmed or will have, it is time to assemble!
•
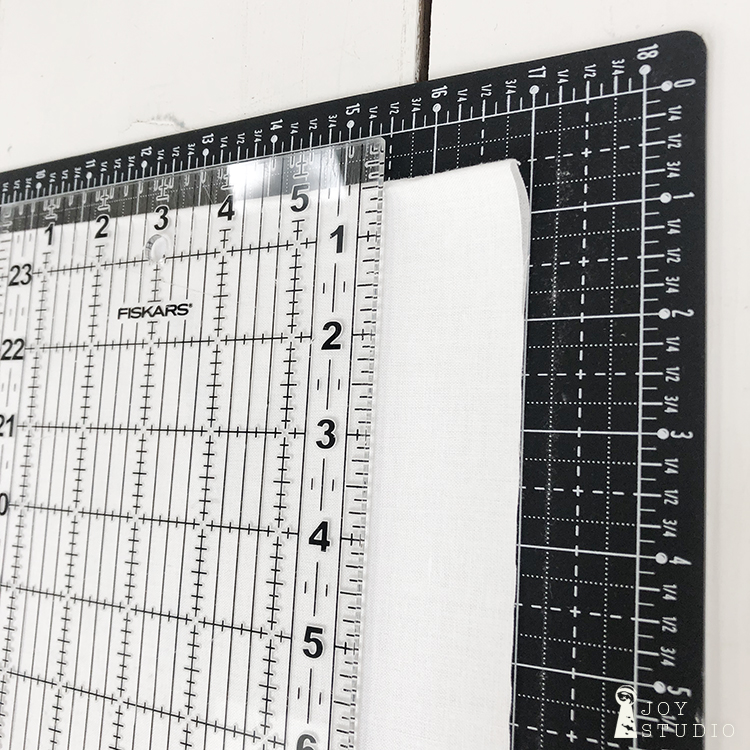
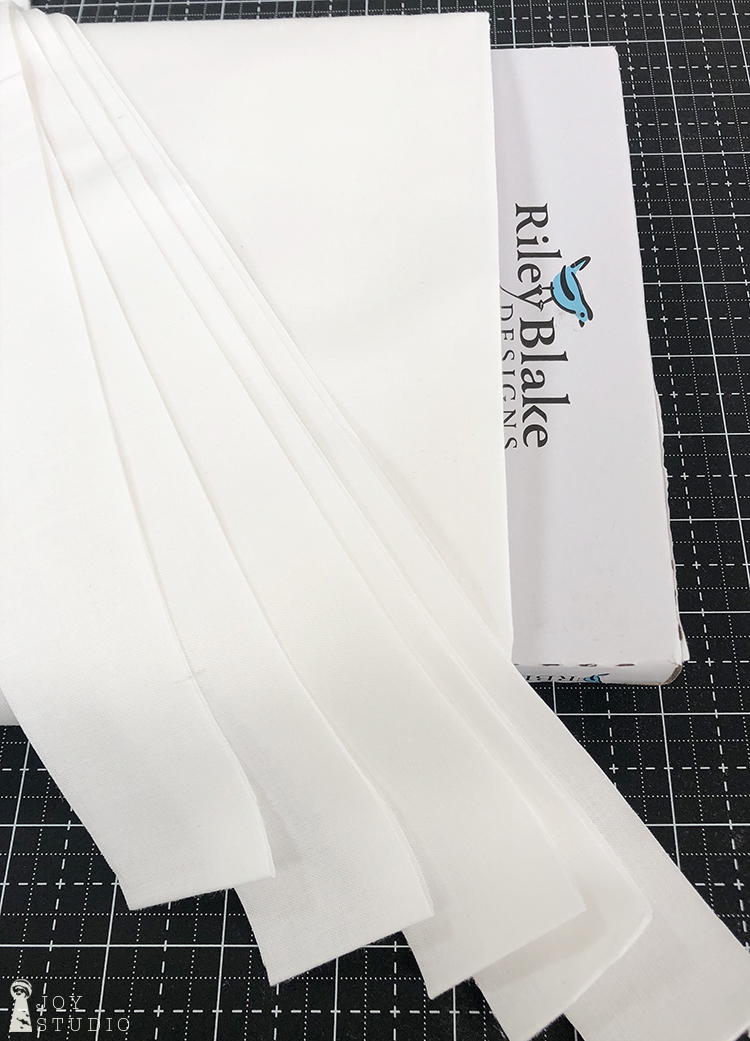
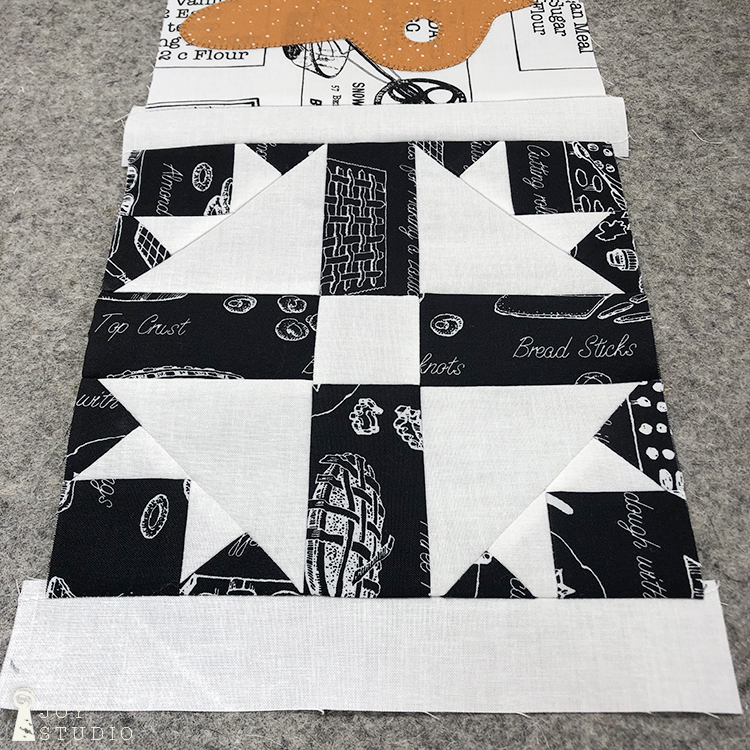
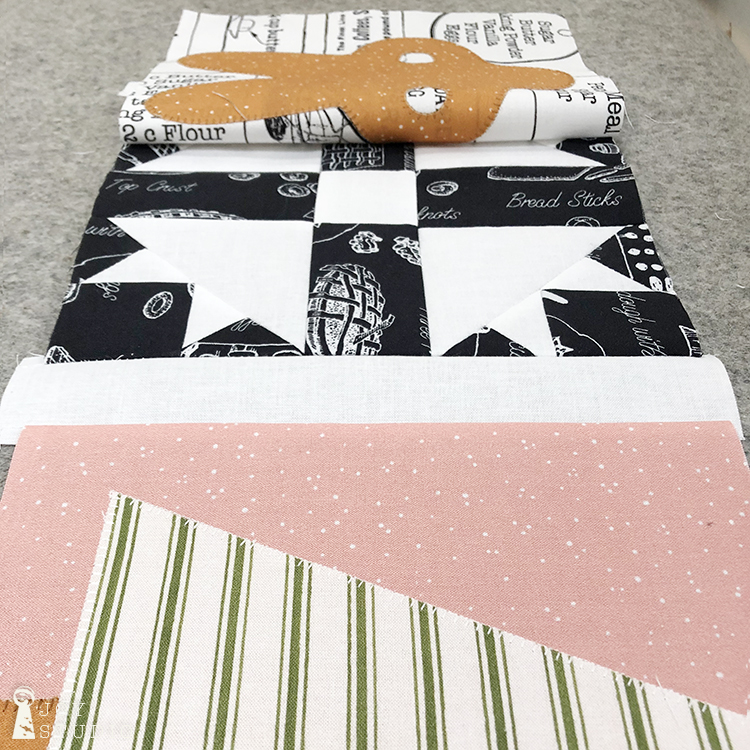
To start assembling the quilt portion, I cut five one and a half inch strips of Riley White fabric for the short sashing pieces. Check your pattern for accurate amounts if you want to cut all at once. I inched my way into this process, no pun intended.
From my five I cut eight and a half inch lengths, enough to attach my first couple of horizontal rows of blocks together. Refer to your pattern cover for block placement.
•
Beginning with block one (top left) lay one of your Riley White strips (1.5″ x 8.5″) on the right side of Block 1, right fabric sides together. Split the difference of the extra half inch between top and bottom of your block to be trimmed later.
•
Sew together using a quarter inch seam.
•
Press the seam toward your block.
•
Repeat the steps to connect block one and two together with this same sashing strip. This time lay block two on top of sashing strip lining up at right (see photo), again right fabric sides together, being careful to also line up both blocks top to bottom. You may want to pin in place before sewing.
•
Continue working this way until you have all of the top row of blocks connected. Then move on to row two!
•
And so on, until you have all of the blocks that connect using the short sashing pieces as shown on the pattern cover art. Seeing it all come together is the most fun for me, agreed?
I will post Part B on Saturday so stay tuned.
•
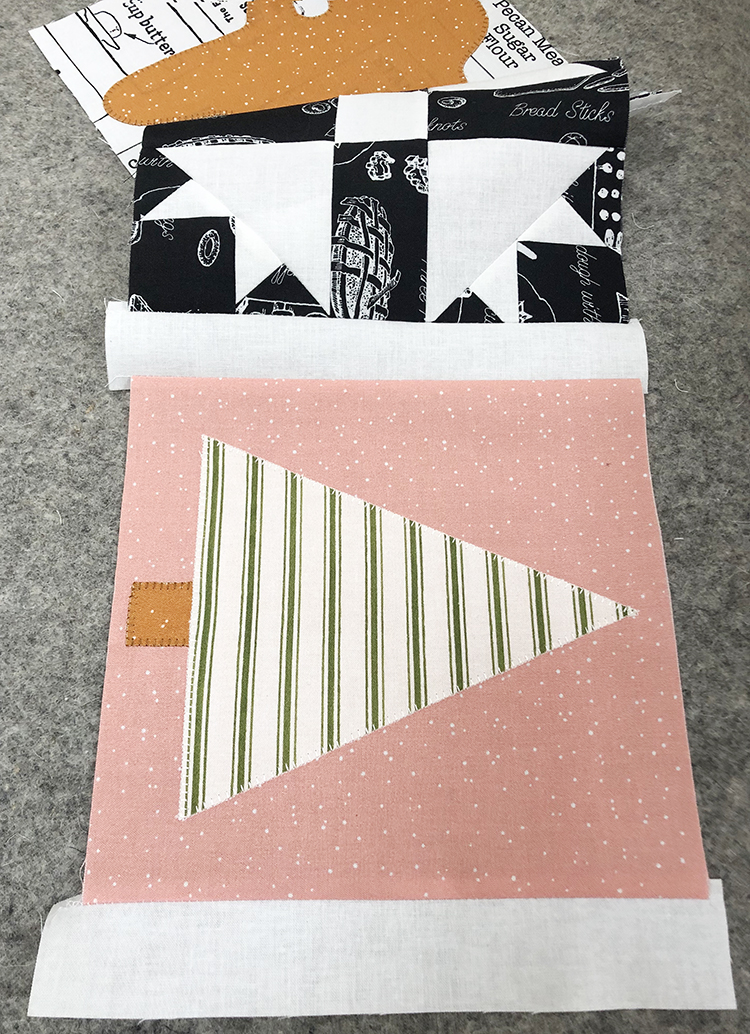
Embellish Options.
This festive project is loaded with possibilities to stitch on some fun extras! We plan to add buttons for our snowmen eyes and gingerbread man but remember to do this after your quilt top has been quilted.