
•
Hello Everyone, good news!
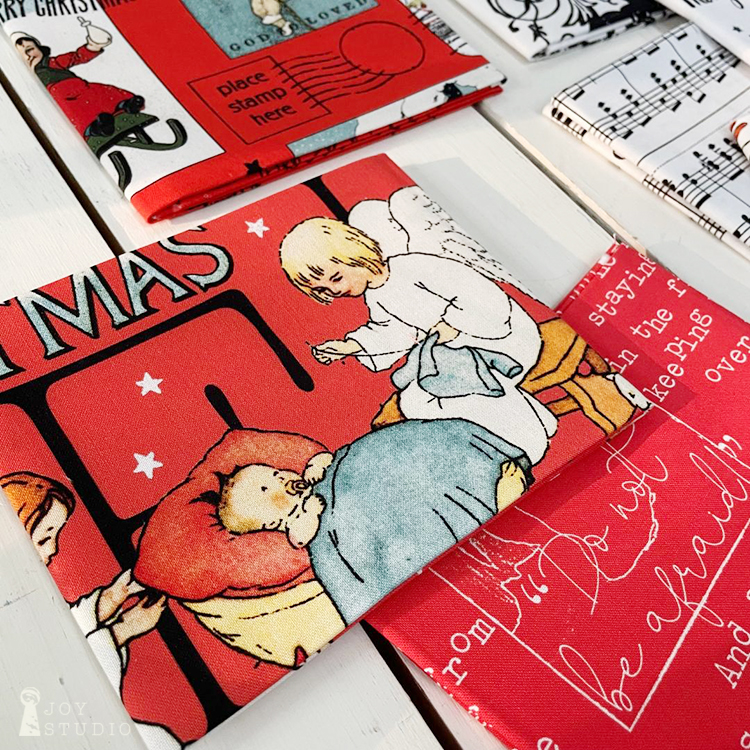
All About Christmas fabric has delivered and is in a shop near you. Find a list of retailers in my last blog post here.
This collection is beautiful! It includes the Christmas story from Luke 2 making it VERY Christmas-y and we especially love those details. In addition, the printing quality is wonderful thank you to our fabric partners at Riley Blake Designs.
•
•
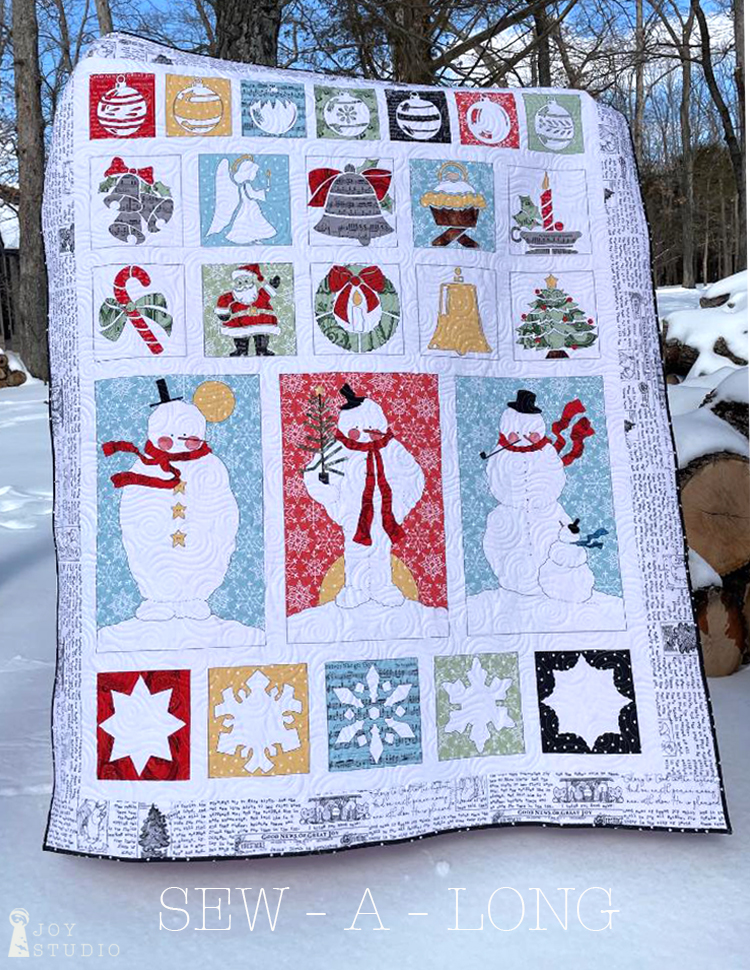
So, here we go with another little Sew-A-Long. This time it will be a mini. The two items that we will be sharing over the three weeks are,
- Our three large snowman blocks (row 4)
- Reverse raw edge appliqué blocks (rows 1 & 5)
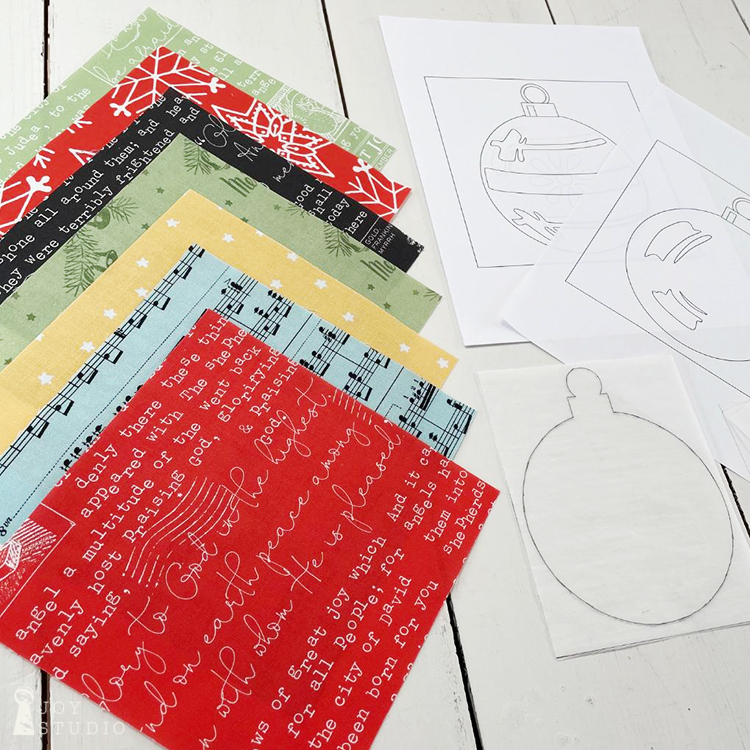
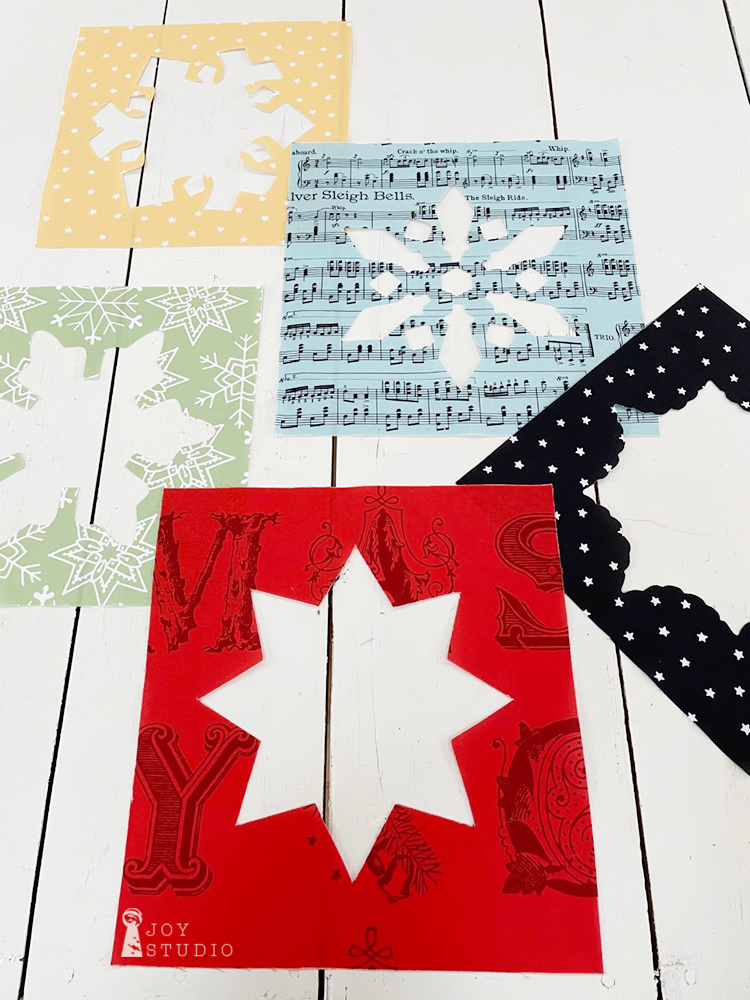
This week we will be looking at number 2, reverse raw edge fusible appliqué for the ornament blocks. The snowflake blocks are done the same way only much less detail so we will be focusing on row one.
Do you have your pattern and fabric ready? If not, visit this link to find a shop.
Are you ready to sew?! Let’s go! According to the All About Christmas pattern instructions, it is important ‘To Get Started’ by cutting fabrics for the large snowmen blocks FIRST. This assures that you will have the larger fabric cuts set aside when you need them. Follow the cover art for the fabric choices and make cuts according to the pattern instruction page(s) and directional fabrics. If you are new to the technique of reverse raw edge appliqué I highly suggest reading the pattern in it’s entirety before starting or cutting into your fabrics.
•

•
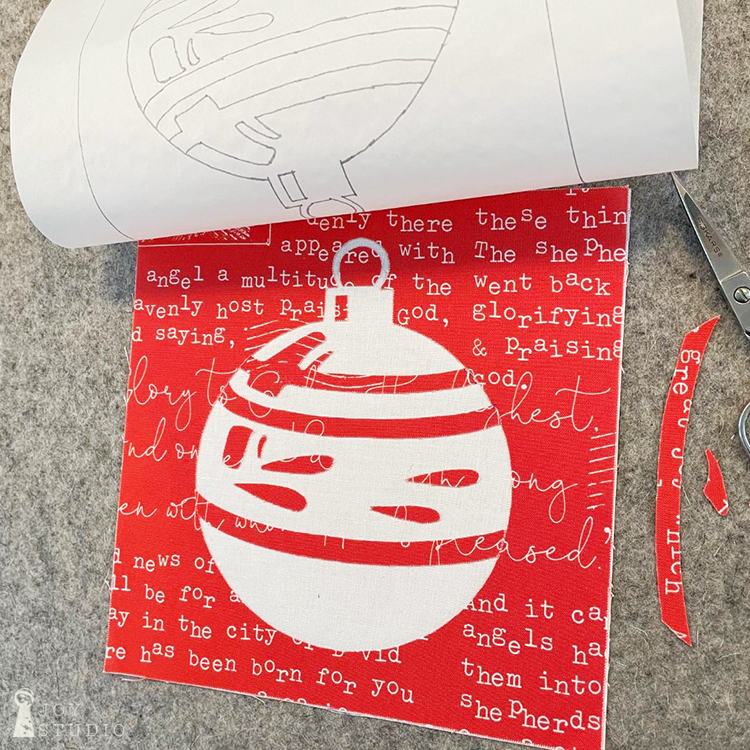
Since some of our designs for this quilt were stencil-like with white as the main center image (see the snowflake and ornament rows), we selected this reverse appliqué technique. Often with appliqué we will use a second interfacing product to mask the background fabric from showing through our white however, we found this to be a better option for the ornament and snowflake blocks on this quilt. The photos below will offer a visual aid so-to-speak to support this explanation.
Once you’ve cut your fabric squares for blocks in Rows 1 and 5, you can begin tracing the designs onto your fusible web product according to manufacturers directions. We like Pellon Featherweight Fusible 805. Be sure to trace all of the pieces that make up the inside ornament designs before fusing. You will be using those to help your fabric remain as a continual image. Fuse to wrong side of fabric considering whether your fabric square will be using a directional print and align accordingly.
•

•
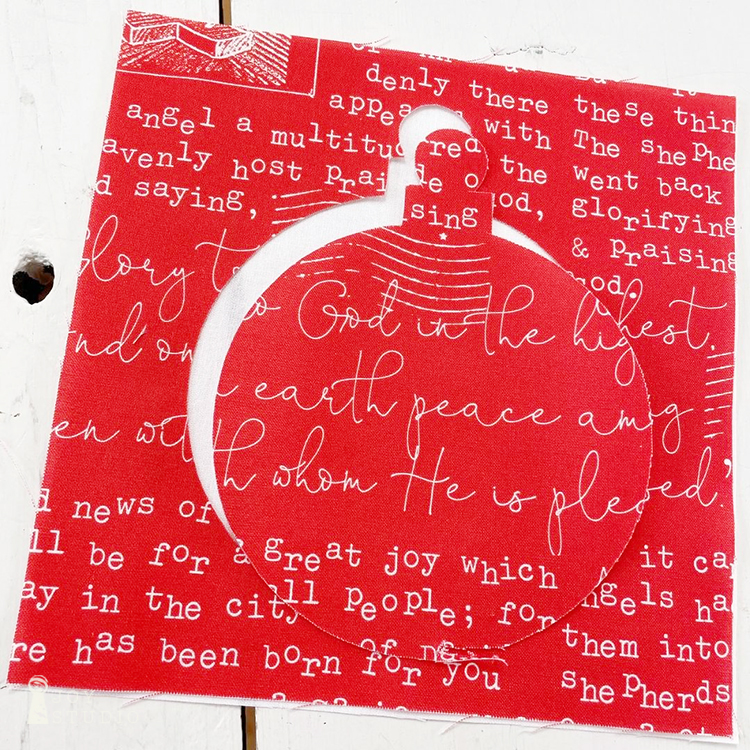
When you go to cut out the ornament rounds, be careful not to cut through the outside square itself or those tiny pieces. You can see at the bottom of our ornament photo below where we began poking the scissors through to cut around the perimeter only. This way, when the traced ornament is removed, your background stays completely intact. Then cut your smaller (traced beforehand) pieces and set them aside somewhat in order, or you can number them if that helps.
•

•
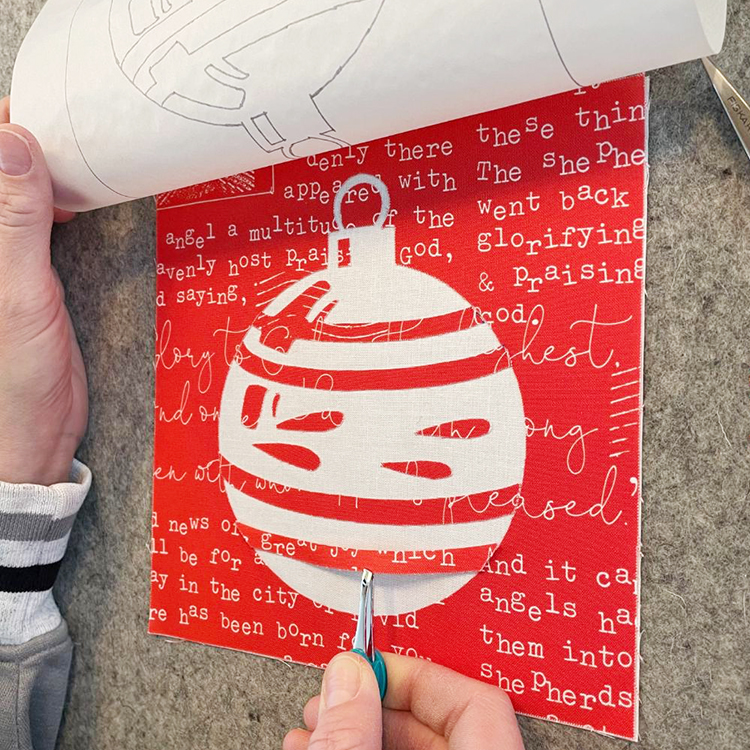
Once all of your ornament pieces are cut out you are ready to fuse. Sandwich the colored fabric silhouette squares on top of your Riley White squares that will show from underneath. You can place the pattern flipped upside down (since already in reverse) beneath your layered fabrics to use as your placement guide. Or, another method that we like to use, is a tracing paper door, as we call it. The photos below plus this link will explain. Simply put, we trace the block template image(s) onto ordinary tracing paper and pin down on one side of your block to help with accurate placement in the event the paper pattern does not show through your fabric. We also found that using tweezers was the easiest way to then nudge the tiny pieces into place. When you get them where you like, fuse!
•

•
Here are our results. Now for the fun part, stitching them down. I will be using thread to match and a blanket style stitch. I find both are somewhat forgiving. You may choose to use any number of decorative stitching to add these details if you prefer over these tiny appliqué pieces. This is where your sewing skills will shine beyond my limited experience so please, send progress photos! And have fun of course 😉
•


•
I hope you had fun sewing along with me! If you have any questions about this technique, leave a comment below! See you next week for the BIG snowmen blocks.
Follow and tag me on Instagram @jweckerfrisch
and use #allaboutchristmasfabric to share your photos.
I will be posting progress shots as well!
