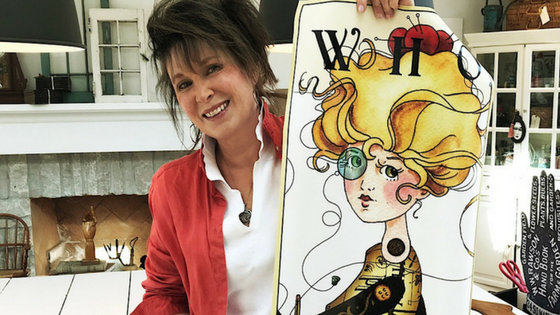
Their post includes a bit of our studio
&
a couple pics of me . . . yikes!
•
More info at Riley Blake Designs.
~
Hello everyone!
•
•
Welcome to our 1st Great Joy Studio workshop intro.
On January 17 we will be hosting a Valentine quilt top sew day from 9:00 am to 4:00 pm. We will be making my Broken Hearts quilt using the “Be Mine Valentine” fabric collection from Riley Blake Designs. Your teacher will be none other than, me, Janet Wecker Frisch. This is a free workshop so you need only to purchase the quilt top fabric kit from our shop. In addition to the sew day you will have exclusive access to shop all six of our Holiday lines (two Halloween, two Christmas, two Valentine) and related kits from my personal shop stash. Some, not all of these, are already out of stock, out of print or hard to find. In addition, for the really fast workers, we will try our hands at a Valentine post card or two.
Space is limited to the first twelve!
We need you to sign up using the Great Joy Studio Workshops link on my Instagram.
Also you must purchase the kit offered for the workshop only, from our Shop link to hold your spot.
Things to bring:
• Sewing Machine
• Sewing Tools
• Threads and bobbins
•
•
Event will be held in Eureka Missouri 63025 at the Eureka Chamber of Commerce, 113 Hilltop Village Center Dr.
•
•
Hello!
I hope that you enjoyed making tags and faux stamps along with gathering any vintage sewing inspired items that you want to incorporate into your journal. Moving along – This week I made a few heavy canvas pocket pages (signatures), to test and started on some quilted pages (signatures) as well.
The featured fabric throughout the project will be She Who Sews (Best of) and the She Who Sews Home Dec fabrics from Riley Blake Designs. SWSs Home are due to deliver in August. So, check with your quilt shop for availability. This fabric is sew pretty!
*
•
1) Blank canvas pages.
Again I had this canvas on hand and decided to begin with these first. I cut them using a rotary cutter and straight edge on two sides to fit my notebook but left the fringed edges for interest. I also reinforced the inside edges with a one inch strip that will be hole punched, just for extra support. I then used up the scraps for my pockets.
If you want to sew anything on your pockets, do before attaching them to your page. I added a few of the spool stamps and buttons but may decide to stamp or paint some details too.
•
•
2) Quilted Pages with She Who Sews.
For my first quilted one I chose She Who Sews Home Dec shears fabric from Riley Blake Designs. This collection is full of vintage sew-y motifs which are perfect for a fabric/sew journal! It will deliver in August so check with your quilt shop for availability.
•
•
Page base is Natural Linen cut a half inch larger than your fusible batting and your top (shears) fabric, on all four sides. Sandwich the three layers in that order and pin in place if your batting is not fusible. I only gave a light press to adhere the fabrics where I wanted them to be and then began to quilt around each of the images.
•
•
I used an off white thread to blend into the fabric. After some light quilting I used a zigzag stitch on a fairly wide setting around the edges of the top fabric. I like the sketchy appearance of raw fabric edges and a variety of stitches but you could turn and top stitch if you prefer. I have not decided yet if I will fringe my linen edges or simply trim them. My pocket will be added just as the previous canvas pages. I am still deciding what fabric to use however, and how deep to make the pockets. Maybe matching the print would be nice. Any thoughts?
•
•
Continue making as many pocket pages as you think you’ll need. By next week I hope to have several and then we can really get creative! Sound good?!!
Meanwhile get daily updates on Instagram and Facebook.
Thanks for visiting, see you next week.
•

*
Their post includes a bit of our studio
&
a couple pics of me . . . yikes!
•
More info at Riley Blake Designs.
~
A
new year
&
a new work space!
•
At last
JOY STUDIO
is complete!!
•
1 year ago,
we were
insulated, waiting for drywall and
•
•
Well, we found it.
Windows on every wall, eight skylights and two sets of French doors with connecting elliptical above each one.
At most times of the day, the room is flooded with a generous amount of natural light.
And I love it!!!
•
Builders on the project couldn’t understand the need for so many windows and I was questioned from every tradesman.
I stuck to my (never enough light) priority and it turned out to be the right decision, no question.
So, beginning 2018
Joy Studio
is completely finished, furnished and finally, ready for (hiding out) creative action.
•
A
Mini photo tour
As you enter:
The large Staircase Reclaim workbench:
Drawing/painting station one:
Drawing/painting station two:
Sewing station and supplies:
Large desk:
Everything maker, supply cabinet:
Coffee station:
&
Sitting, thinking, dreaming area:
•
It was a long, extremely tough journey but worth the effort.
Every time I enter the new studio space, I feel like a kid.
Curious,
and still hard to believe.
Thanks for visiting.
•
•
Happy New Year!
Still seeking light. And still hopeful,
in more ways than just a bright, well lit work space of course.
However,
I decided to share the Joy Studio portion and progress on our big project, to start out the blog year.
•
If you’ve been following us in the past two years you may remember that as we outgrew our work space it was necessary to rent additional office and Etsy shop storage areas. This was working out nicely until our shop managers MOVED! So, everything came back to the home studio causing quite the challenge in 2016.
Here’s the timeline in a photo nutshell.
•
With the former home studio now full of fabric, office and Etsy shop we (I) decided to build on our home site. A scary project but a long time dream that I never thought would be realized. Still waiting but it’s looking like in 2017, it may really happen!
•
We were told the wait for windows would be five weeks! Then they came, in a big storm. Windows were wrong. It was then we discovered that two of the four walls were also, wrong. So, they came down and we waited for windows. And waited. And waited. It would be another five weeks. Second try, they were wrong again. Windows held up the studio project until December.
•
•
We kept going luckily, wrapping walls, running wires and having HVAC installed.
•
We couldn’t leave out a fireplace of course. Built by family and friends. Nice!
•
As the new Joy Studio sits now, we are fully insulated and with the correct windows.
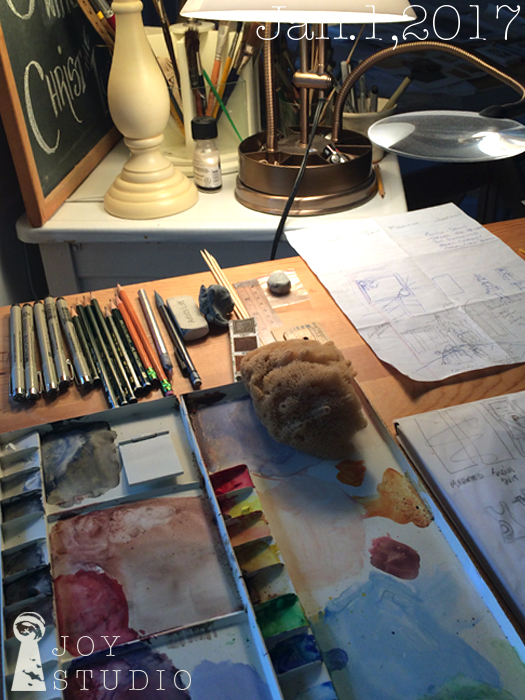
I am starting the new year working in the designated drawing station in the dinning room at my dad’s drawing table. I’m feeling snug and . . . GRATEFUL.

Dad’s Table & Palette Tin
•
Looking forward to 2017 and I hope you feel the same.
&
I almost forgot! We are having a FABRIC special!!
Use Code: january2017 for 25% off at,
Through January.