

•
Hello Again!
Welcome to week two of the
Snow-A-Long
Featuring our
Snow Sweet
collection from
We will be sharing an appliqué placement method using tracing paper doors to make this the easiest and most fool proof fusing process for making all the appliqué blocks.
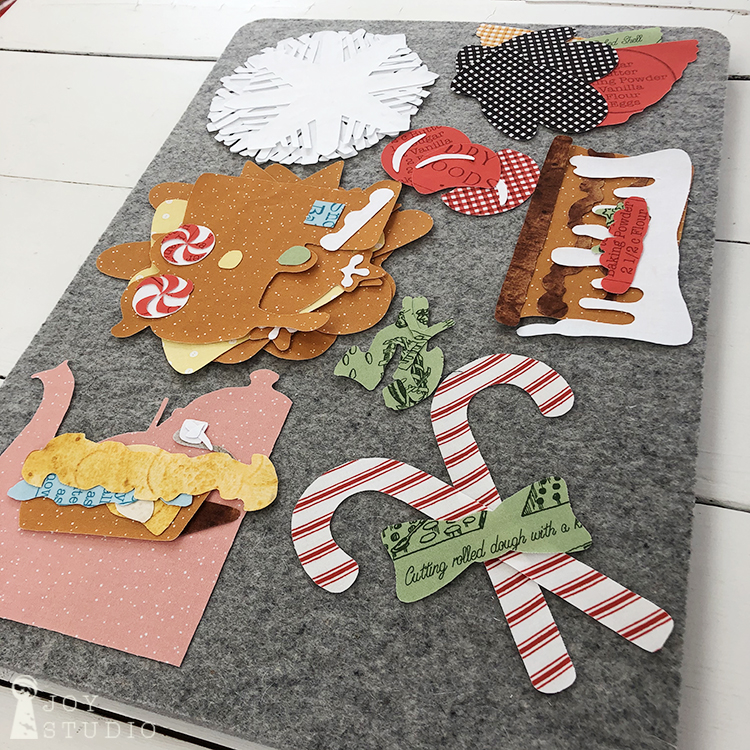
Here are our appliqué shapes described in last week’s post. You may notice that we chose to trade out a couple of the fabrics that were listed and shown on the cover art but this is each maker’s prerogative! All of the fabrics can be interchanged to suit your desired look. You’re the maker!
•

•
Let’s make doors!
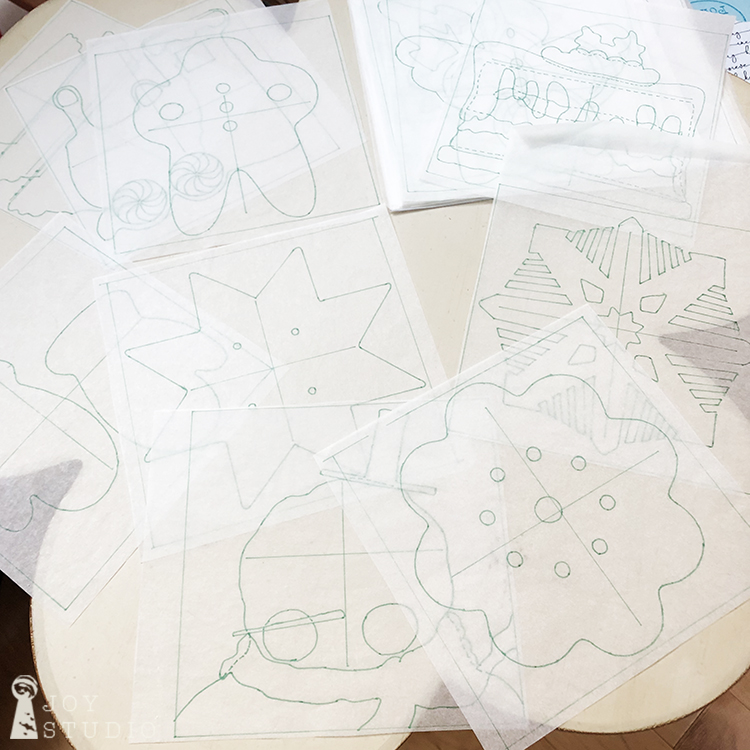
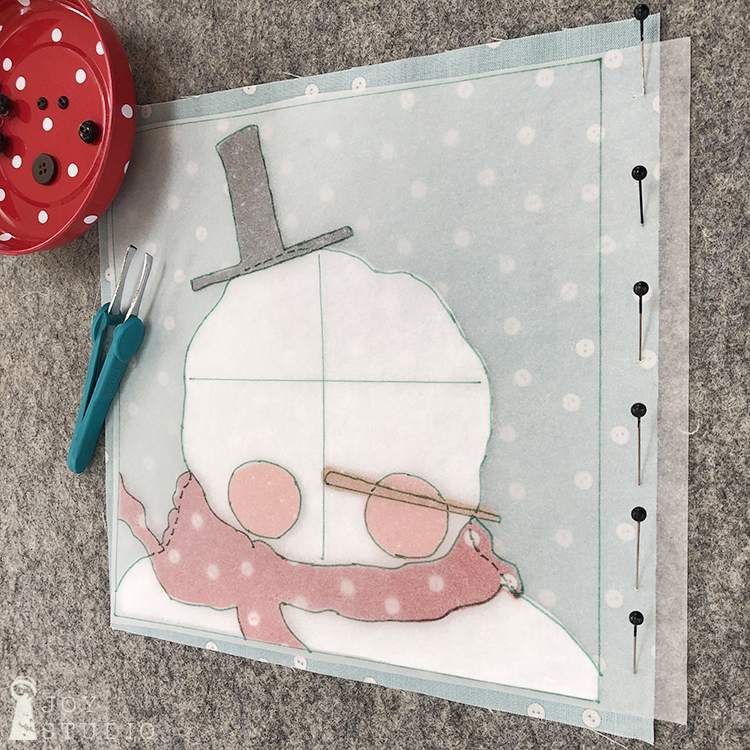
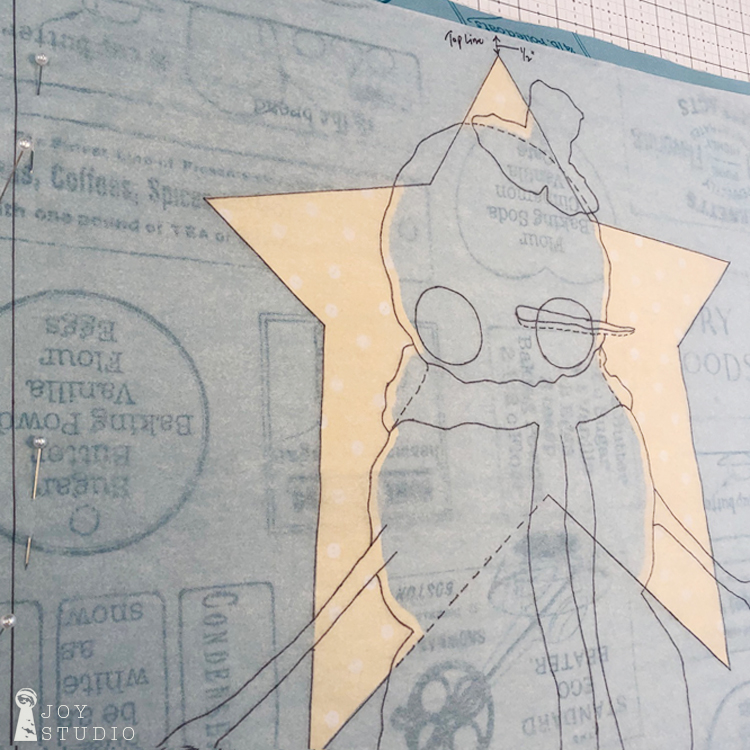
We like the tracing paper door for placement accuracy both in making each multi layered appliqué, and also centering on the block background fabric. This is an optional step if you are not such a stickler for detail as myself but a tried and true way for good results. Here’s a (link) little bit more about making a placement door from the Hat Shop SAL.
Use the same appliqué template sheets and trace them, again. This time on to a piece of tracing paper with a fine tip sharpie. Trace as much or as little of the details as you will need for placement guides. Tracing paper allows for turning over to reveal the image as it will appear on your block. Soon you will have several tracings that resemble the table top below:
•

•
And now, on to the fusing!
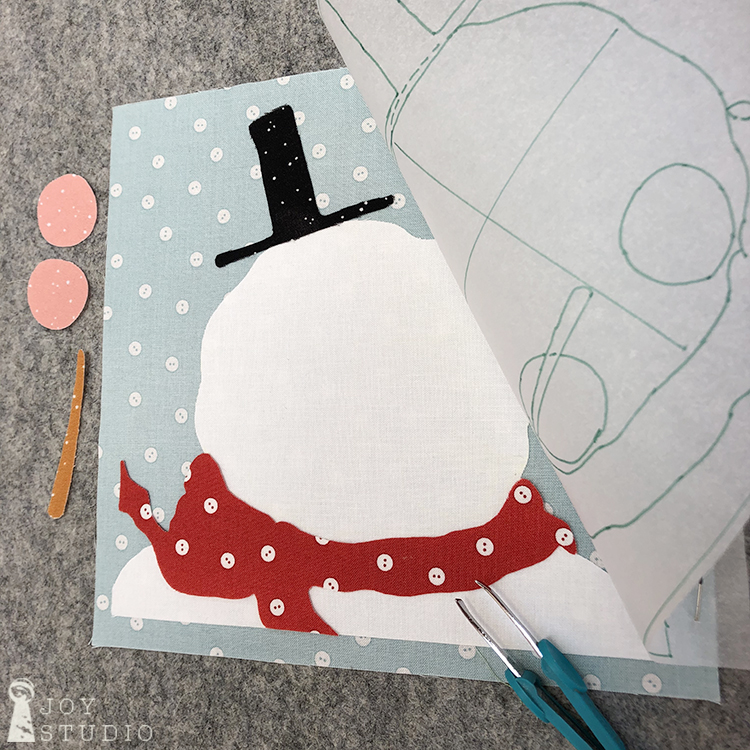
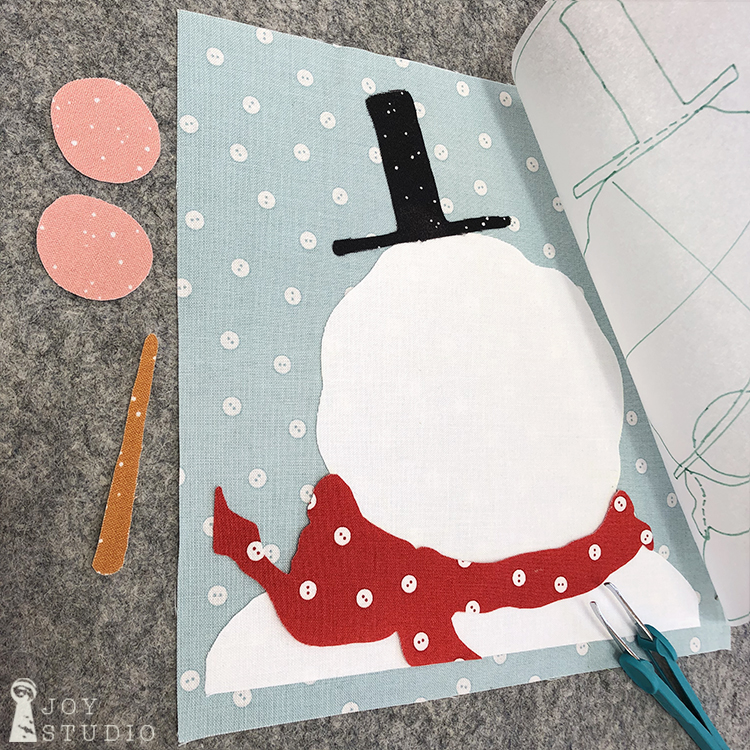
We are building each block from the bottom/underneath appliqué pieces, up.
Place background block fabric on to your pressing surface.
Then center the detail traced door, flipped over to match the direction of your cut out appliqué pieces, and pin along one side.
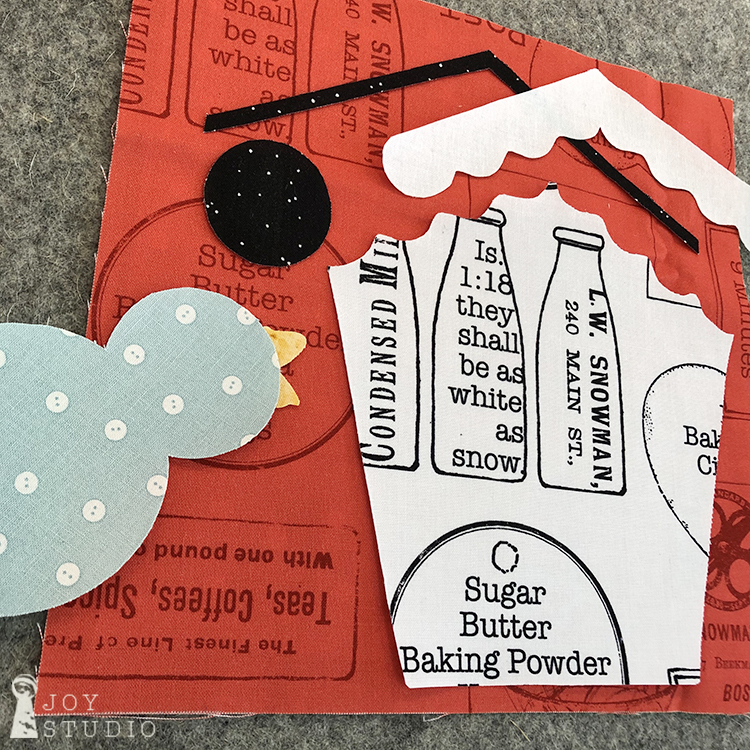
Then open your paper door and place the largest appliqué fabric, glue side down and nudge in place. You can easily open and close the door to line up your pieces precisely. Once you have them where you like, press according to the fusible product manufacturer’s directions ten seconds or so.
•
•
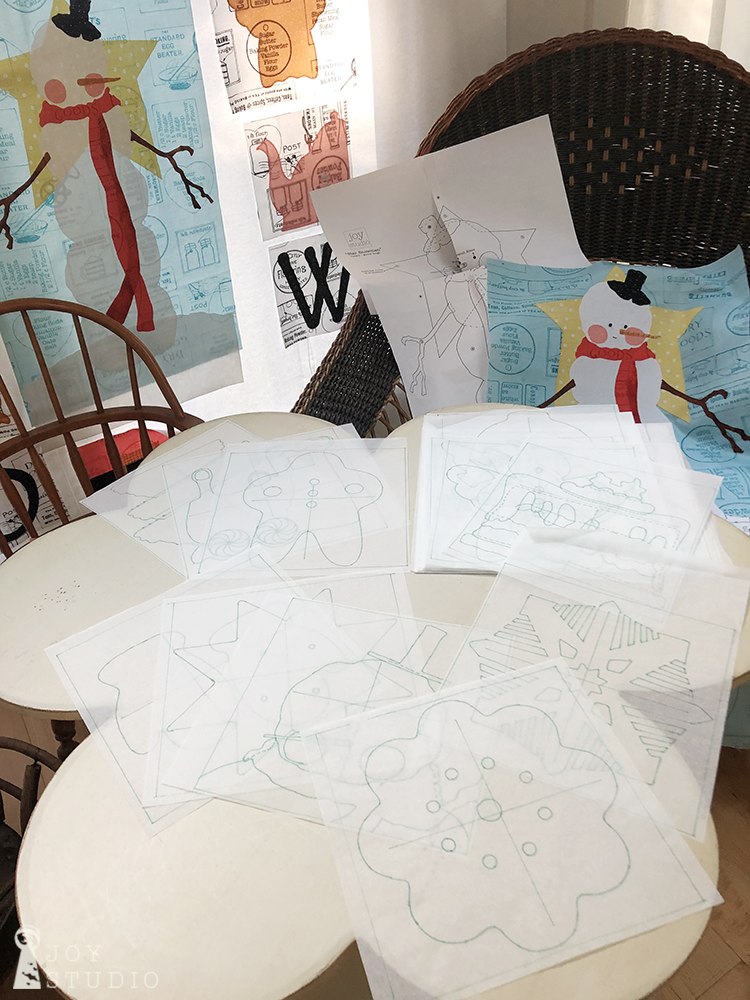
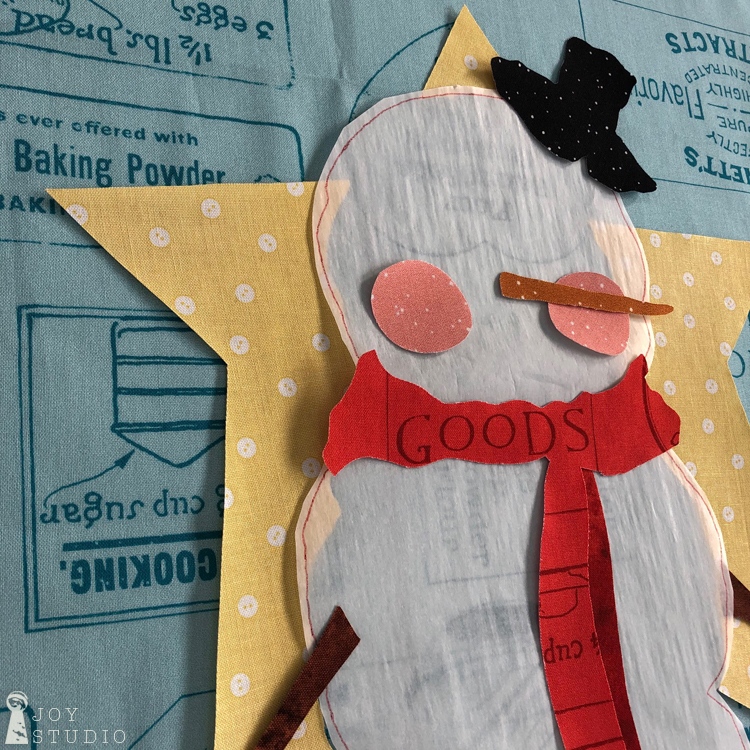
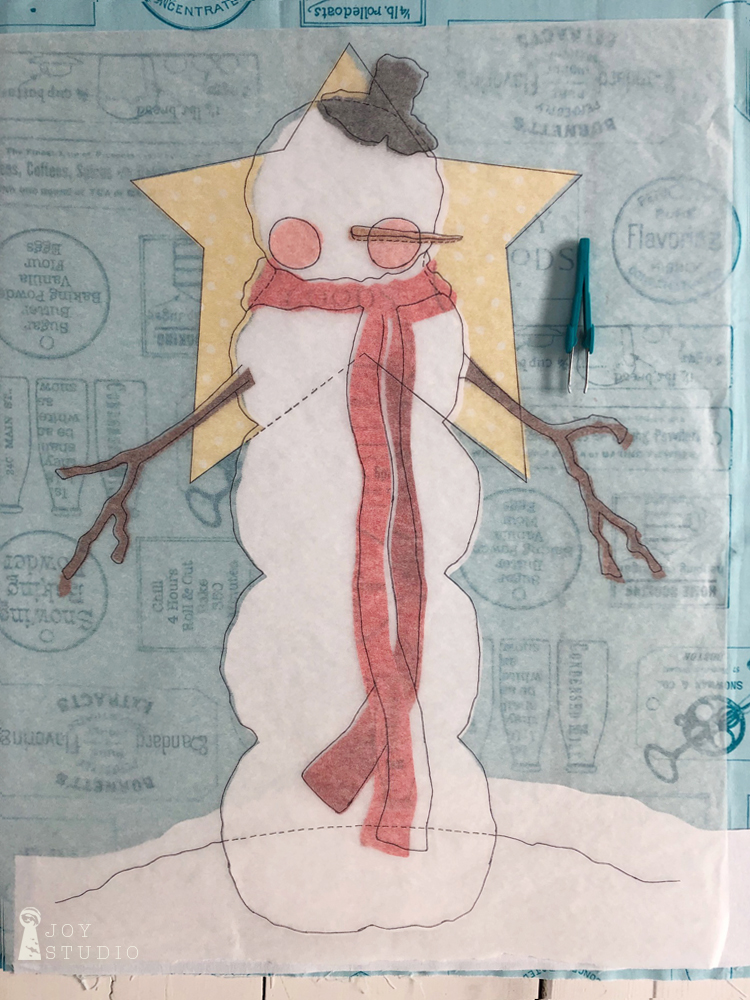
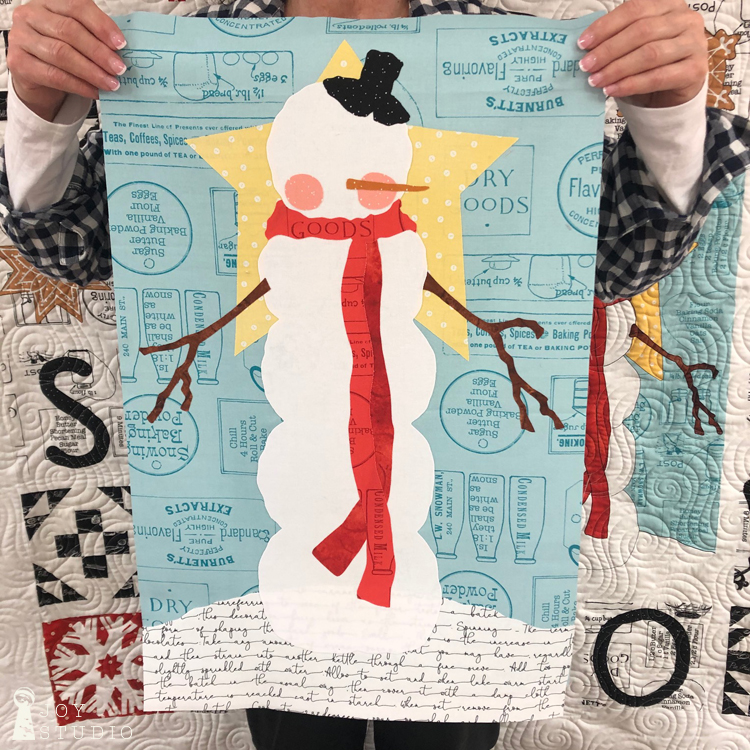
The large snowman template sheets are numbered so place each one according to the sequence marked on your pattern. We rough laid them out initially just to get an idea of how it would look and to determine which appliqué gets fused first. For instance one arm goes under snowman’s body and one goes on top. So again follow the sequence numbers and use the tracing paper door. It really helped us on the large snowman block.
•

•
I also wanted to point out that the star was cut in three different pieces and is marked on your pattern that way to eliminate the yellow from showing through the white fabric. We recommend an extra layer of interfacing as described last week/post to help with this as well. Wherever light fabric goes over a darker one, use the interfacing to get a better result.
•
Ta-daa!
We made two, one with plain white snow for our quilt and this one was to be for a (now cancelled) class.
•
•
•
Keep going until all of your blocks are fused and we’ll see you next week. And take lots of photos so you can post and share for a social media GIVEAWAY op!
Save

No images appear after you show the applique shapes at the top???
Ok, now they popped up!!
By the way makers, I noticed that I put my background fabric on the large snowman block , what I consider to be up-side-down. However, here is no real direction for the blue vintage ads fabric. Text and boxes go in all four directions. So no worries, it does not matter what ever way you like is fine.
Janet,
I am gathering all my supplies for this quilt-along. Do you use mostly black thread to sew the applique pieces to the background? Or match the thread to the applique piece? I can’t tell for sure from the pics. Also, do you use different thread weights? My apologies if this is posted elsewhere.
I’m so glad you’re doing this QAL. Thanks.
Hi Diana! Great. I used mostly thread colors to match each fabric however, I debated using black. My sewing skill is not the greatest so, I wanted to have my stitches somewhat hidden. Lol