
Hat Shop Sew-A-Long begins today!
What better way to start off than with a blog follower’s GIVEAWAY! We have a bonus hat plus some fun sewing related add on-s for this project that were included in the original art but are also cute stand alone-s. Oh, and did I mention, we are including some of my new fabric fat quarters to that!! Chances are if you are participating in this Sew-A-Long, you are already following here, on the Joy (blog) Journal. If not, simply click on the subscribe button above right if you would like to enter for a chance to win the bonus pattern. Follow us on Instagram too for another chance with a comment tagging a friend. @jweckerfrisch You can still enter by subscribing even if you are not participating in the SAL.

•
As you read in the previous announcement post, I am sharing my art that we have translated to appliqué design. Please know that I am not a qualified expert in sewing technique and/or quilt assembly. I wanted to remind everyone of this up front. This is my first time making the project also, together with you. It is the 5th quilt I have pieced! One of them was “doll” size too so, I’m not sure that one even counts. The encouraging news is, that even a beginner like me can make these charming appliqué blocks and have fun.
•
Raw edge fused appliqué is the method that works best for my very detailed images and one I am most comfortable executing. Our pattern was designed to work with this technique only, although you can certainly add an allowance to create turned appliqué if you choose. I am still learning so please feel free to comment any tips, questions, or critiques below or email to janet@greatjoystudio.com. I’ll do my best to address them all.
•
OK, let’s get started!
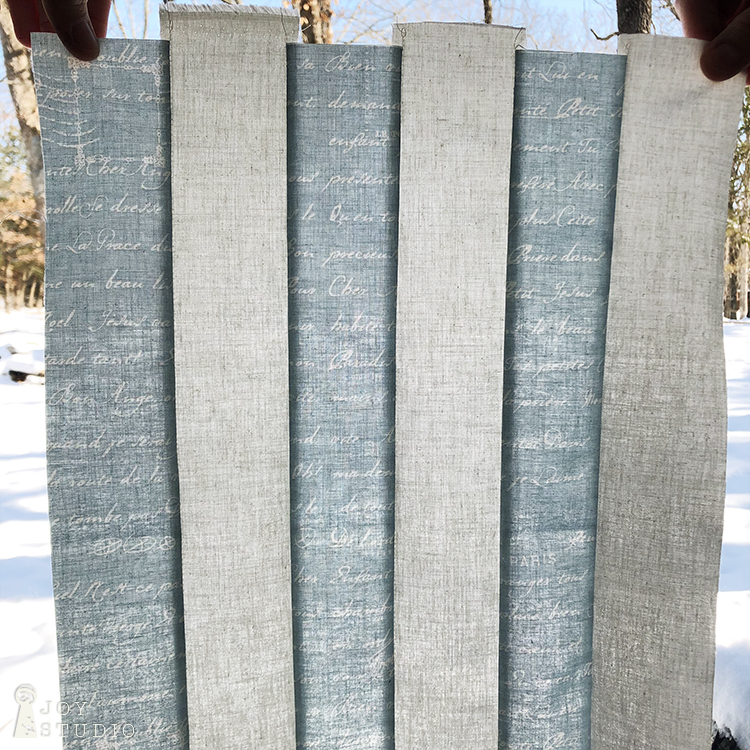
We will be making the 12 blocks that make up the window background in the main body of the quilt this week. First decide if you want a striped or solid background. We chose to make a striped background using Couturiere Parisienne light blue text (#C8850-BLUE) and Confetti Cottons vintage white (#C120), both from our fabric partner, Riley Blake Designs. As indicated on the pattern, you will be cutting equal number of 2.5″ x 18″ (or longer) strips from both, for a 2″ x 17″ finished size, 1/4″ seam allowance. If you choose a directional fabric as we did, you will be cutting your strips parallel to the selvage.


•
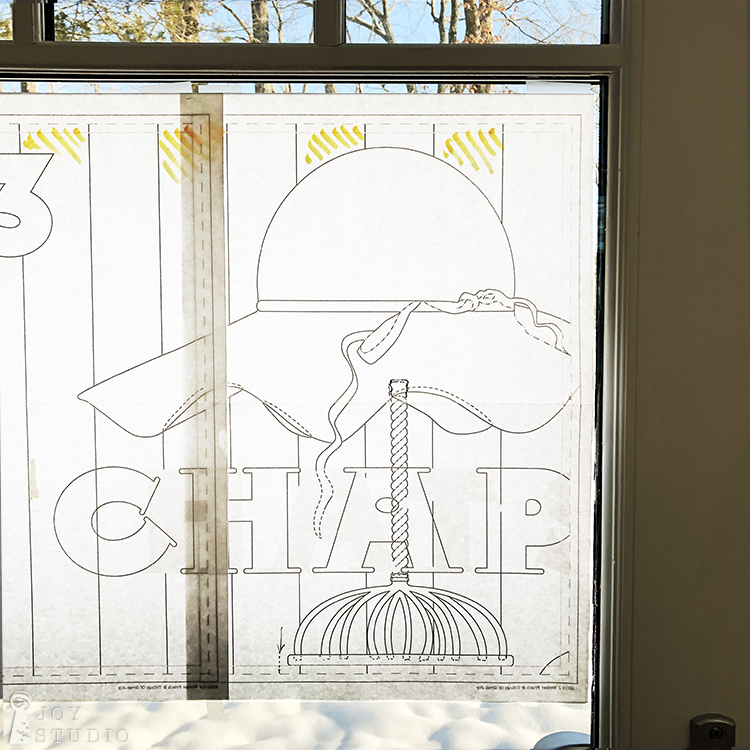
Some of the blocks begin with a light strip and others begin with a blue and in several blocks, the stripes overlap! As you can see in the photos below, we flipped the pattern over and taped all four blocks in the top row together, matching the horizontal dashed seam lines, to our window in order to view the pattern lines as they will appear. Then we marked the darker stripes with a highlighter for an easier visual reference. The top row then will be your guide as you work vertically for the next two rows of blocks.

Strip Background Piecing Tip:
I learned the hard way that you will want to stitch each of the strips together from alternate ends of your block. As you can see, I started each strip at the top and my first 3 blocks had a distinct curve to them.
Once you have all of your blocks made, you you are ready to start on you appliqué pieces.
Choosing Fabrics
Pattern correction, not listed is yellow swirl (#C8945-Yellow). You will need a fat eight.
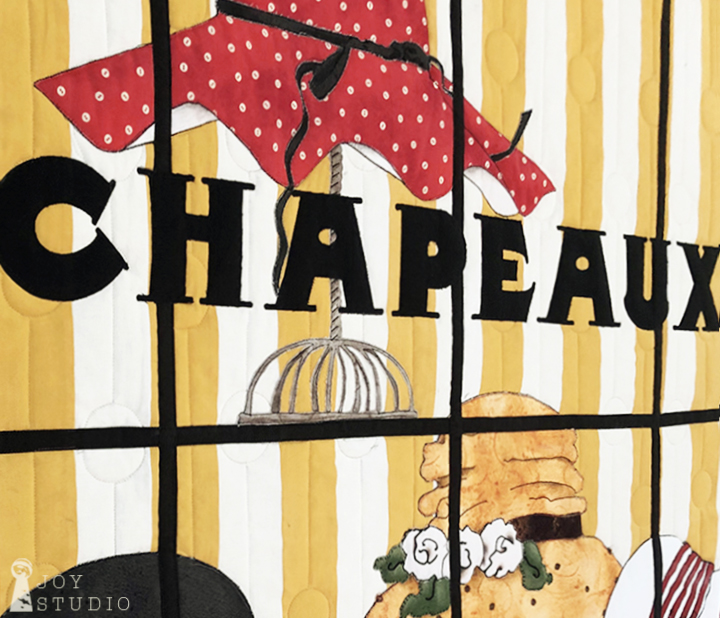
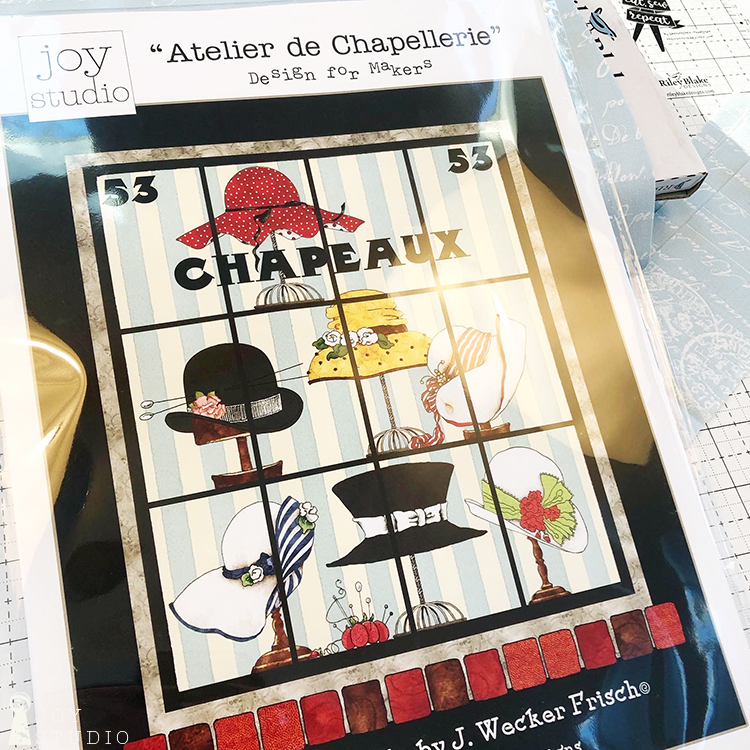
On the back of your pattern in fabric requirements is a list of Riley Black Designs fabrics used for each hat as they appear top to bottom, left to right. You can also reference the picture (worth a thousand words) on the front cover. Our Painter’s Palette Collection from Riley Blake Designs include a wide range of colors, values and artful textures to create from when you want to achieve an interesting watercolor look. I plan to keep plenty on hand to use with former and future projects.
•
Making Your Raw Edge Fusible Apliqué Pieces
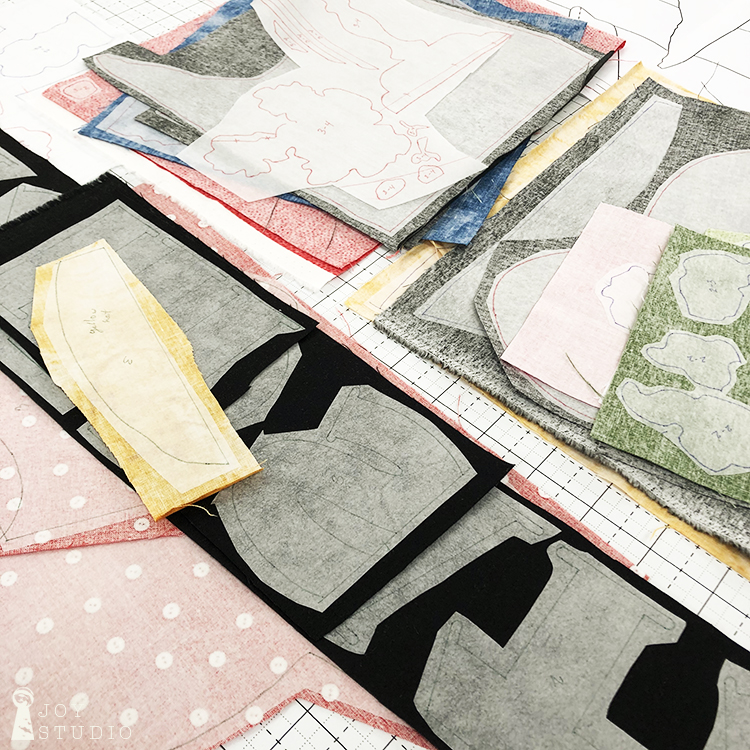
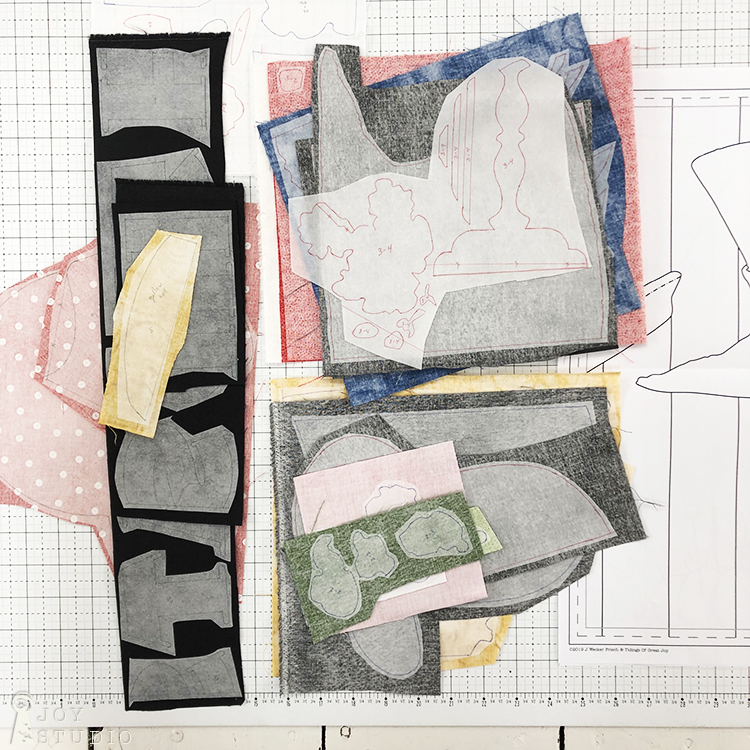
Begin by tracing your appliqué pieces onto your choice of fusible web product. We used Pellon 800. The pattern is already in mirror image so trace each appliqué piece from the printed side of your pattern. With so many similar pieces, it is very important to mark each one with a system you will remember. We chose to use the row and block numbers. Once traced, rough cut your fusible pieces.
•

•
Organize them on the appropriate block. and you are now ready to fuse!
See you next Wednesday for further fusing instructions.
•

where do you buy the blocks
Patterns are in quilt shops or we have a couple more in ours on the shop page Marilyn.
You are so talented! I so enjoyed your lecture this past summer at quilt show in Utah. I love how you add little beatitudes in all of your fabrics.
Thank you Carol, you are too kind. Maybe we’ll meet again, same event?!!