

•
Celebrating,
the launch of
first low volume Designer Collection,

Excited,
to be the first designer to showcase our
“Follow the Blue Bird”
original project.
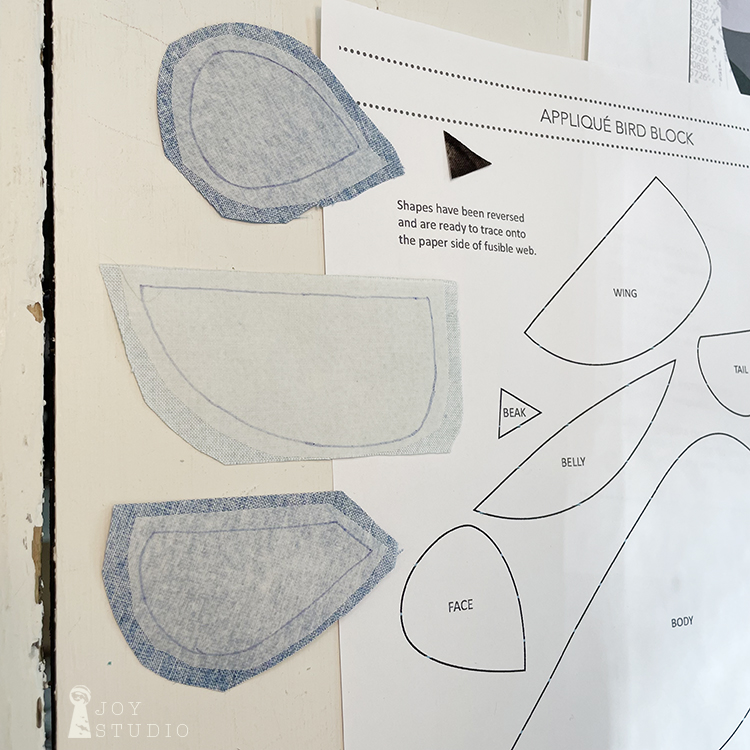
Using our favorite fusible applique technique, and the free pattern which can be found on RBD’s website, we created a Birdhouse Bunting!! Our bunting features Riley Blake Designs fabrics from Hush Hush, Painters Watercolor Swirl, and Hungry Animal Alphabet. Basic applique instructions are written below:
General Instructions for Fusible Applique:
- Refer to photos for fabric choices/placement
- Download the template sheets (using the link bottom of this post) to create your bunting flags by tracing onto paper backing of fusible web. Rough cut around each.
- Fuse according to the product instructions on wrong side of selected fabrics.
- Cut out the applique pieces on the drawn line, cool and remove paper backing.
- Fuse applique pieces onto the background blocks according to fusible web directions.
- Once all of your flags are fused you can secure your applique and/or further embellish with decorative stitching.
•
First, trace your pieces onto the paper side of your fusible product then fuse to wrong side of fabrics and cut out your blue bird pieces. I found this was helpful to do first to help in choosing my Hush Hush background fabrics.
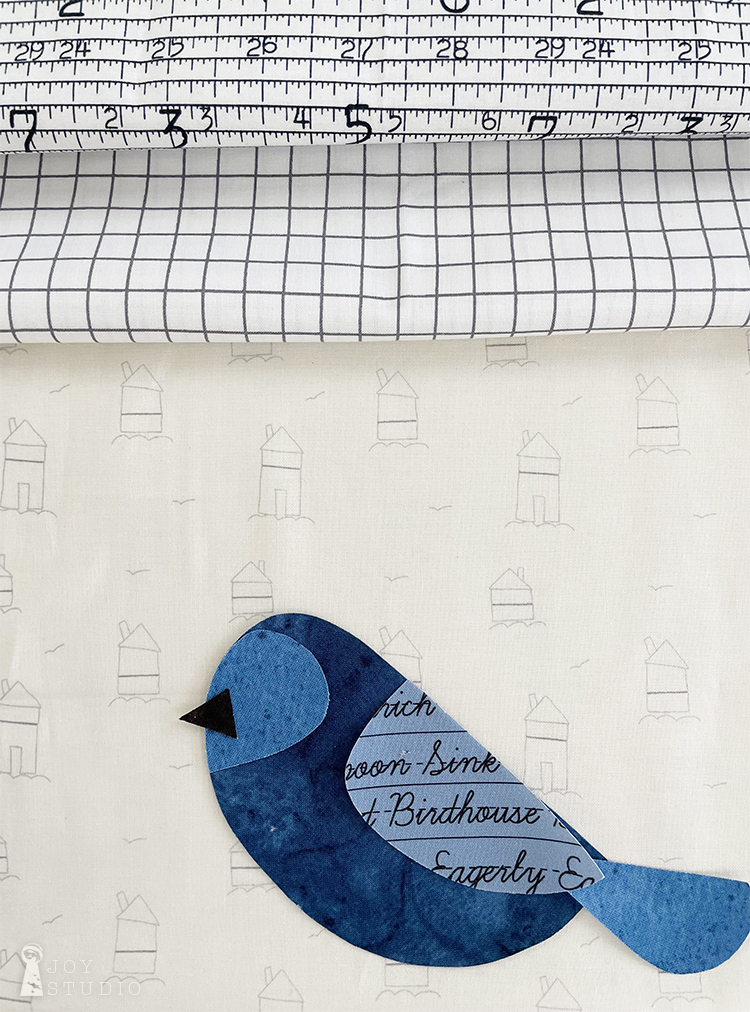
Next, choose your fabrics.

Print out your two sheets for the bunting flag using the link at bottom of the page. Assemble with tape to form half of the flag and use this template to make the full pattern image on any craft paper of your choosing. Once you have this you will also trace the various pieces on to the paper side of your fusible product and cut out.
You can chose to fuse backing fabric to your bunting flag for a flat result as we did here or layer with batting before attaching backing fabric.
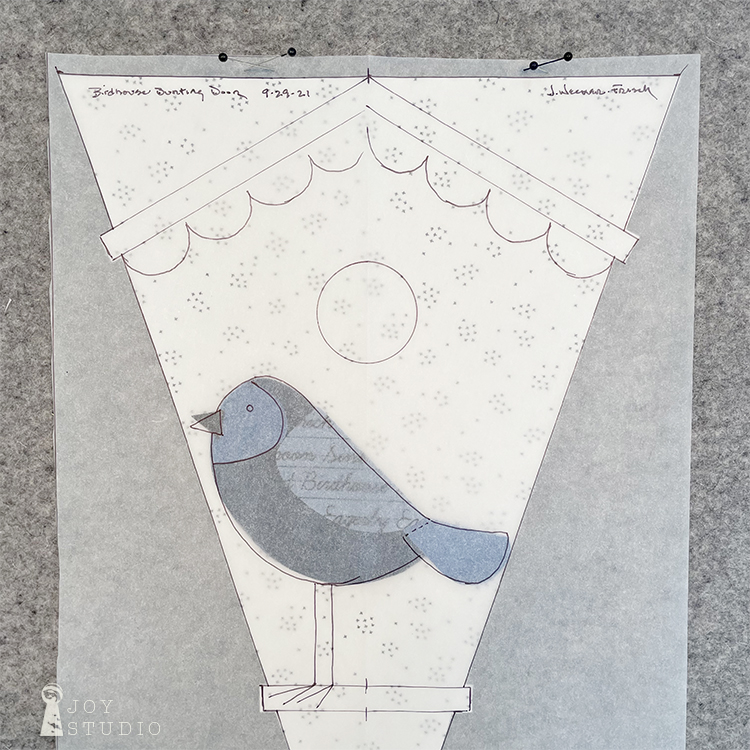


We always make a tracing paper ‘door’ to enable accurate appliqué placement as shown in the photos above. Pinning to the top of your pressing mat makes it easy to flip open and closed to nudge the pieces where they go.

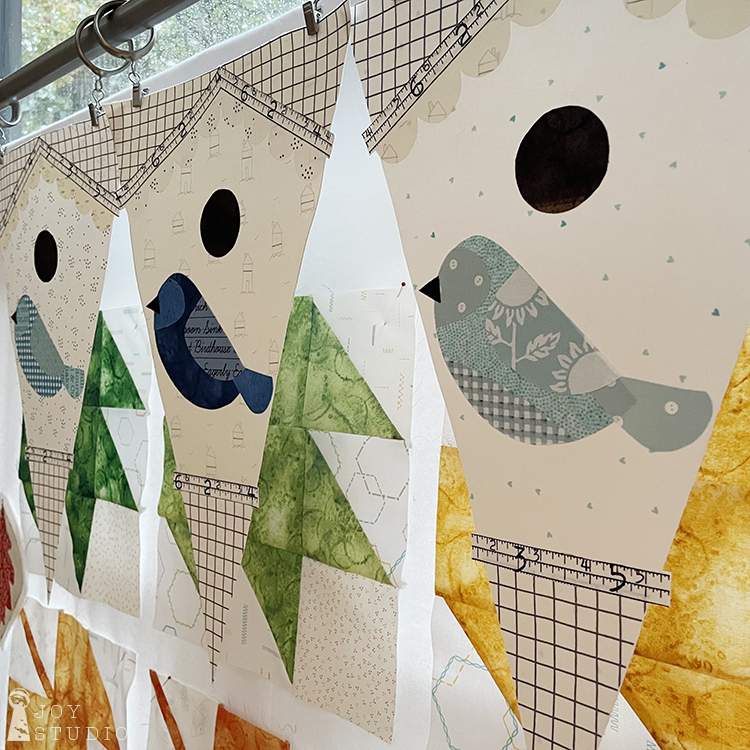
The bunting flag pattern can be used to piece your top and bottom fabrics which form your birdhouse shape or fuse them as we show here. These are first, then fuse scallops, then (tape measure fabric) trim. Next we fused the birdhouse hole (black Swirl fabric) and last assembled our blue bird.
Now, for the fun part, decorative sewing!
You can see our Birdhouse Bunting finish photos on Instagram and/or Facebook later today and throughout the week.
•
*
We also used Hush Hush fabrics as the background for a Maple Leaf nine patch table top quilt, made with Painter’s Watercolor Swirl fabrics. A perfect pairing with our Fall Leaves Place Card project and HERE, that we created with Painters Palette fabrics.
Follow me on Instagram at @jweckerfrisch and Facebook for more.
