by Great Joy Studio | Aug 27, 2020 | Quilting & Fabric
•
Week 5, The Finish, Part 1.
Since there is a lot of info to cover this last week will be in two parts.
Assuming that everyone has all of their blocks completed and trimmed or will have, it is time to assemble!
•
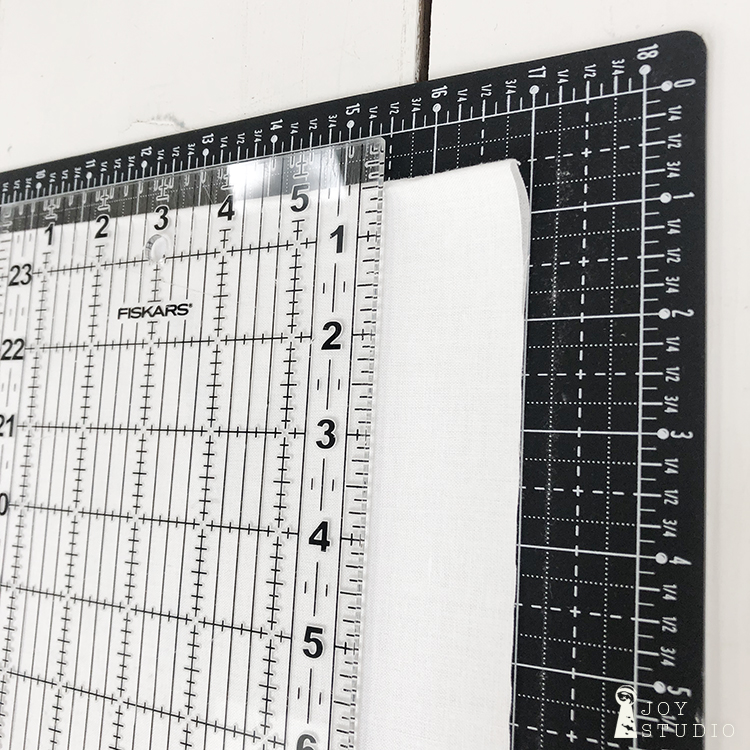
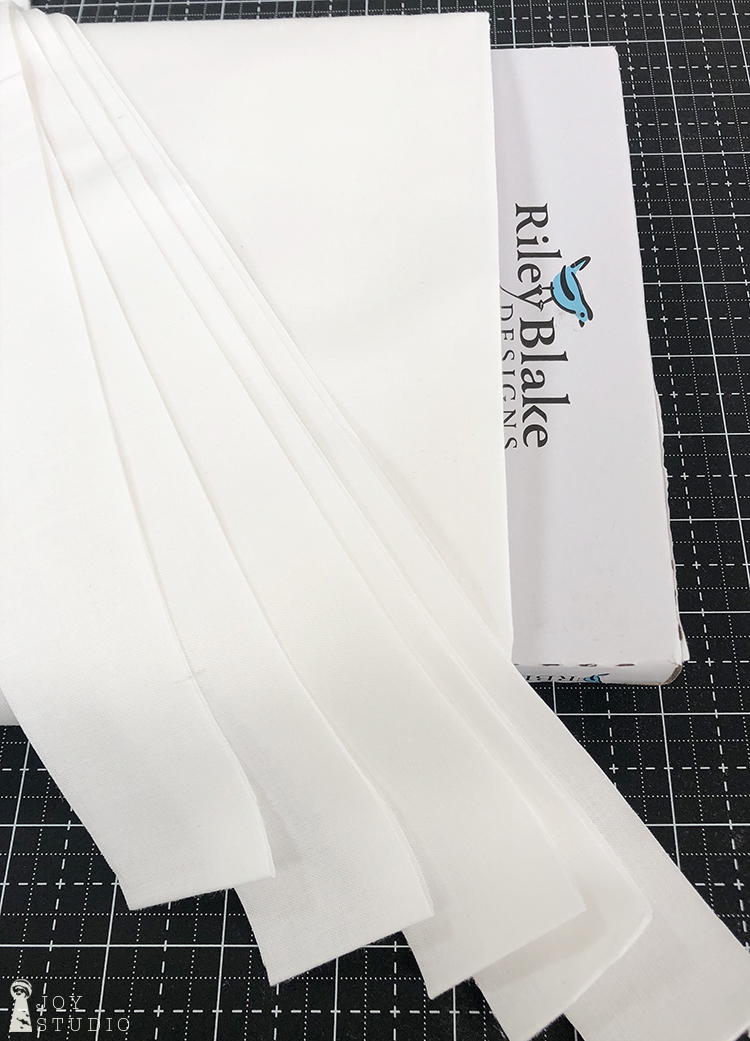
To start assembling the quilt portion, I cut five one and a half inch strips of Riley White fabric for the short sashing pieces. Check your pattern for accurate amounts if you want to cut all at once. I inched my way into this process, no pun intended.
From my five I cut eight and a half inch lengths, enough to attach my first couple of horizontal rows of blocks together. Refer to your pattern cover for block placement.
•
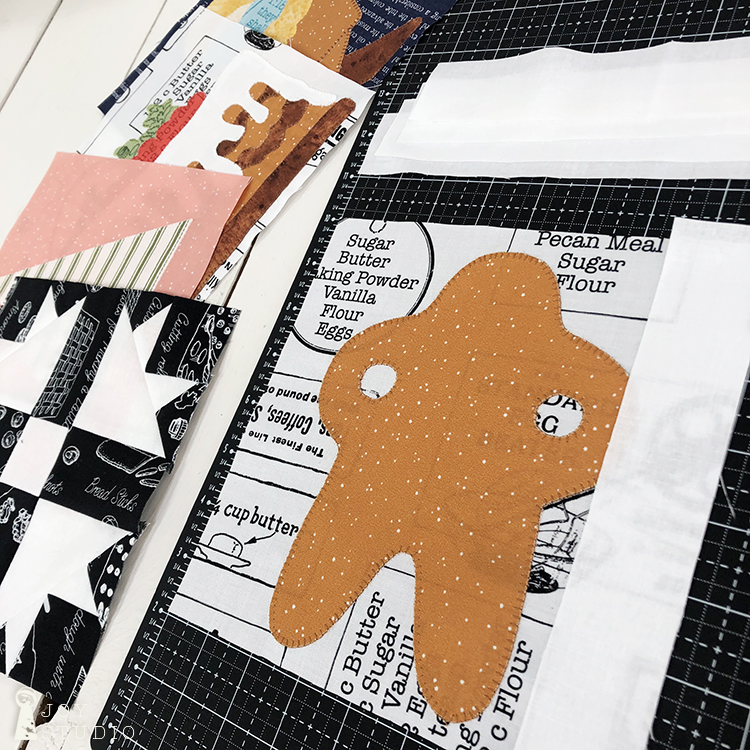
Beginning with block one (top left) lay one of your Riley White strips (1.5″ x 8.5″) on the right side of Block 1, right fabric sides together. Split the difference of the extra half inch between top and bottom of your block to be trimmed later.
•
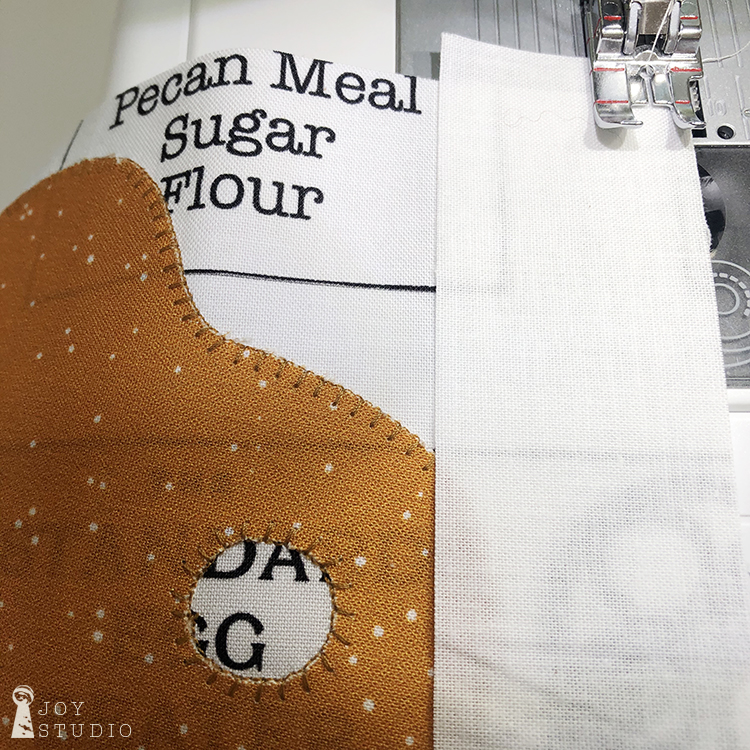
Sew together using a quarter inch seam.
•
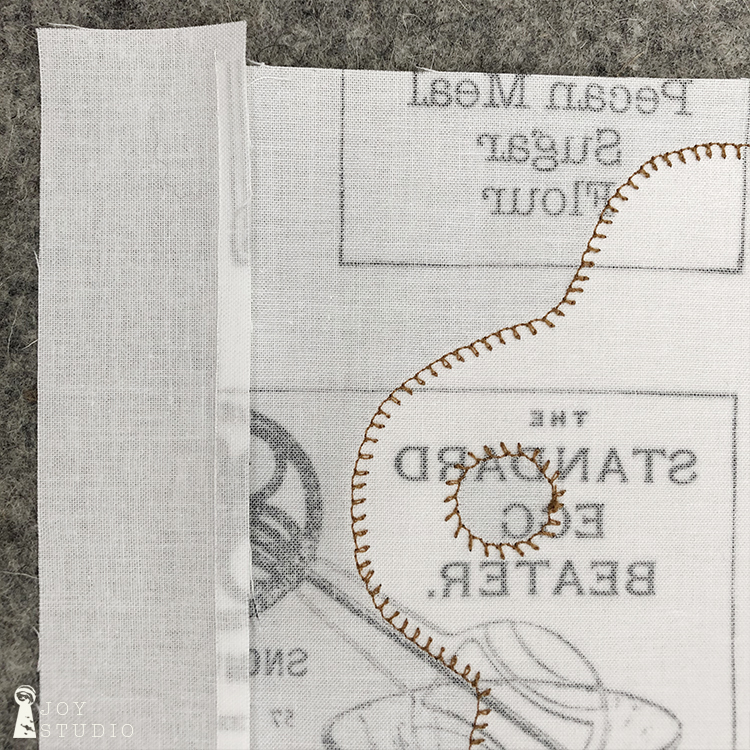
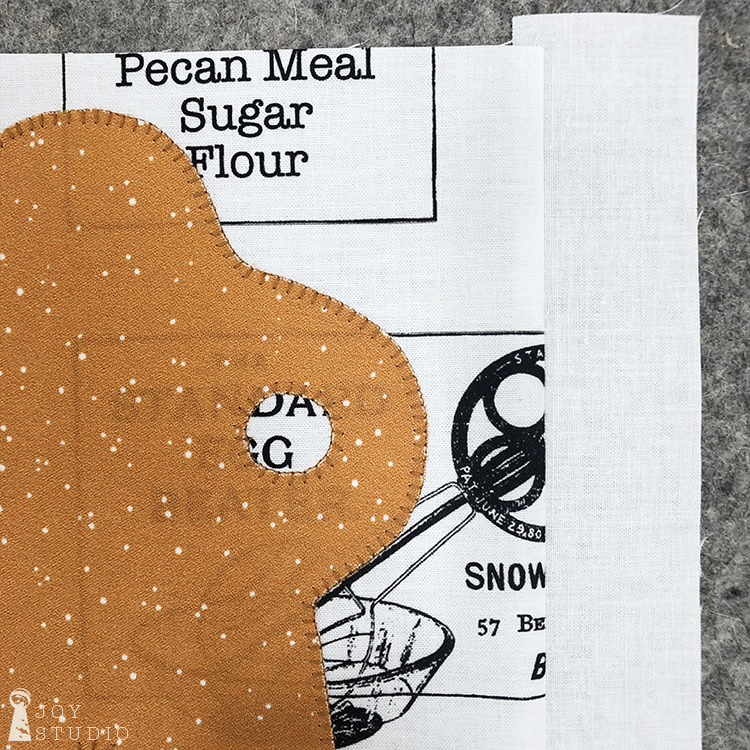
Press the seam toward your block.
•

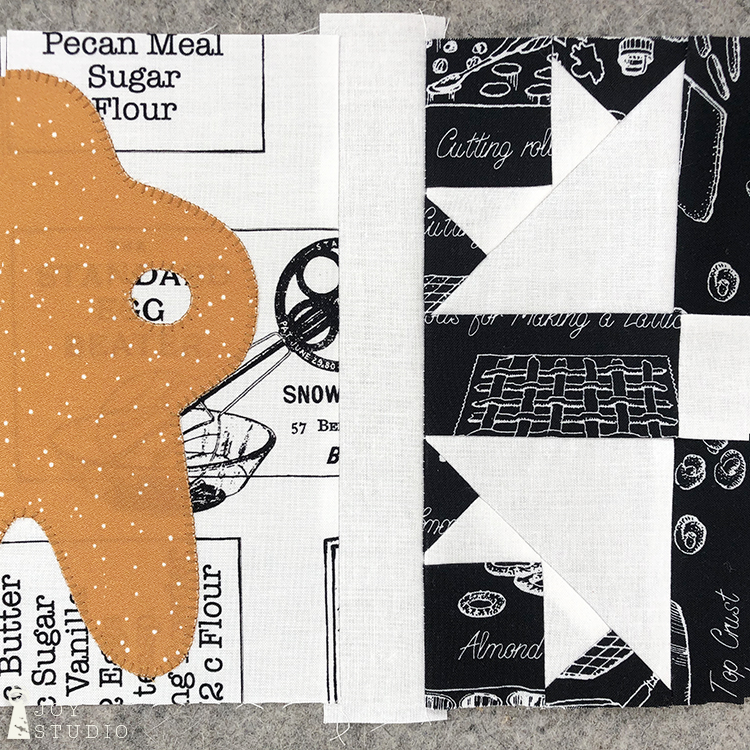
Repeat the steps to connect block one and two together with this same sashing strip. This time lay block two on top of sashing strip lining up at right (see photo), again right fabric sides together, being careful to also line up both blocks top to bottom. You may want to pin in place before sewing.
•
Continue working this way until you have all of the top row of blocks connected. Then move on to row two!
•
And so on, until you have all of the blocks that connect using the short sashing pieces as shown on the pattern cover art. Seeing it all come together is the most fun for me, agreed?
I will post Part B on Saturday so stay tuned.
•
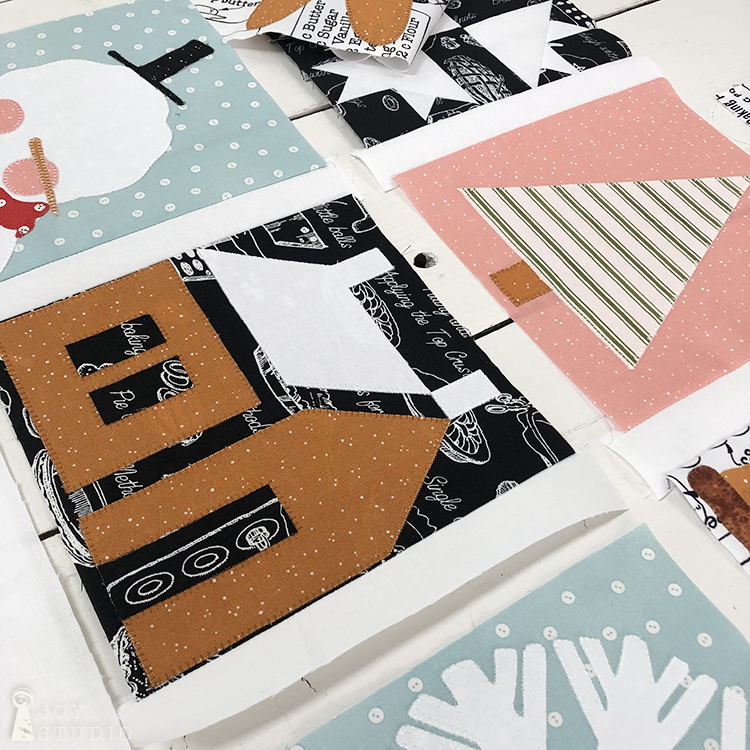
Embellish Options.
This festive project is loaded with possibilities to stitch on some fun extras! We plan to add buttons for our snowmen eyes and gingerbread man but remember to do this after your quilt top has been quilted.
•
Snow Sweet fabrics are from our partner at Riley Blake Designs are available in shops now.
To see more:
Pinterest, Instagram & Facebook,
and please post your progress with #snowalong and/or #snowsweetfabric.
We would enjoy seeing!
•
by Great Joy Studio | Aug 20, 2020 | Quilting & Fabric
Wow, week four already!
•

•
So, this is the part of the Snow-A-Long where it gets tricky for me,
PIECED BLOCKS.
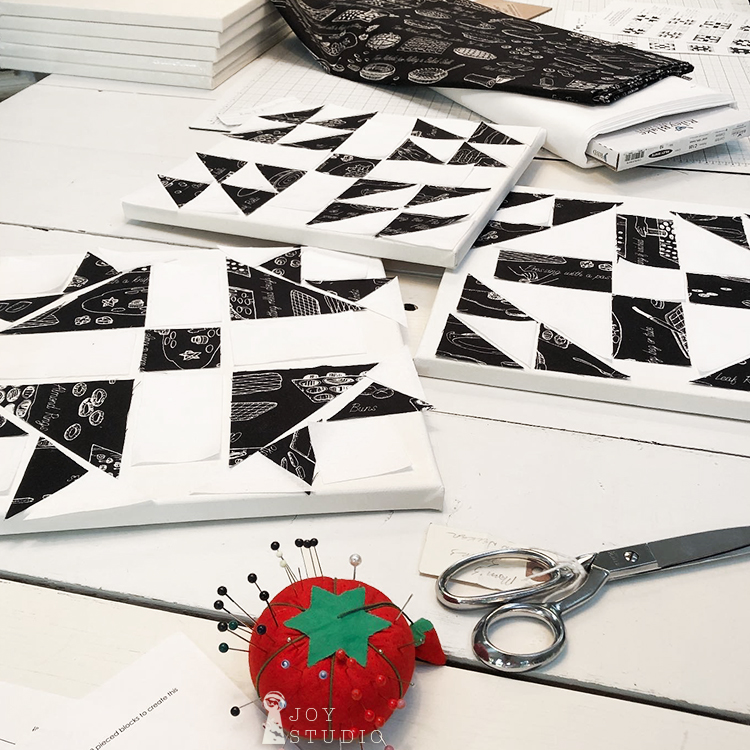
I not an expert when it comes to constructing pieced blocks. On the contrary, I am a novice. I began learning two years ago and have limited experience. I cannot offer tips on how to get these blocks perfect or precise. The best way I can instruct you in this segment is to show how we did it in a picture is worth a thousand words quilt block how to gallery, from a watercolor artist perspective rather than a quilter’s. It worked fairly well for us so no matter what your level of piecing skills is, I am confident that you can do this too.
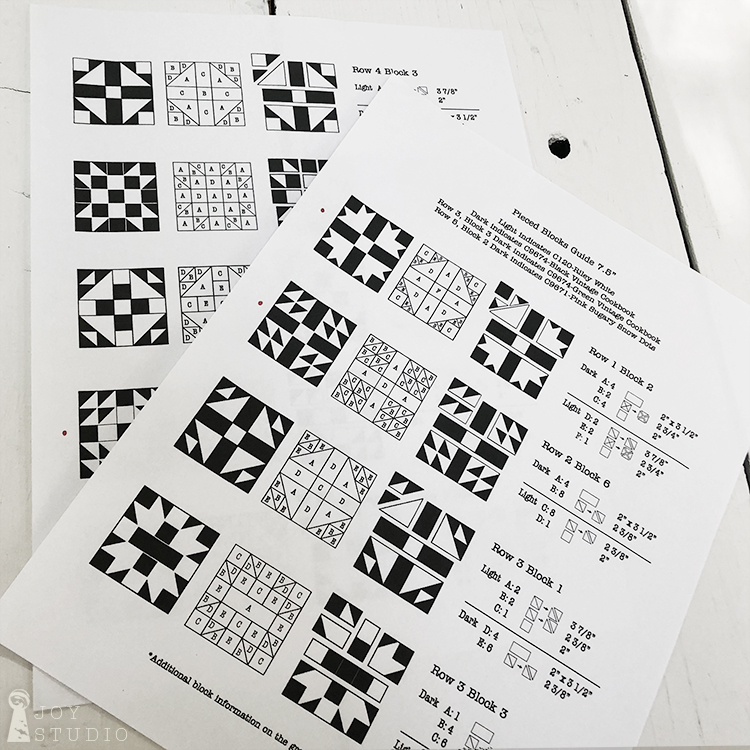
First, using your two Pieced Blocks Guide sheets included in your pattern and the cover art for color, cut all of your fabrics according to the specified sizes in each of the 7.5″ (finish size) blocks. Our approach was block by block although, some of you experienced quilters may want to cut multiple blocks of the black and white fabrics, all at one time. The blocks are all two color classics so we found the majority were fairly simple to construct.
•
•
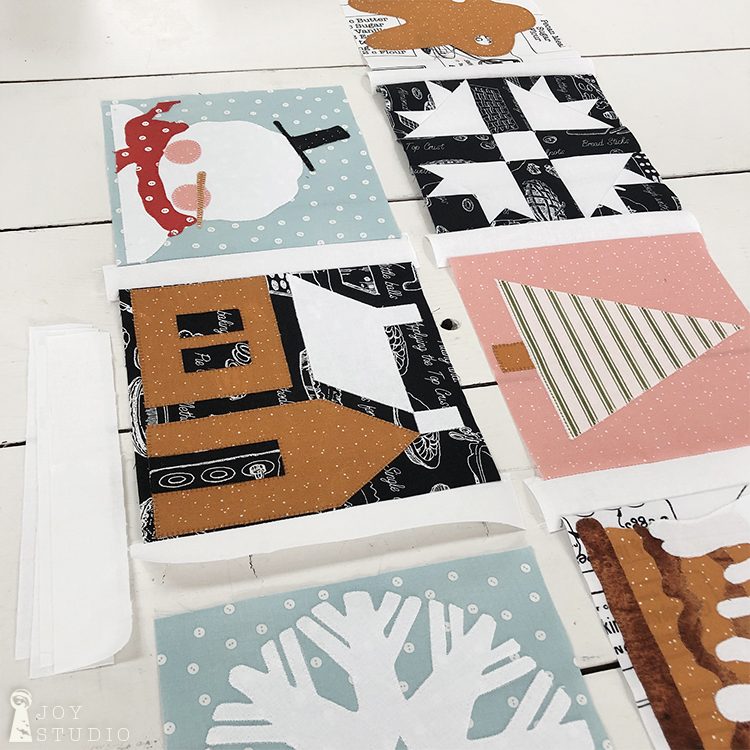
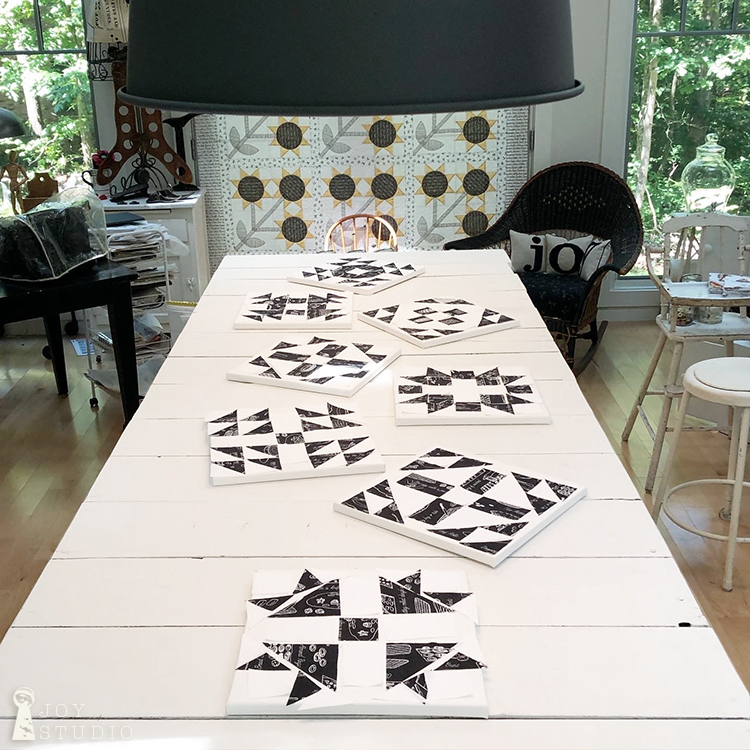
Once all of our fabric was cut we laid out each block’s pieces on pre-stretched artist canvases that we had on hand to use as our mini design boards. I hope to make some proper ones in the near future but these were just the right size and served our purpose.
We also labeled each board by row and block number with post-its. This helped us to keep everything organized until we were ready to sew. It will also help you to spot any mistakes that may have occurred during cutting too, as was the case in our first attempt! Can you spot them?
•
•
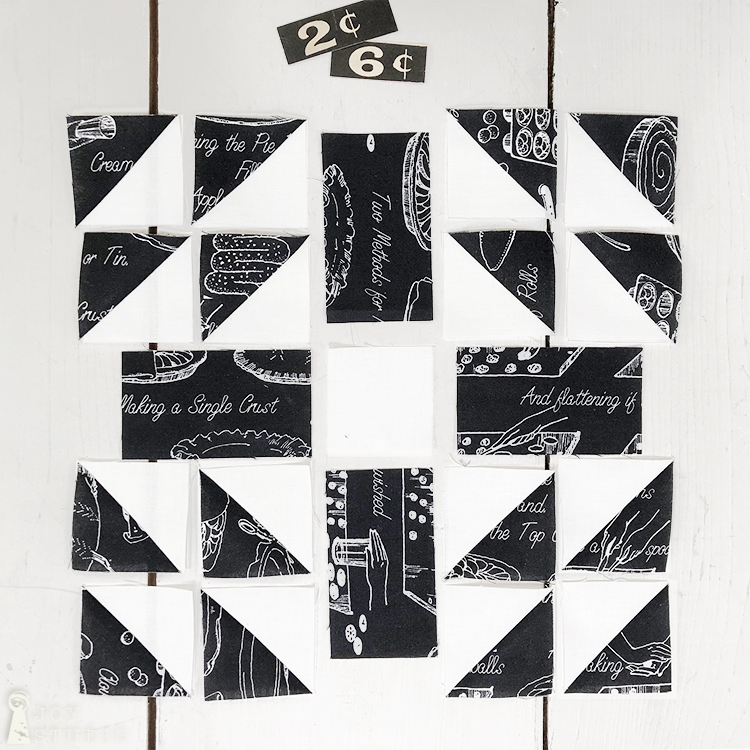
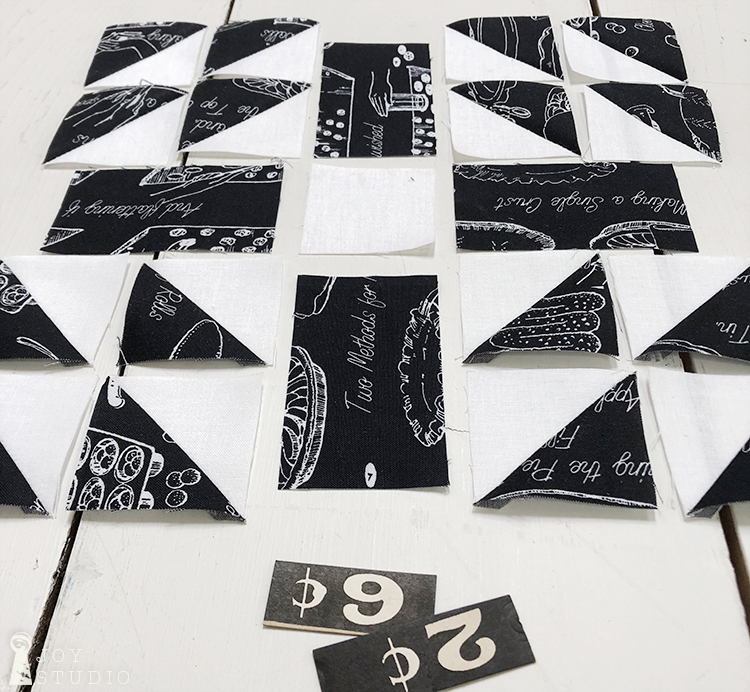
For our post photography we used these cool vintage price labels to show the quilt rows (top #) and blocks (bottom #).
I began with the blocks that were easiest for me to see how they could be assembled in horizontal rows but you can start with any of the blocks that you like. The design boards allow you to arrange the various pieces in advance to see how you think they look best. I tried wherever possible to have my text facing up and the pieces that were sideways, to be facing in the same direction.
•
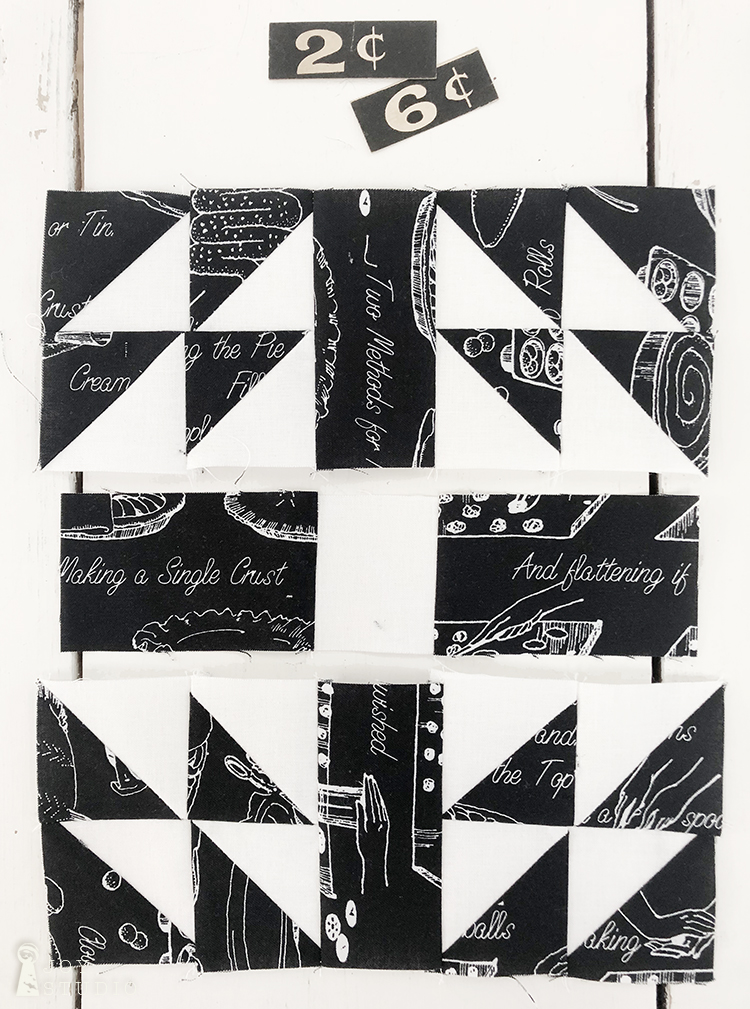
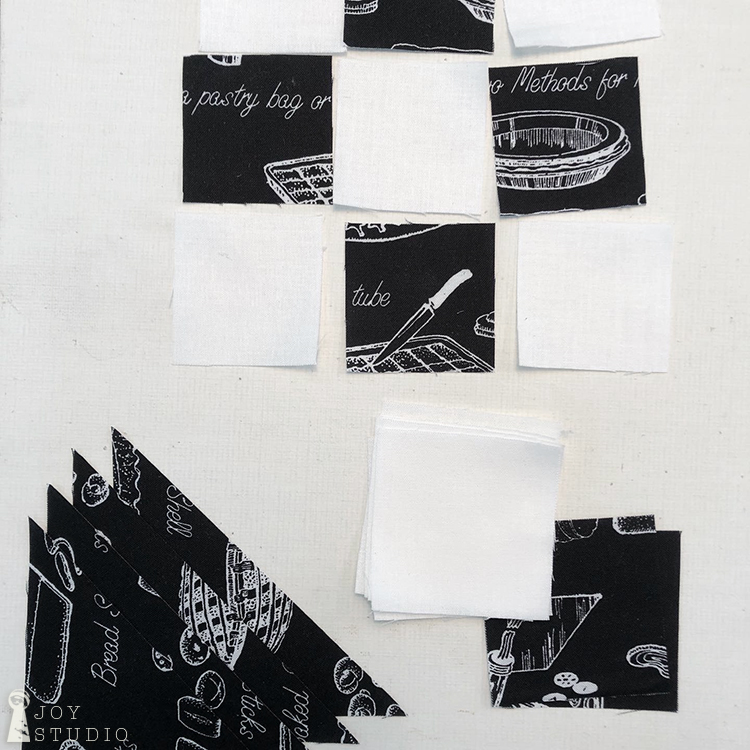
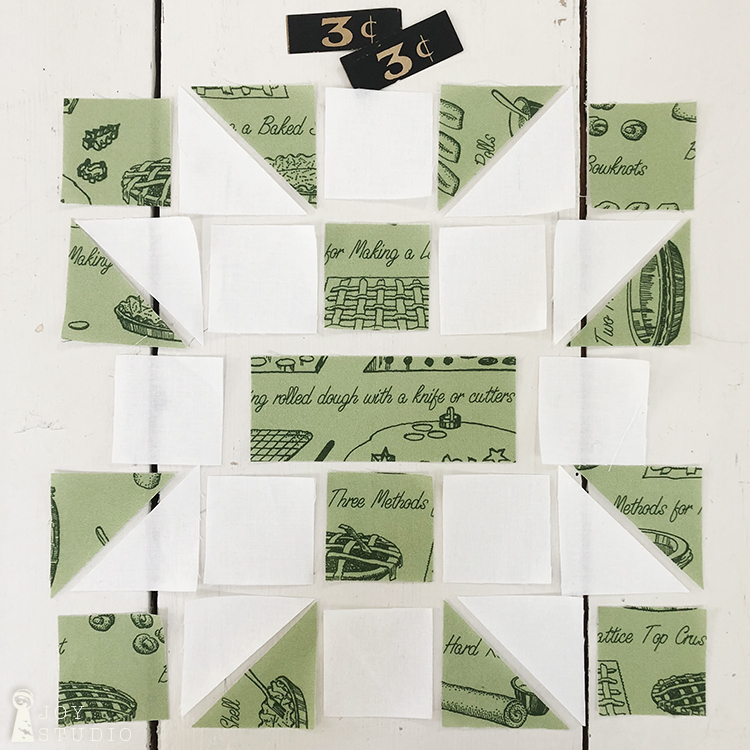
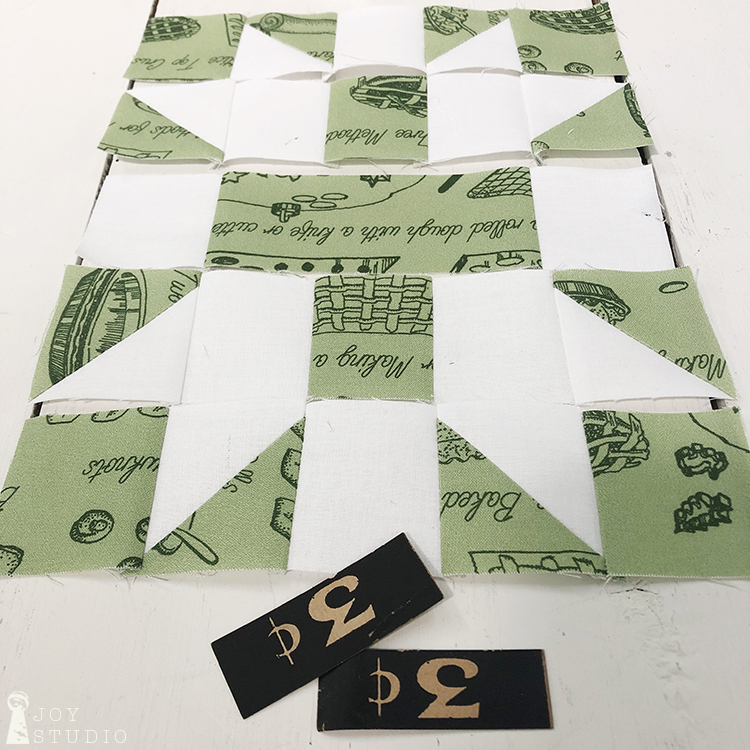
Row 2, Block 6
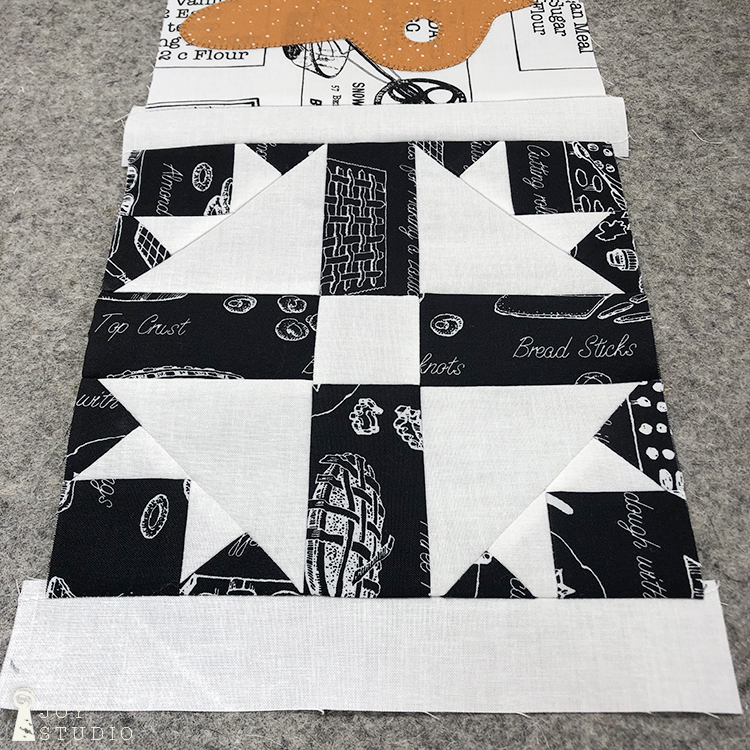
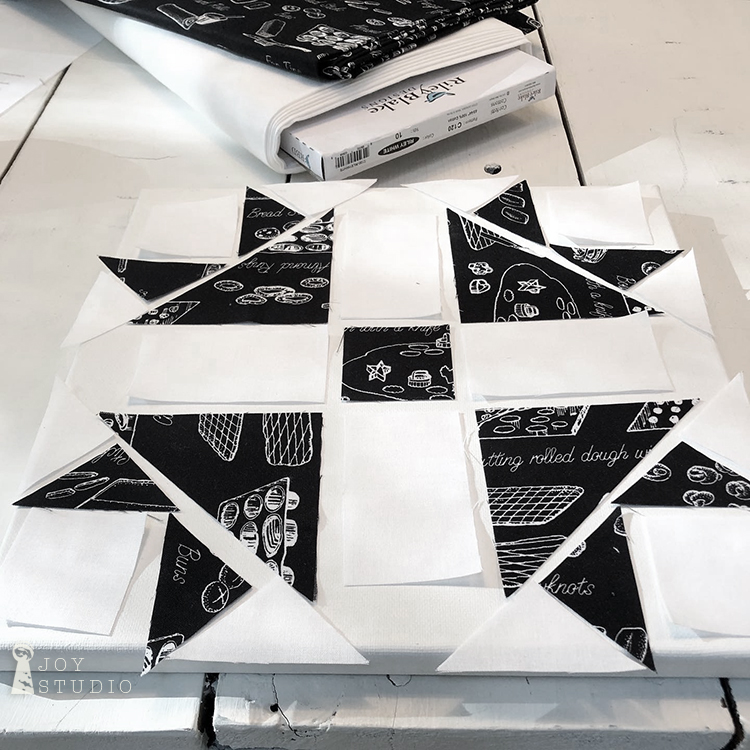
We attached all of the half square triangles, B and C cuts together with a 1/4″ seam, shown in the first photo. Working from left to right we attached the top left two units together forming a horizontal, half square triangle double. Then we attached the two below those in the same way. After that, all four half square triangles were sewn together forming the top left corner unit of four half square triangles. Follow the same for the remaining three corners.
Attach the two top corner units to each side of your D cuts, and then bottom the same way. Attach the horizontal D cuts with center cut C. You will have three rows. Pin to match seams and working top to bottom attach all three rows together to complete the block.
•

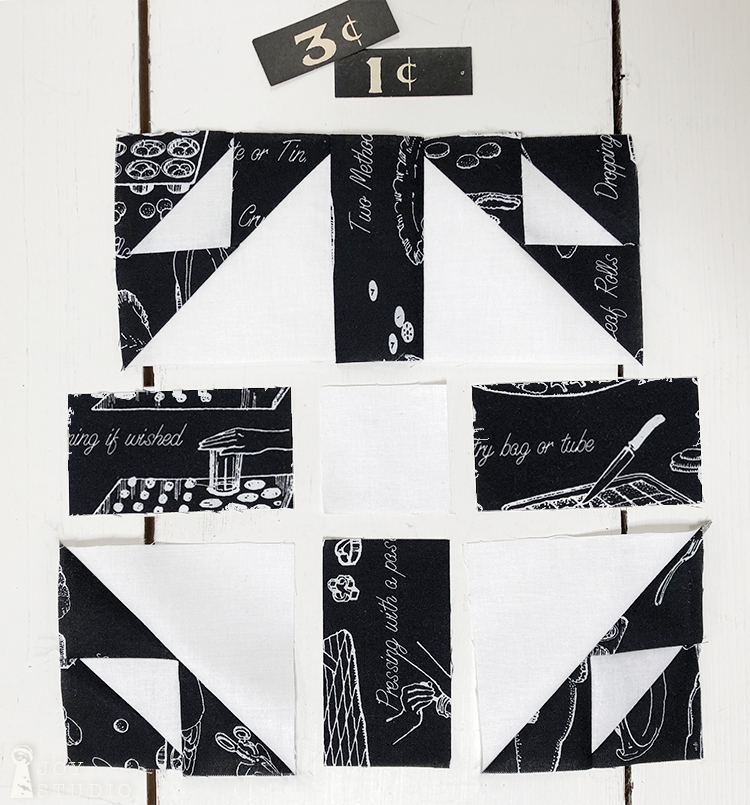
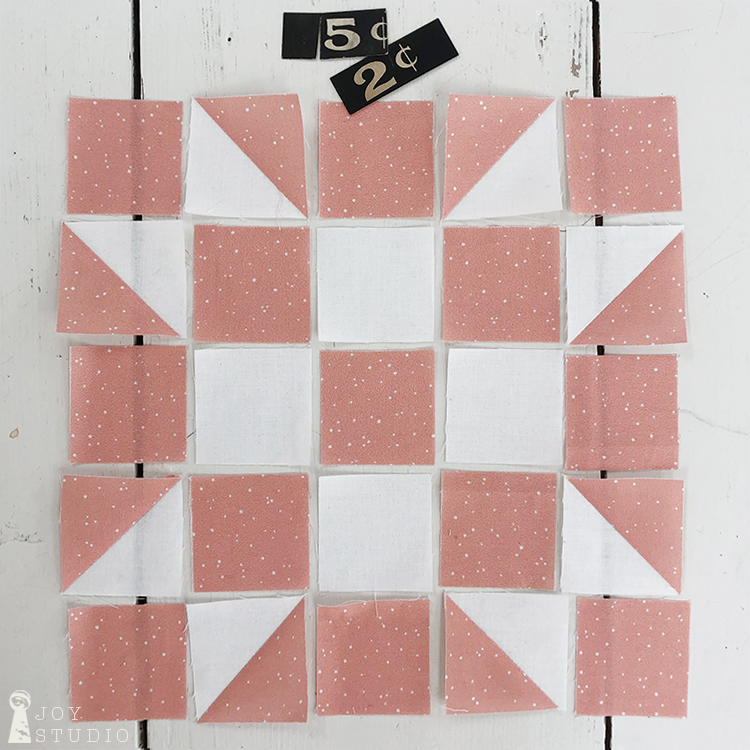
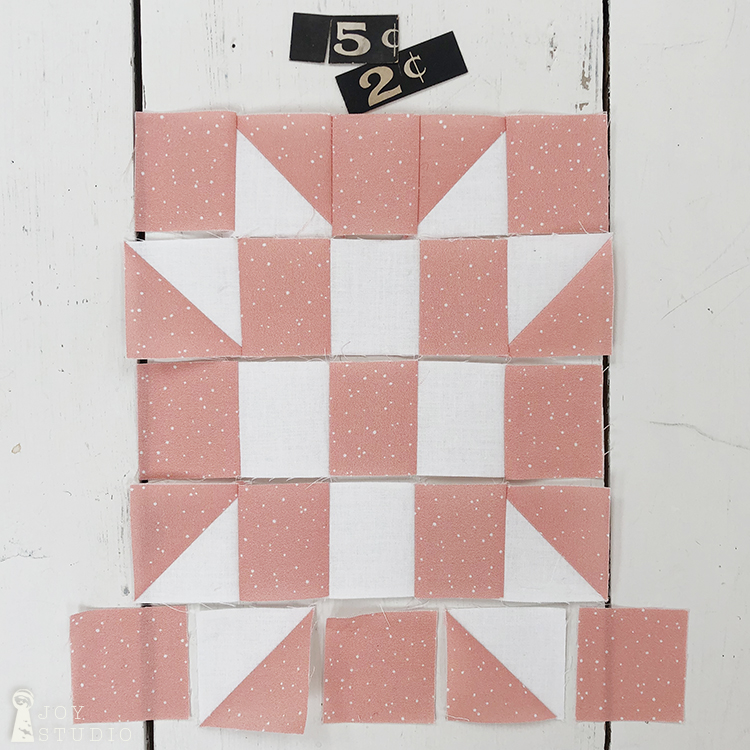
Row 3, Block 1.
I started in the upper left corner making the small half square triangle by attaching E to B with a 1/4″ seam. Then added both of the dark triangles E to two sides of that unit forming a larger, 4 piece triangle. Again and throughout the quilt construction, we tried to maintain 1/4″ seams. To complete the corner unit I then sewed to the large white cut triangle A in the same way you made your first small, half square triangle. I repeated the steps for the remaining three corner units.
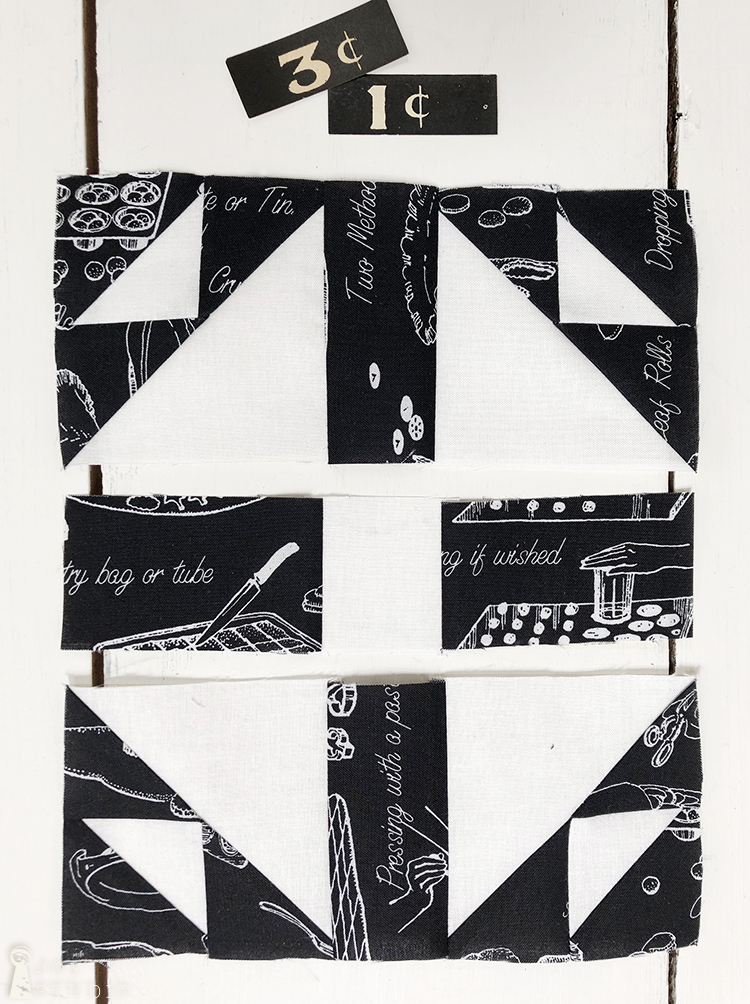
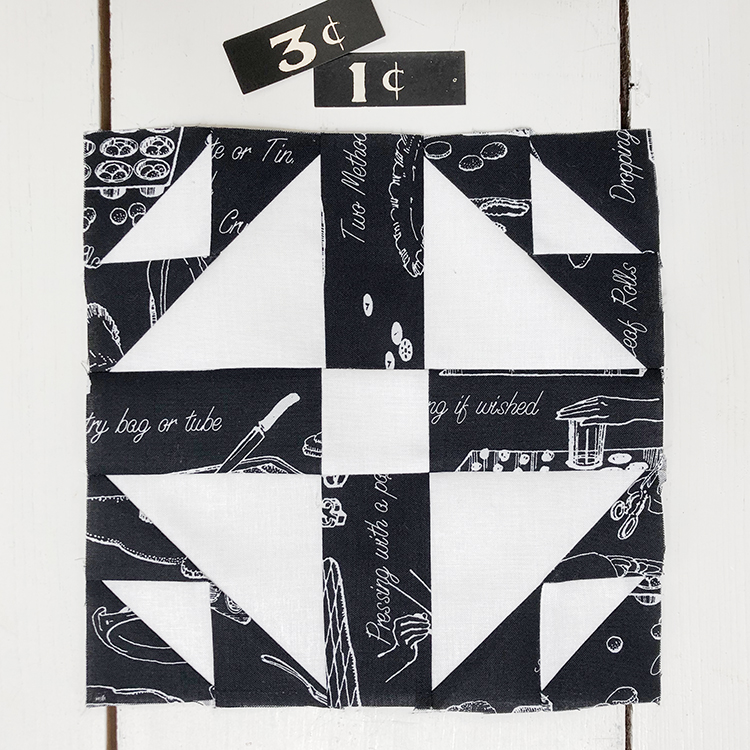
Then working from left to right attach top two corner units to D and repeat for the bottom corners. You will then have three horizontal rows. Last we pinned in place to attach all three rows together.
•
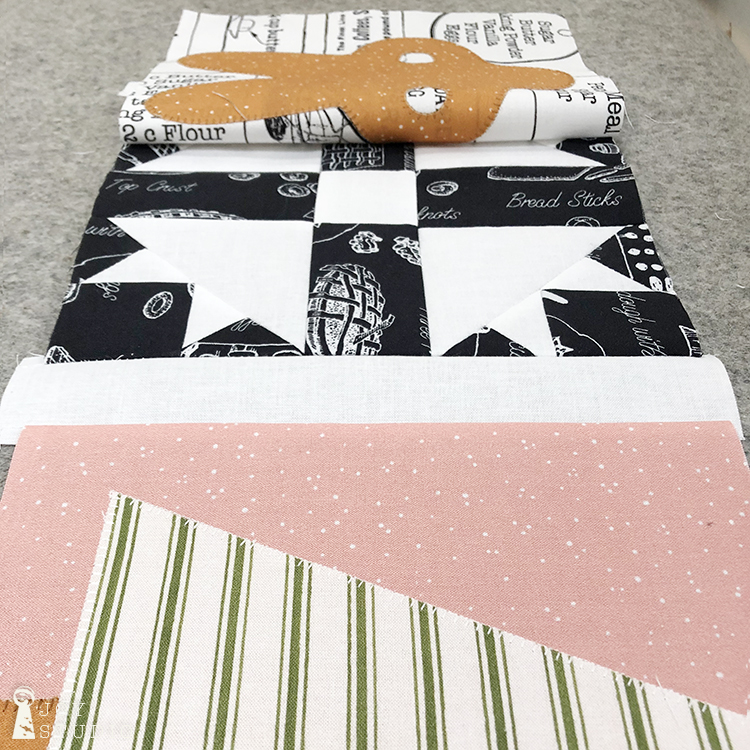
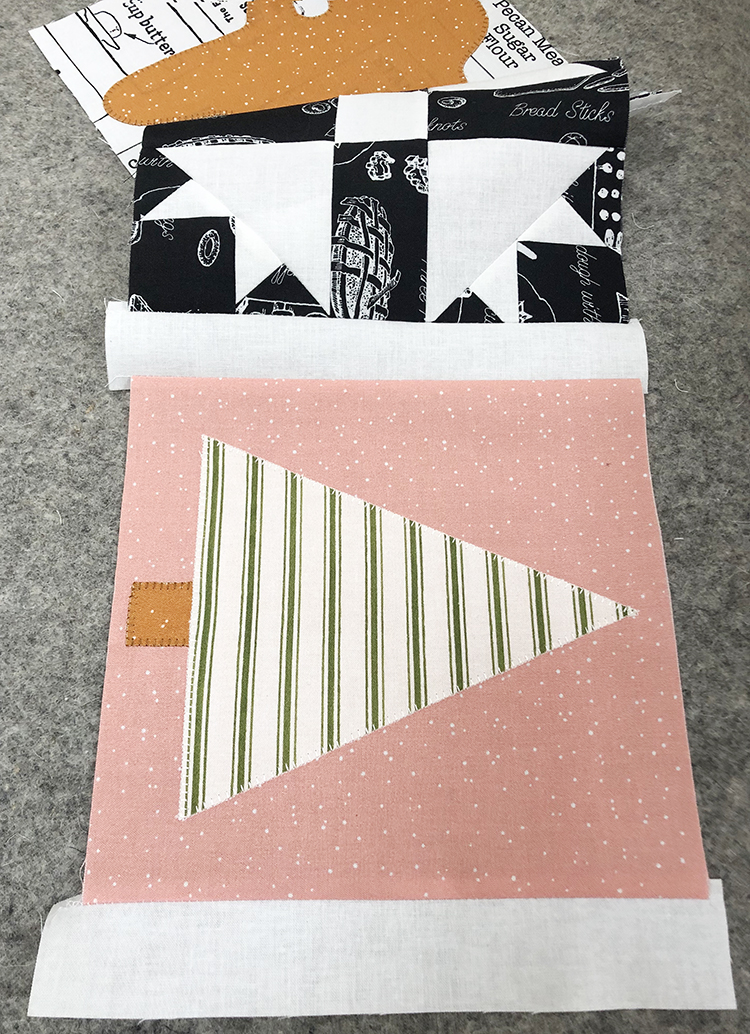
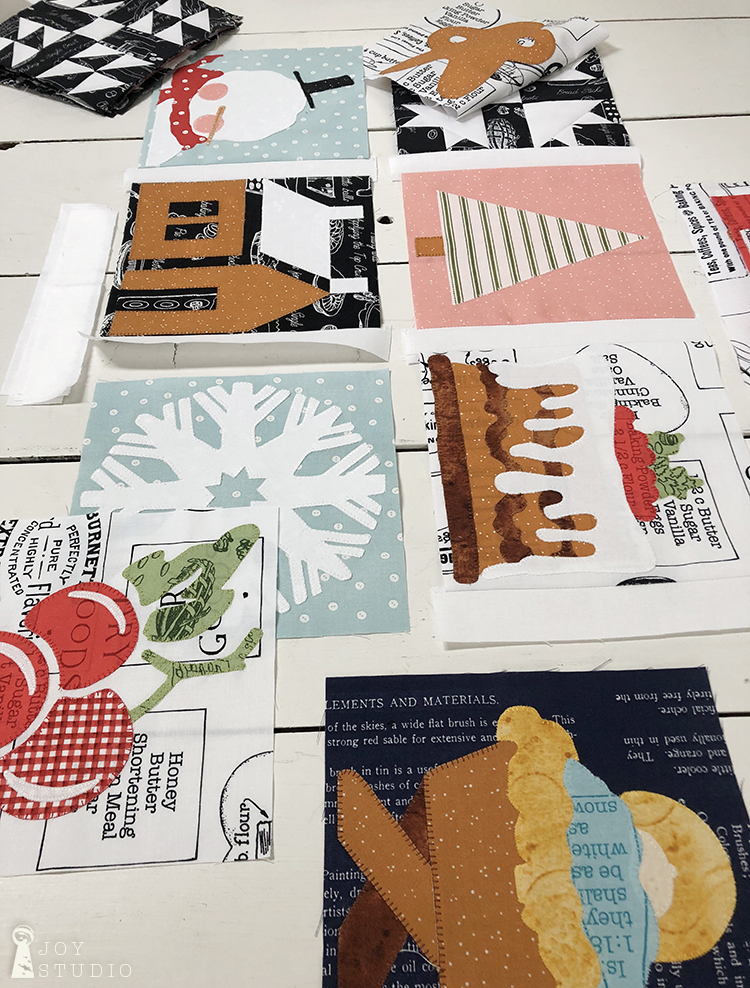
More of our picture is worth a thousand words quilt block gallery:


You can see that we followed a similar sequence for each of the remaining blocks. I attached all of the small half square triangles first as I moved from block to block.
•
I do not know the technical terms for block assembly so please excuse me quilters and please, interject your vast knowledge from experience in the comments! We would all love to learn more!
•
•
Once again, this Snow-A-Long features fabric from Riley Blake Designs, Snow Sweet, Riley White and Painters Palette.
I have not included every block in this post but will add the remaining four in a follow up post.
I imagine that most of you following are able to quilt circles around me but I read somewhere once, “finished is better than perfect.” Jenny Doan I believe said that and I found it encouraging.
So, keep going!
And post photos with #snowalong and #snowsweetfabric in your social media so we can find/see your progress.
•
by Great Joy Studio | Aug 12, 2020 | Quilting & Fabric
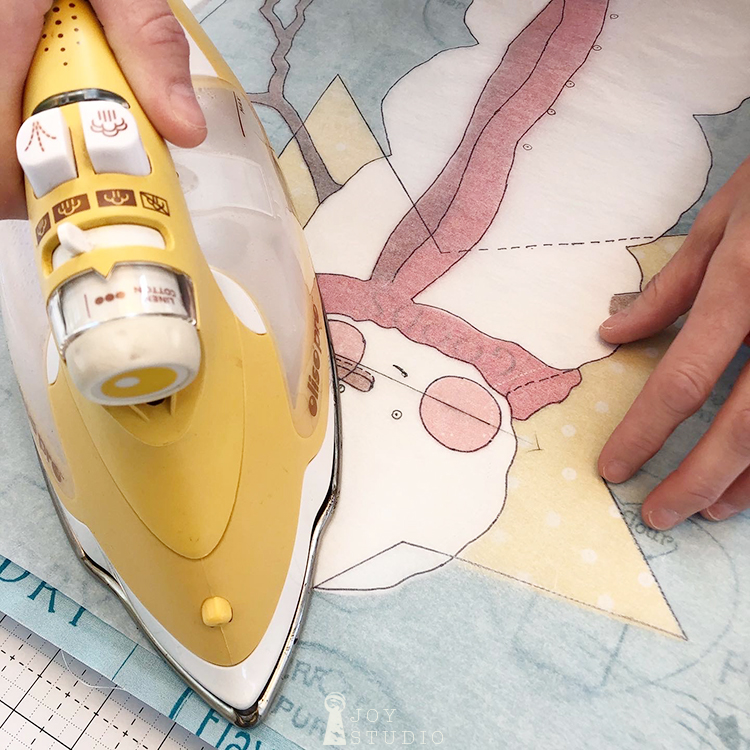
Hi Again!
How’s everyone doing with their Snow-A-Long quilt?
Have everything fused?
*
*
Sew far, sew good I hope.
Speaking of sewing, here is where it gets tricky for me!! I soar at drawing and cutting but sewing makes me a bit nervous, still.
This week we are
securing/stitching
your raw edge appliqué pieces down and
trimming
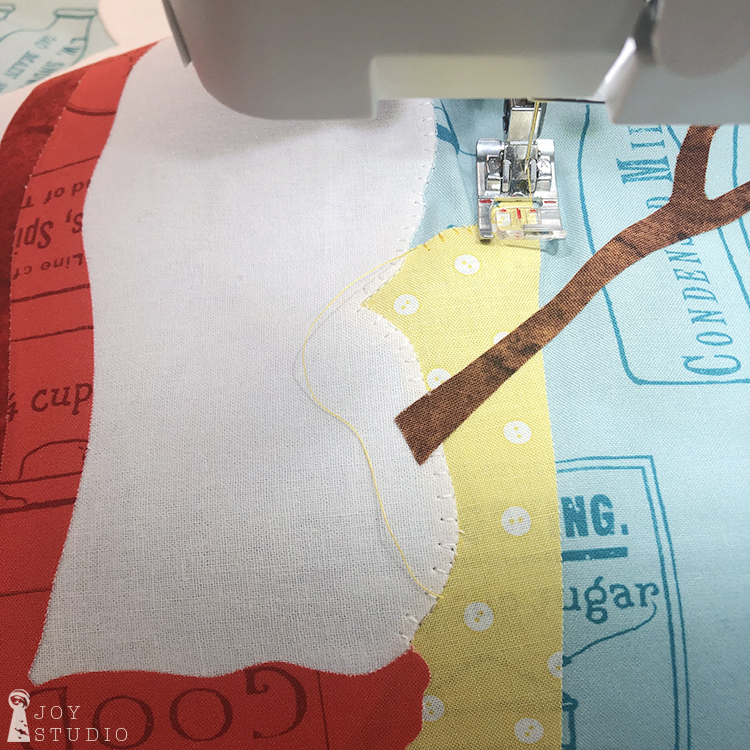
the blocks. You can also do any additional decorative stitching or embroidering at this time. Decorative stitch guidelines are provided on your patterns. Although the fabrics do much of the work in this quilt, the gingerbread blocks are perfect candidates for some fancy thread work either by hand or machine.
*
*
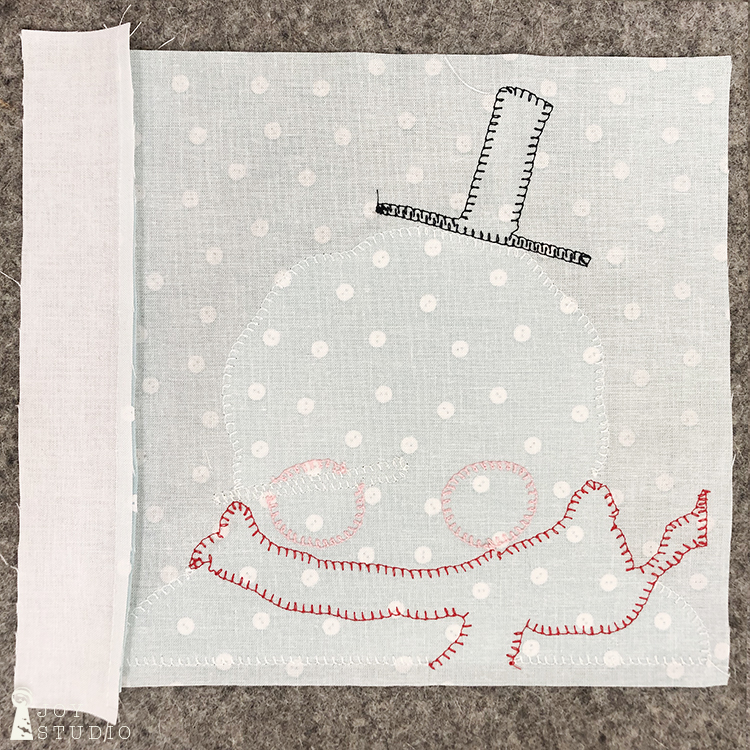
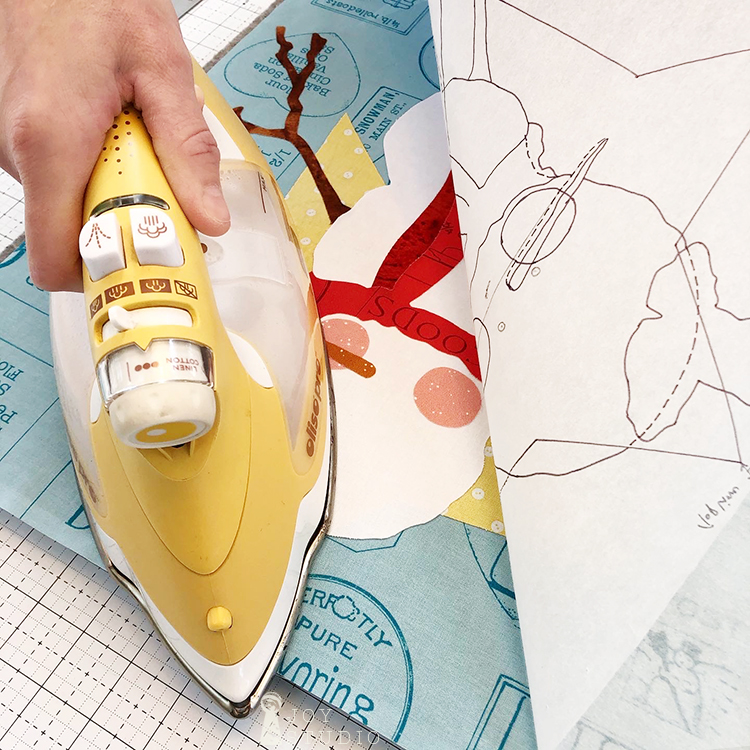
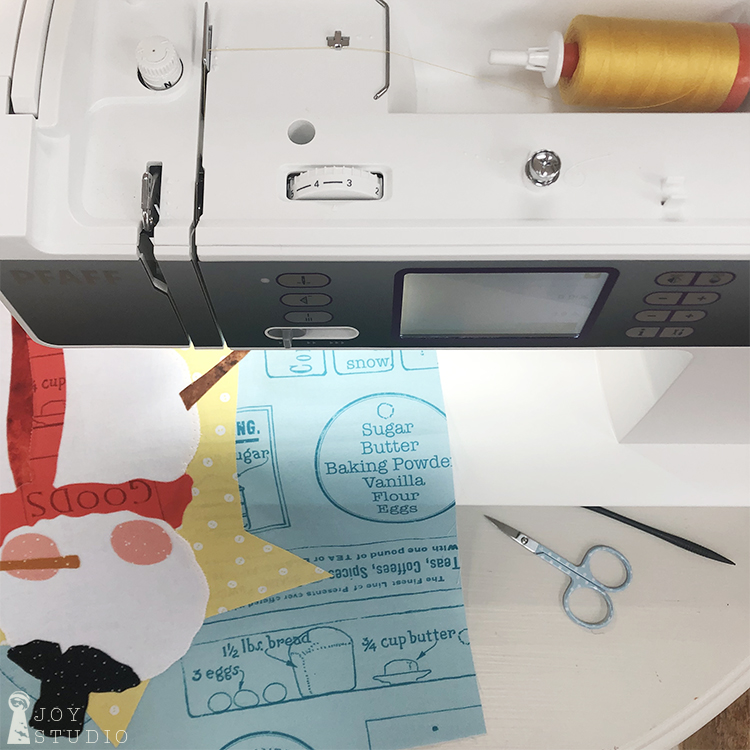
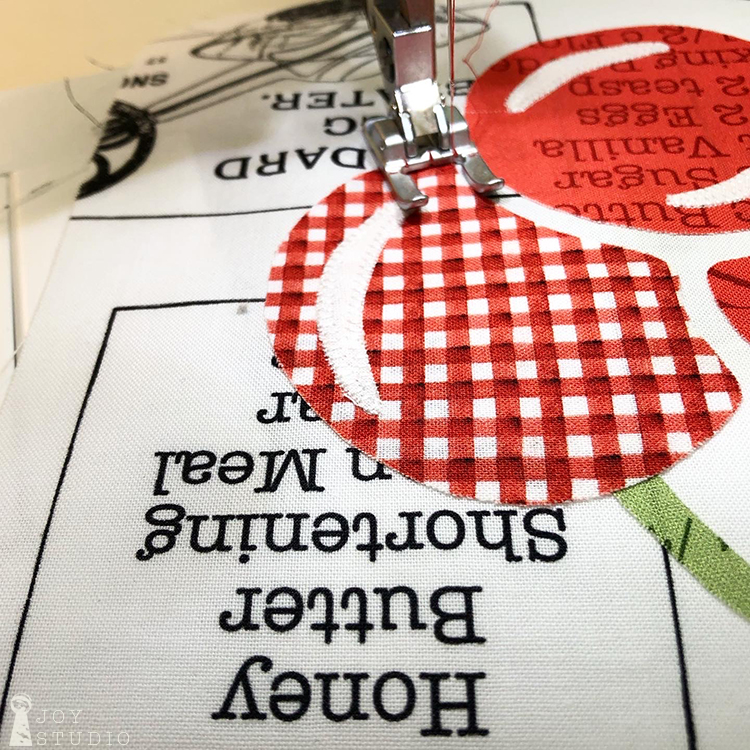
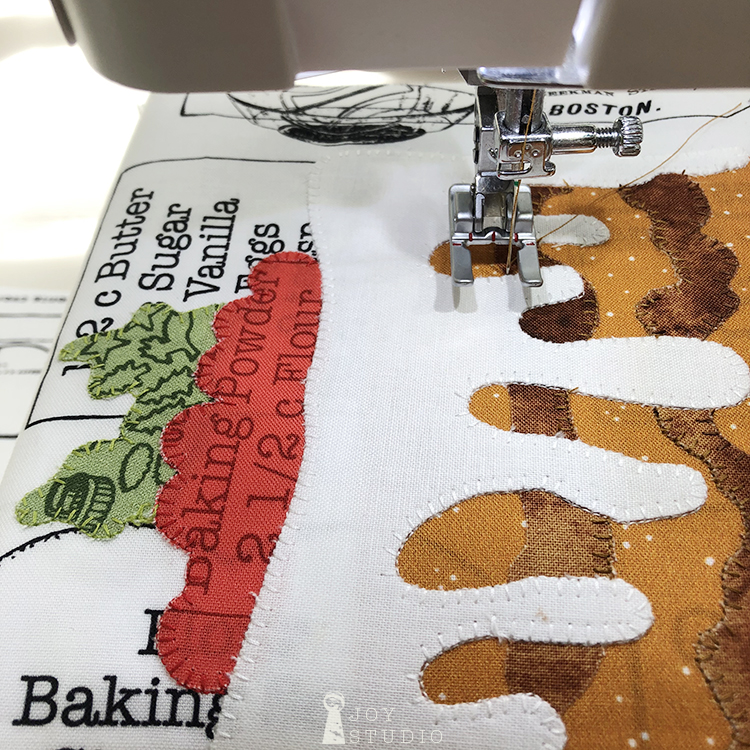
I have several photos that will show you our sewing process. I used a blanket style stitch (under the quilting stitch guide on my machine) for the edges. That is the one I am most comfortable using with my skill level but feel free to choose any that you like. I am certain that all of you have more sewing experience than myself so I look forward to seeing and/or hearing about your personal choices for this step. My understanding is that with raw edge appliqué you want a stitch that will help to keep the edges from fraying should the fusible product let loose with washings and use. However, I’m seeing the trends for raw edge appliqué and looks like anything (personal preference) goes!! And I like that.
Please #snowalong and #snowsweetfabric progress photos on social media so we can find and add to our
Pinterest board!
*

*
I also chose to use the same thread color as my appliqué fabrics. Again this was to better blend in and hide any of my stitching errors. If you want the appliqué art to stand out more you may want to try black and possibly some sketchy free motion which I love and hope to learn some day. I used Aurifil cotton 50 wt thread for all appliqué sewing.
•
•
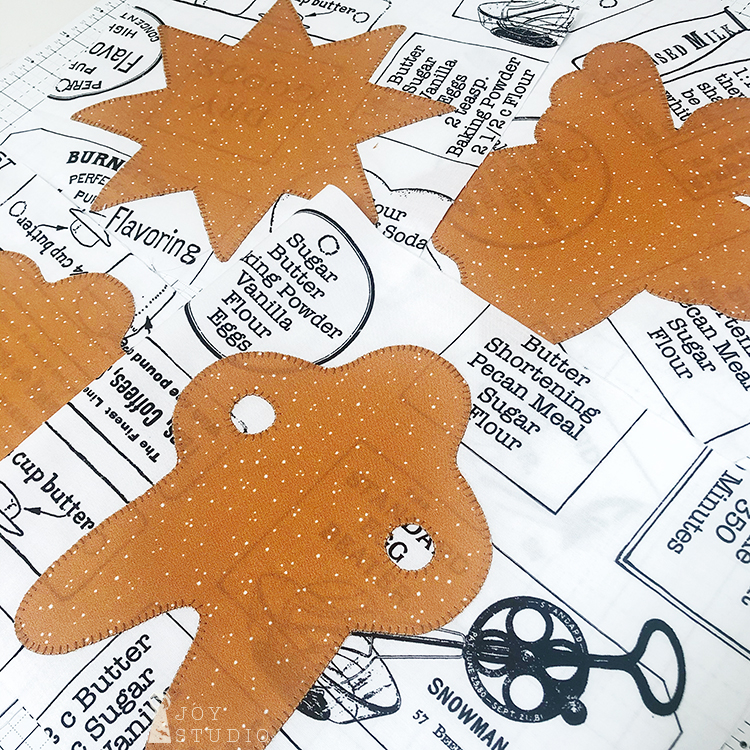
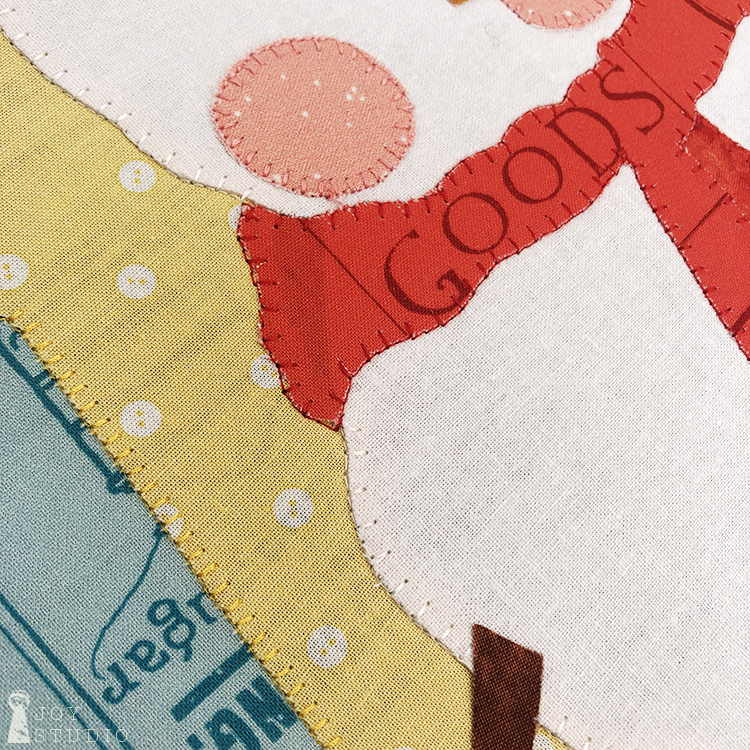
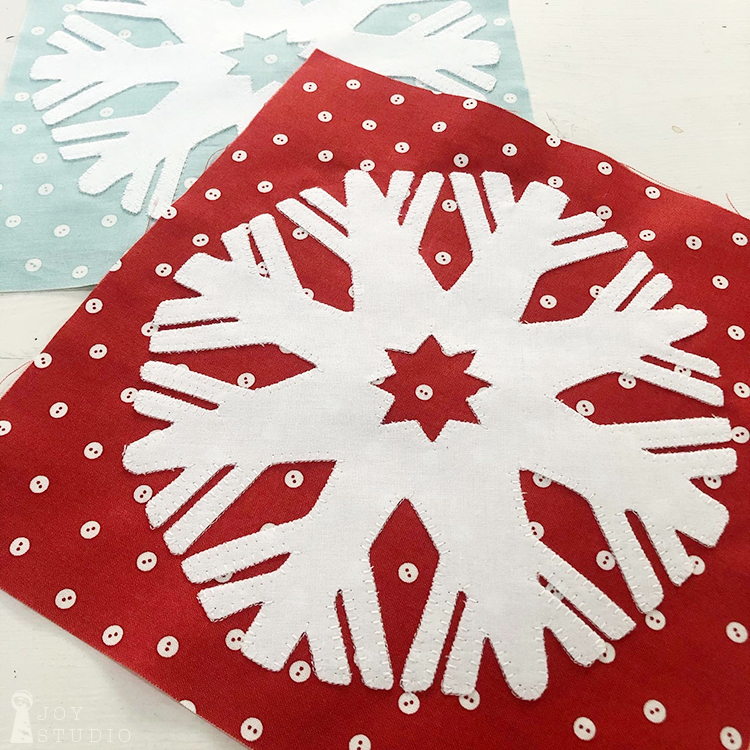
With so many blocks to stitch down, I did all of the white first, then black, red, and so on. Soon you will have them all finished.
*

*
Time to trim.
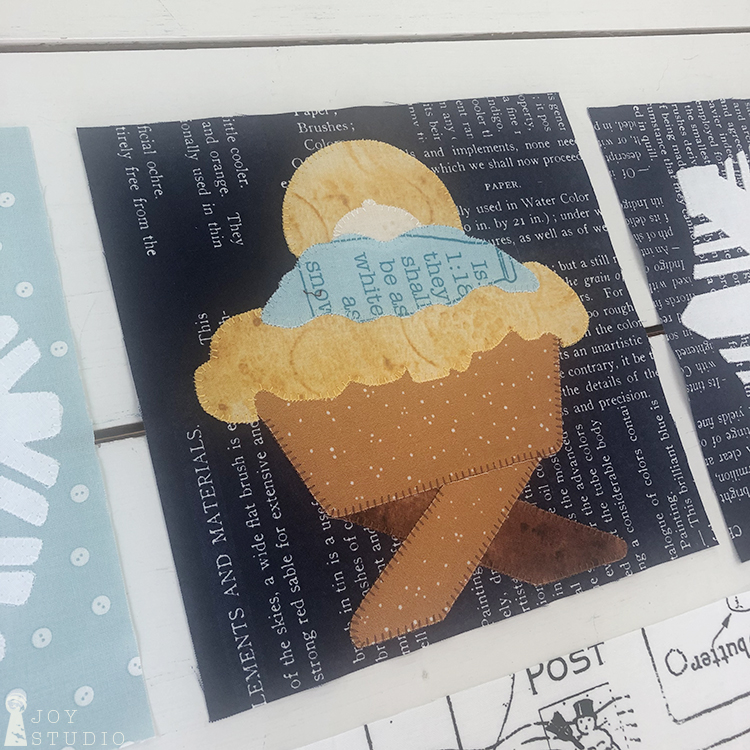
This is done after the stitching to allow for any shrinkage that possibly took place. Be sure to leave yourself a quarter of an inch for a seam allowance on all four sides of each block finish size. Block finish sizes are stated on your pattern. Some images like the gingerbread house is intended to sit on the bottom seam line of the block. So I trimmed to the one quarter inch mark at bottom and sides.
•


•
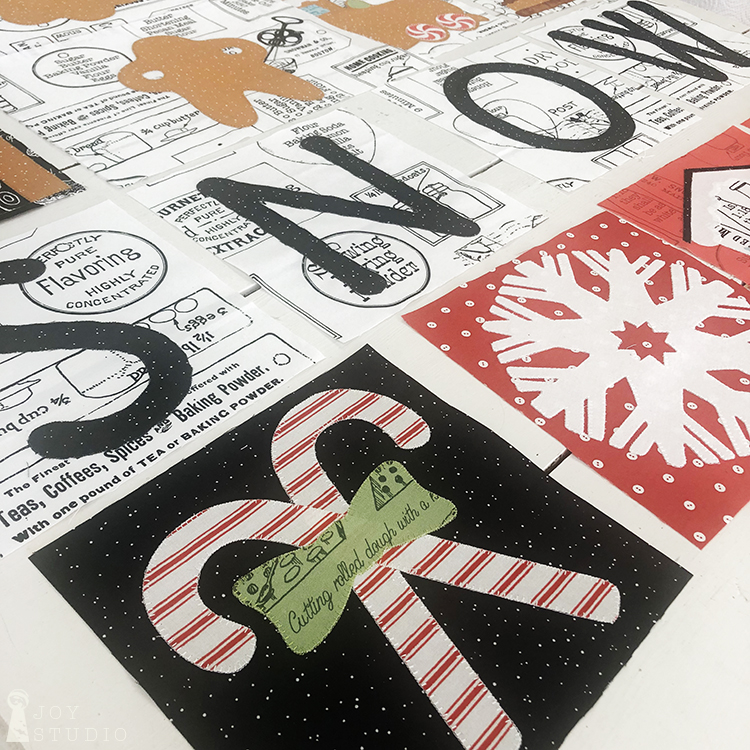
Once all are trimmed, post on your design wall and enjoy seeing your quilt come together!
I love that part.
And I love this Snow Sweet collection from Riley Blake Designs!
Widely available in shops now, but it’s going fast.
•
See you next Thursday.
by Great Joy Studio | Sep 26, 2018 | Quilting & Fabric
 •
•
Last week in September and also for
Riley Blake Designs
MEET THE MAKERS QUILT ALONG!
&
My last PAPERDOLL block.
I used Black Text, Blue Text, Blue Pin Dots & Riley Blake White.
•


•
And I used more Just Another Button Company’s new alphabet buttons in my styling! Loving those, on everything.
And speaking of buttons, these oversized are stoneware coasters that I picked up in Hamilton last weekend. They are my Birthday Bash present to self that I spotted in the Farm Goods shop and couldn’t resist getting for the studio. Set of four, yellow and green not pictured. Aren’t they sew cute?

•
Well, that’s all for the Meet The Makers QAL project but not for me and piecing/quilting! I think I’m just getting started. Learning to piece and a bit of quilting during the QAL and September’s National Sewing Month this year seams so fitting and friends say was about time. After designing fabric and projects for over fifteen years I am enjoying getting to actually use the fabrics as they were intended, in the ‘sew through’.
I hope you enjoyed seeing my progress while you quilted along and I would love to see yours. If you haven’t already I hope you’ll try this fun project. All of the details and kits are at RileyBlakeDesigns.com
Thanks for tuning in! 😉
Save
by Great Joy Studio | Sep 5, 2018 | Quilting & Fabric

Once again, this Riley Blake Designs Maker, is sharing!
Here is my progress for the
RILEY BLAKE DESIGNS
MEET THE MAKERS Quilt-Along.
•
Week Two.
My block #2 features
“Paperdoll”
pincushion toss, vintage button illustrations and tape measures plus,
Riley Blake White.

So,
please tell me, are YOU quilting along?
Jump in anytime.
Details are on their BLOG.
•
And very good details they are too! Including a VIDEO TUTORIAL.
Each time that I complete one of these blocks I am fascinated to see the results. In case you missed my last post, I’m actually learning to piece during this QAL. Very fun and challenging at the same time. And, I think I may be hooked!
•


•
Meet me here next week for more,
Meet the Makers Paperdoll blocks!
•
And be sure to tune in for the
RBD Paperdoll Tour
starting Thursday, Sept. 6 for four consecutive Thursdays on the blogs listed below.
I’m betting these Makers are going to be showing you some really
CUTE STUFF!
Aunt Henri
The Polka Dot Chair
Flamingotoes
Jedi Craft Girl
•

For some of our really cute stuff using Paperdoll fabrics:
“Doll Closet” Applique Design for Makers
in our ETSY SHOP
•
Save
Save
Save
Save
Save
Save
Save
Save
Save

