by Great Joy Studio | Sep 30, 2025 | Quilting & Fabric

•
Hello everyone!
I posted this project originally with “Costume Makers Ball” fabric when it was offered from Riley Blake Designs in 2019. Owner, Cindy Cloward thought it was so fun that she is sharing hers as a YouTube tutorial at Riley Blake Designs – YouTube.
•
We borrowed these instructions (below) from our original step by step post which pairs seamlessly with the new “Costume Makers Act II” fabric collection! However, you will want to follow along with Cindy as she creates her version of this festive fall favorite.
•
BIG SCARY BOOK!
Featuring,
COSTUME MAKERS Act II
fabric by me, J. Wecker Frisch
from Riley Blake Designs
•
So many of you have asked if this fun fall project was a pattern so, we decided to share the easy process here!
I pretty much made this up as I went along and it was truly so easy. I’m still learning on the sewing front so, if you see anything that can be improved on, I’m interested to hear from you. Of course we love the images on the patch panel and they were the perfect sizes for the pages and pockets to hold whatever spooky items we found around the studio. Choose anything you like in your stash of old photos, tags, charms and trims to personalize your scary book.
•

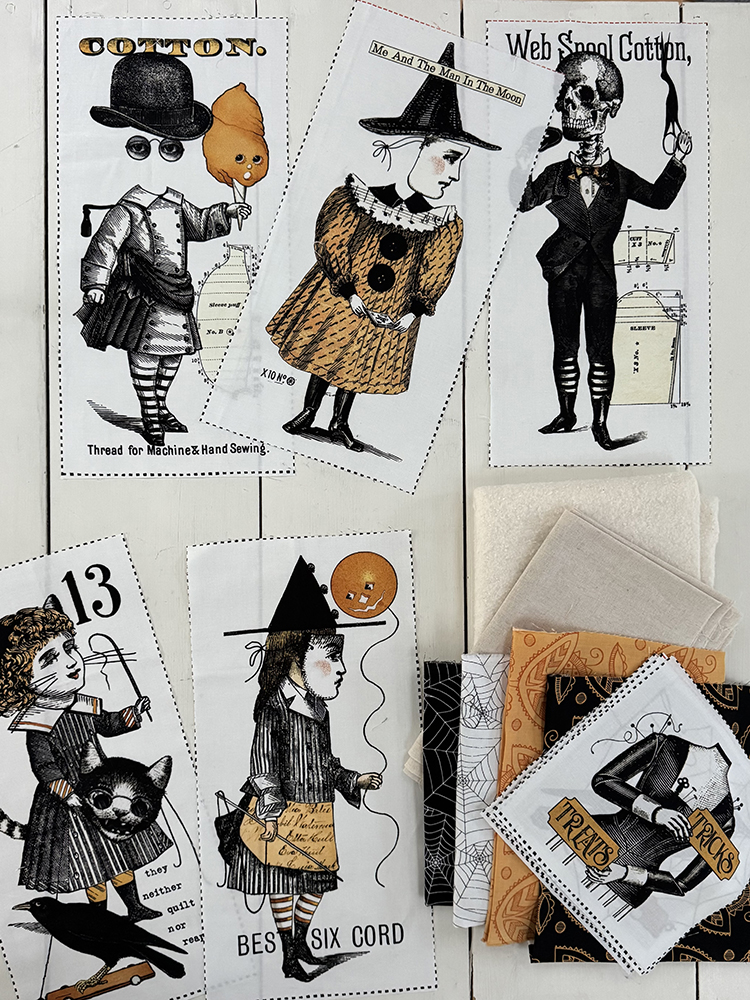
What you’ll need, beginning with Costume Makers Act II fabric:
• One – Patch Panel for pages and pockets.
• One repeat – Border Stripe for a few fun tags to slip inside and attach.
• Fat quarter – Black Text for cover.
• 1/2 yard – Jac O Lantern Balloons on Black for inside of cover plus one page background.
• Fat eighth – Measure Tape Stripe Blk n Wt for one page.
• 1/2 yard – Riley Blake Linen in Natural for inside pages.
Optional:
• Quilt batting, 1/2 to 3/4 yards based on preference. We used a light weight fusible behind page patches and cover.
• A medium weight Interfacing for a stiff cover cut to 17.5″ x 17.5″
• Measuring tape ribbon, buttons, decorative string, one cargo tag, old key & vintage notions or game cards, etc.
• Fabric only kits available exclusively at greatjoystudio.com/shop/
•
Pictures worth a thousand words?


Pages six & seven with quilted tags made using the CMB border stripe.
•

Sandwich each of the individual cover and (18″ square) page layers as you like. I chose batting between my cover fabrics and under each of the fabric patches. I then used a variety of sketchy stitches around each the page edges to create decorative borders and attach to the linen pieces. Using your skill level and imagination there are no limits to what you will create with these fantastic fabrics! Again, my stitching experience is short and some of these are my first attempts but I was pleased with the results. So remember, have fun, no rules, anything goes and you can’t make a mistake.
•
Here are the the page layouts:

Inside front cover & page 1

Pages 2 & 3

Pages 4 & 5

Pages 6 and 7 are pictured at top of post and are holding the border stripe kid tags.

Page 8 and inside back cover.
Not pictured is the outside cover! We used the CMB black allover text.
•
Complete Scary Book fabric kit available on the Shop page.

•
More Scary Book photos and fun projects on IG @jweckerfrisch and FB Joy Studio
&
Please share your scary book eye candy with us!!

•Be sure to follow us on Instagram @jweckerfrisch & Facebook Tidings Of Great Joy.
by Great Joy Studio | Aug 16, 2024 | Quilting & Fabric
Hi Friends!
I’m going to be honest, summer is not my favorite and this one has been has been a little scary. And hot of course. It has been exciting but nerve wracking, a lot of hard work but fun and all the while fulfilling, as I complete the last steps of my entrepreneurship.
•

•
On a happier note, I’m still going! Here’s the latest:
We are nearly moved into our new office and workshop location at 16 Dreyer Ave., in Eureka, MO. Our new hours for visitors are
Thursday – Saturday from 10:00 am – 1:00 pm.
Follow us on Instagram @jweckerfrisch and Facebook Joy Studio-tiding of Great Joy for upcoming mini classes this fall.
•


•
My three NEW fabric collections from Riley Blake Designs, “Pumpkin Patch”, “Old School” and “Press On” are in quilt shops now! Check them out at your favorite local or on line location.
Our Wonderland Workshop for October 4th is sold out. Next one is scheduled for mid January so stay tuned.
Upcoming events:
This weekend it’s off to Hamilton, Mo. and on August 19 – 20 we will be visiting our friends at Missouri Star Quilt Company! Watch for me on Jenny’s Tuesday Newsday and my interview with Misty Doan on her Homespun channel, in an upcoming episode. I am quite excited about this as you can well imagine!
Studio Class: Fused Applique Fall Place Cards – Details to come on IG and Facebook
Studio Class: Vintage Watercolor Color-Mixing Chart – Details to come on IG and Facebook
Fall Quilt Market in Houston TX is Oct. 26 – 28 where Riley Blake Designs will be introducing my new fall collections, one of which is, “Costume Makers Act II” .
•

•
Well, I think that has us all caught up. I hope to see you soon at one of these events or just drop in to say Hello. We have been enjoying meeting folks, swapping quilt stories and sharing creative journeys. We would love to know yours.
•
by Great Joy Studio | May 16, 2021 | Quilting & Fabric
In A Nutshell Post
•

•
• Old Made fabric is our 2021 (non Halloween) Halloween collection delivering to shops now!
•

•
• Painters Watercolor Swirl fabric is our first Basics collection with Riley Blake Designs and is delivering now. It was chosen out of our Painters Palette fabric group which has joined the Riley Blake Designs Basics offerings!
•
•
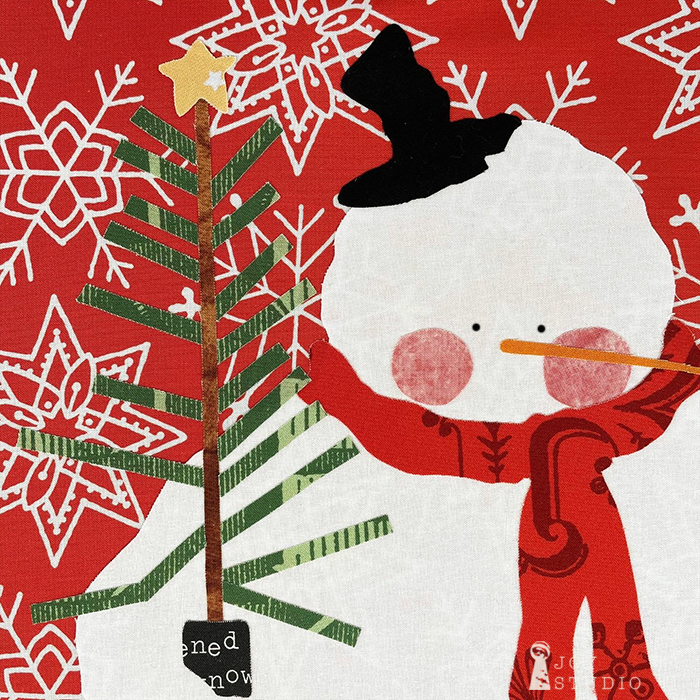
• All About Christmas is scheduled to deliver in shops next month! And when we say ALL about Christmas, we mean Jesus! Complete with Him in a manger as the main panel. Also angels, camels, nativity, etc. You get the picture. Lol
•
•

•
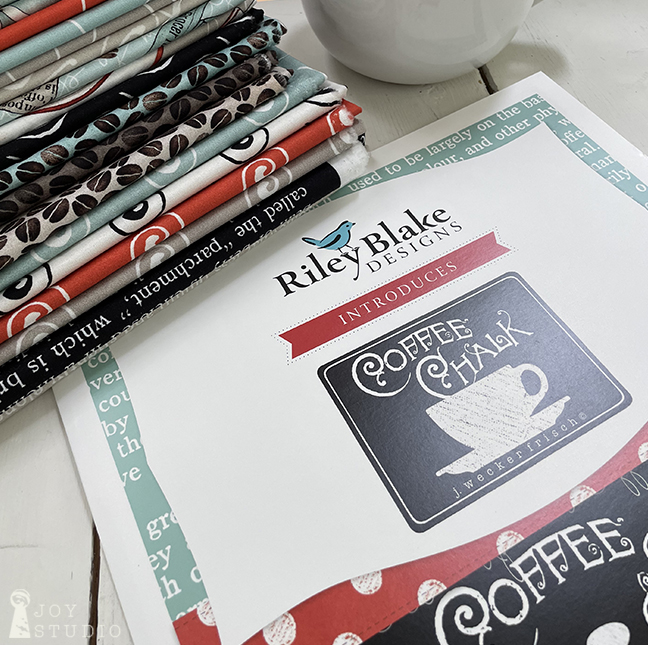
• Riley Blake Designs Virtual Quilt Market is next week!!! We are presenting “Coffee Chalk” and “The Best of She Who Sews”!! Join this Facebook event here:
https://www.facebook.com/groups/294355661719623
Or – Go to rileyblakedesigns.com for the market schedule. We will be on Wednesday morn, Friday afternoon and Saturday morn.
•
And that’s, what’s new in our fabric world! For plenty of Joy Studio sneak peeks, follow me : @jweckerfrisch on IG and Joy Studio News on FB
Thanks very much for visiting. ~ Janet
by Great Joy Studio | Jun 28, 2019 | Quilting & Fabric

•
B U N T I N G M A K I N G
with the
Costume Makers Ball
Bunting Panel
from
Riley Blake Designs
makes this project so quick,
so easy,
and so FUN!
*


•
Of course there are several ways that you can use this bunting panel.
I chose the no sew approach for a super quick finish.
•
For this you will need:
• One Costume Makers Ball bunting panel – 24″ x 43″
• Backing fabric – approximately 22″ x 43″
• Black 3/4″ wide gross grain ribbon, approximately 10 yards
• A medium weight, double sided fusible web product – approximately 22″ x 43″
• A package of fusible tape, approximately 10 yards
• Iron and pressing surface
•

•
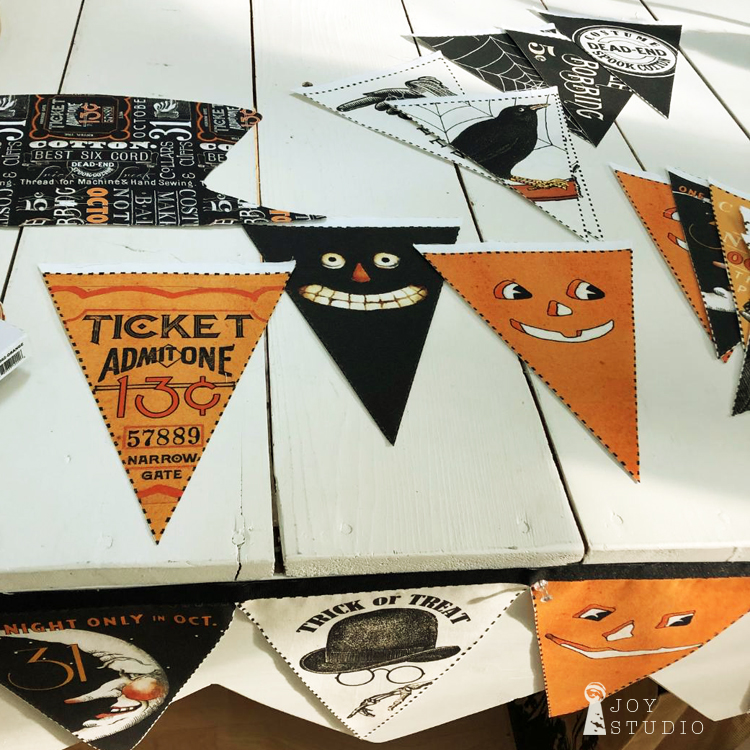
Begin with your panel by cutting it in half, selvage to selvage. You can cut along the heavy dash lines on the outside of the two orange strips that separate the two rows of flags. This will leave a wider seam allowance at the tops of your flag sections.
Place your nine flag section on top of your fusible, paper side up. Trace the flag section with a marker or pencil and cut out. Sandwich them together glue side to back of fabric on your pressing surface. Make sure the fabric is a little larger than your fusible so you do not fuse to your surface or iron. Press according to manufacturer’s instructions.
Peel off the protective backing of your fusible product and place glue side to wrong side of your second, backing fabric. Again fuse together. Then your ready to cut the flags apart.
I designed this bunting outlining each flag with the same heavy dash lines to add a decorative edge and make cutting easier. You can use your rotary cutter or scissors to achieve a clean cut through your two fabric layers.
•

•
Once all of your flags are cut out you can fuse them to your ribbon. Lay them out in the order that you like and begin to fuse the ribbon to one top side of the flag. When you get close to the edge overlap just a bit and join the next one, until all are attached. Then turn your strand over and apply another layer of ribbon to the back for additional strength.
Then hang & enjoy!
•
They’re really fun to layer with batting and quilt some details too!
•


•
Ta-daa!
I hope my last two how to project posts were helpful. If I get up my courage maybe we’ll try a video!!
Now, that is SCARY!!!
Save
Save
by Great Joy Studio | Jun 7, 2019 | Quilting & Fabric

•
Hello everyone!
We’re back from our two big events and eager to share.
First up is our big,
SCARY BOOK!
Featuring,
COSTUME MAKERS BALL
fabric by me, J. Wecker Frisch
from Riley Blake Designs
•
So many of you have asked if this fun fall project was a pattern so, we decided to share the easy process here!
I pretty much made this up as I went along and it was truly so easy. I’m still learning on the sewing front so, if you see anything that can be improved on, I’m interested to hear from you. Of course we love the images on the patch panel and they were the perfect sizes for the pages and pockets to hold whatever spooky items we found around the studio. Choose anything you like in your stash of old photos, tags, charms and trims to personalize your scary book.
•
What you’ll need, beginning with Costume Makers Ball fabric:
• One – Patch Panel for pages and pockets.
• One repeat – Border Stripe for a few fun tags to slip inside and attach.
• Fat quarter – Black Text for cover.
• 1/2 yard – Jac O Lantern Balloons on Black for inside of cover plus one page background.
• Fat eighth – Measure Tape Stripe Blk n Wt for one page.
• 1/2 yard – Riley Blake Linen in Natural for inside pages.
Optional:
• Quilt batting, 1/2 to 3/4 yards based on preference. We used a light weight fusible behind page patches and cover.
• A medium weight Interfacing for a stiff cover cut to 17.5″ x 17.5″
• Measuring tape ribbon, buttons, decorative string, one cargo tag, old key & vintage notions or game cards, etc.
• Fabric only kits available exclusively at greatjoystudio.com/shop/
•
Pictures worth a thousand words?
Pages six & seven with quilted tags made using the CMB border stripe.
•
Sandwich each of the individual cover and (18″ square) page layers as you like. I chose batting between my cover fabrics and under each of the fabric patches. I then used a variety of sketchy stitches around each the page edges to create decorative borders and attach to the linen pieces. Using your skill level and imagination there are no limits to what you will create with these fantastic fabrics! Again, my stitching experience is short and some of these are my first attempts but I was pleased with the results. So remember, have fun, no rules, anything goes and you can’t make a mistake.
•
Here are the the page layouts:
Inside front cover & page 1
Pages 2 & 3
Pages 4 & 5
Pages 6 and 7 are pictured at top of post and are holding the border stripe kid tags.
Page 8 and inside back cover.
Not pictured is the outside cover! We used the CMB black allover text.
•
Complete Scary Book fabric kit available on the Shop page.
•
More Scary Book photos and fun projects on IG @jweckerfrisch and FB Joy Studio
&
Please share your scary book eye candy with us!!
•
Save
Save
Save
Save
Save


