by Great Joy Studio | Aug 30, 2023 | Quilting & Fabric
•

Hello there!
•
•
Well, I did not expect my fabric journal journey to take a full year to put up my next blog post! However, if you’re following me on Instagram then you have a pretty good idea of what Great Joy Studio has been up to. Five more fabric collections, a White As Snow Winter-y Projects booklet, lots of quilt design and some time to create a few inspirational pieces for church.
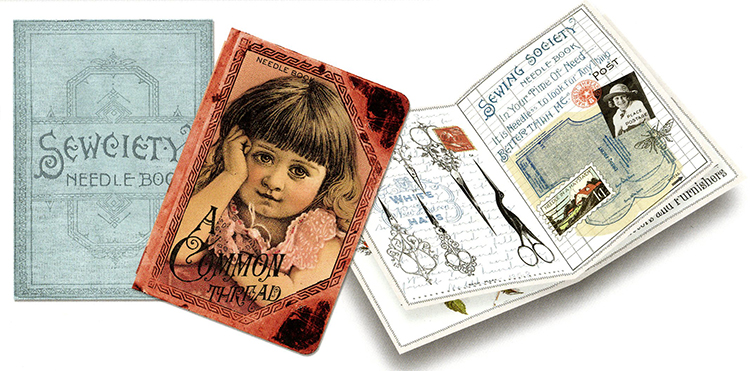
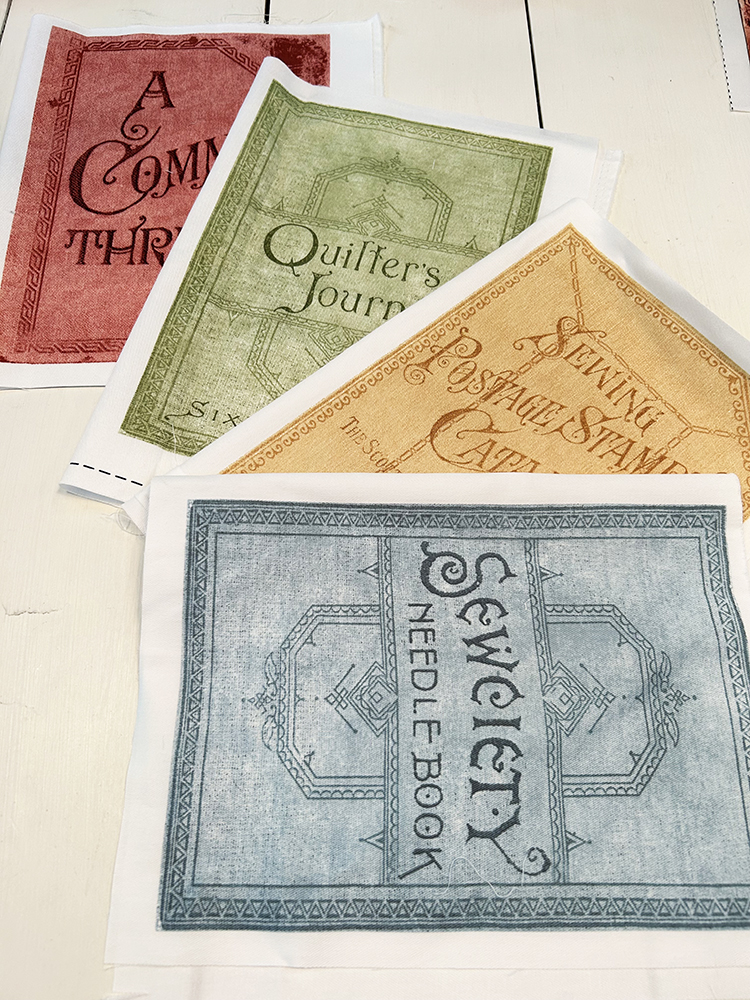
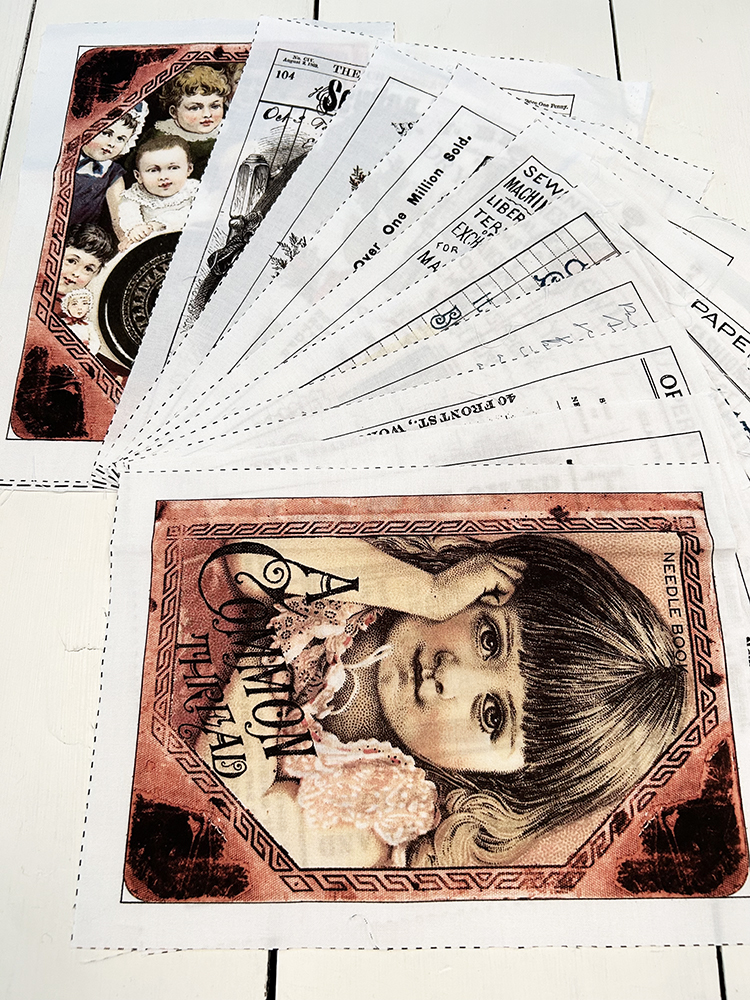
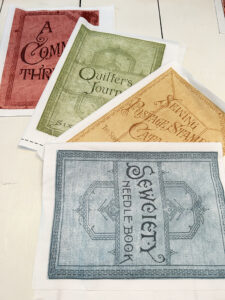
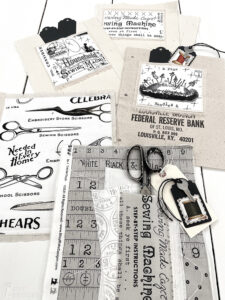
So, let me tell you what else is new like our latest collection from our fabric partners at Riley Blake Designs. “Sew Journal” is the name and is currently delivering (or delivered) to shops this week. Of course it is full of the coolest vintage and antique sewing imagery from my own personal ephemera stash. Some of the pieces are quite rare so I am especially glad that we can present this stunning art and can share on fabric and quilts for years to come.
•

•
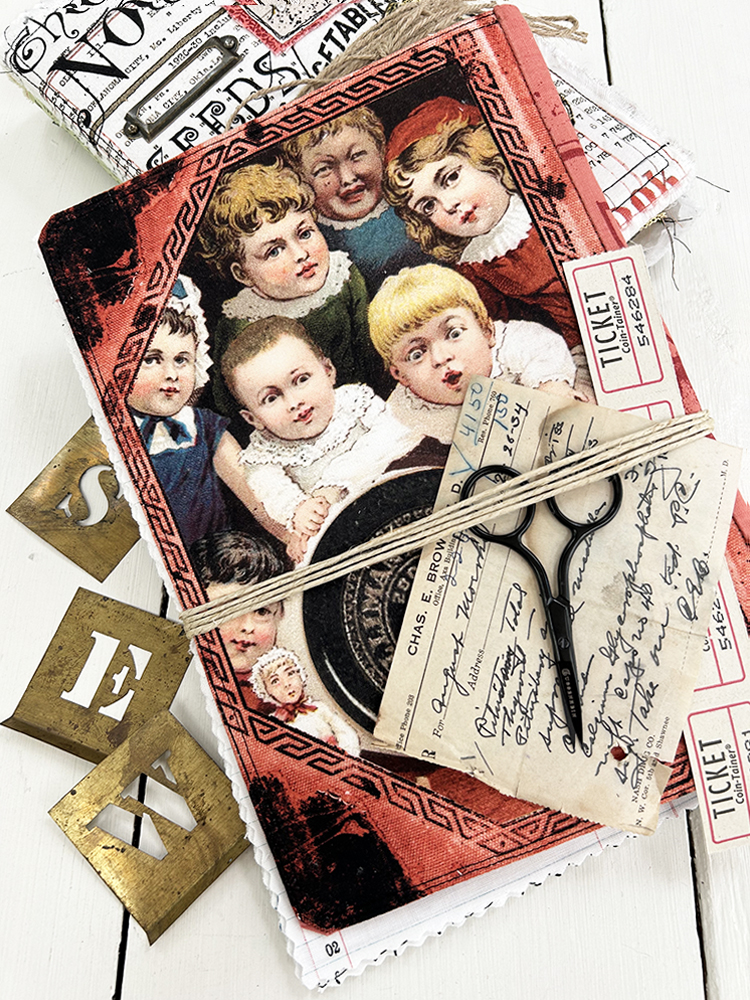
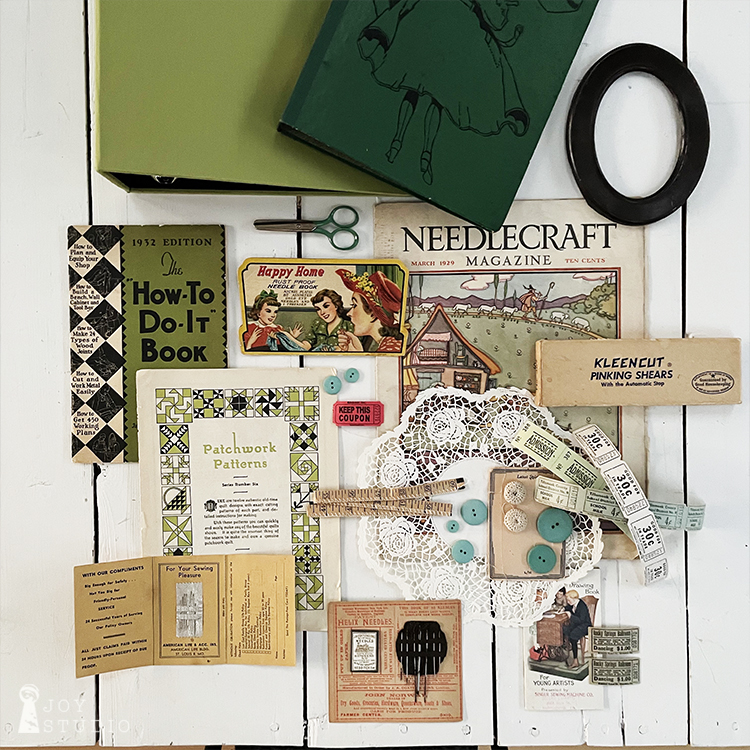
We used three of the Sew Journal panels and several scraps from all three of my ‘Journal’ collections, Art Journal, Journal Basics and Sew Journal to continue on our book making exploration. In addition I have gathered all of the tiny and interesting trinkets that one tends to collect through the course of a creative lifetime. You know the ones I mean, countless items that just don’t seam to go anywhere but you hang onto just in case you need for that special project? Well . . . we have it! And we want to invite you to join me at our first Sew Journal weekend retreat. Here are the details:
October 13 – 16
Quilt Town USA – Hamilton MO
MSQC Retreat registration click here!
See you there and keep following us on Instagram for inspiration and retreat updates.
•

•
by Great Joy Studio | Sep 22, 2022 | Quilting & Fabric
Hello once again.
We took some time at the end of summer to do a bit of traveling so, our week five for the fabric journal post was delayed. We also took a couple days for garage and closet cleaning! In addition, the actual execution of this project is somewhat new to me and I am learning what works and what doesn’t. So I’m giving myself plenty of time for my fabric journal style to evolve. There are many techniques to try and experiment with.This is going to be an ongoing, learning process to enjoy.
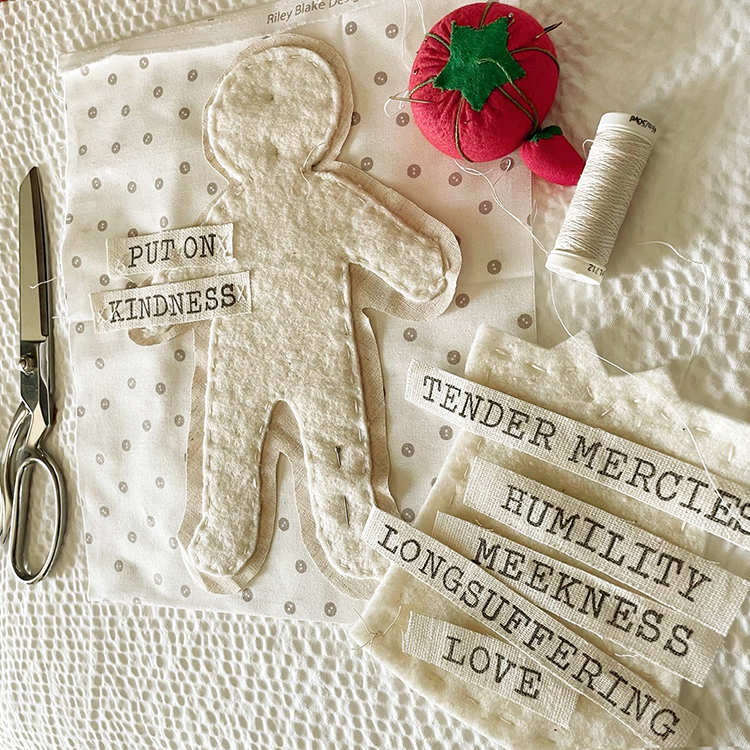
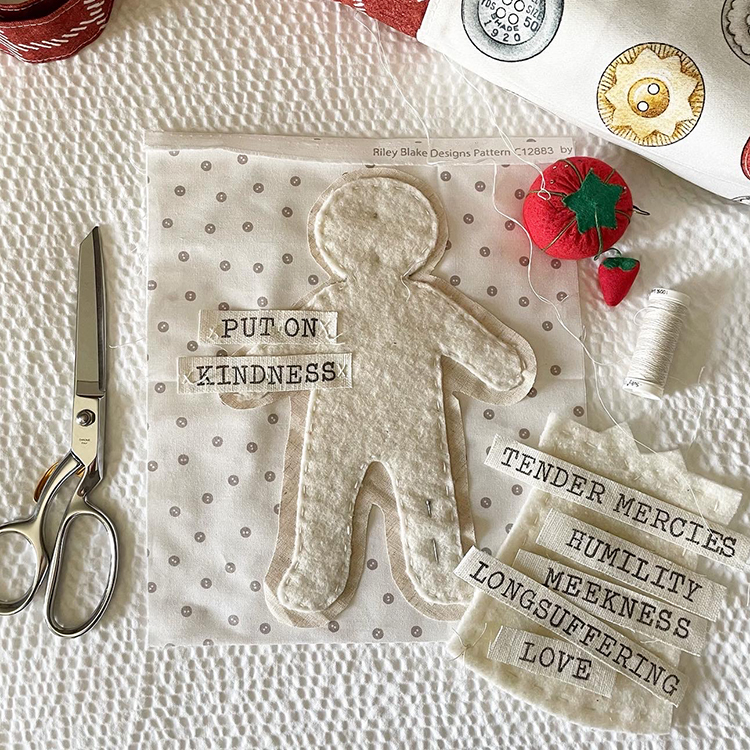
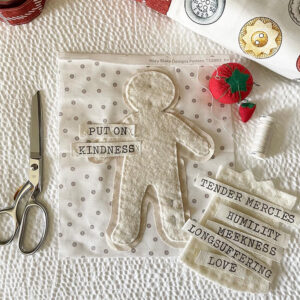
Now, back to the fun fabric stuff! I have two more fun layouts signatures/pages to share. One I did in the car while riding along on the road trip. We had just received a bundle of Hush Hush II from Riley Blake Designs before we left so I grabbed our Baby Button Dot low volume sample and a bit of inspiration for this one. I stamped some words on linen scraps from Colossians 3 which was my scripture reference for this piece.
•

•
I had purchased some craft board paper doll templates some time ago and decided to cut one from Riley Blake natural linen and one out of ordinary batting. Then a dress from our Doll Closet appliqué template and adjusted to the right size. I simply layered in a pleasing layout and began to hand stitch. A perfect project while taking in the sights.
•
•
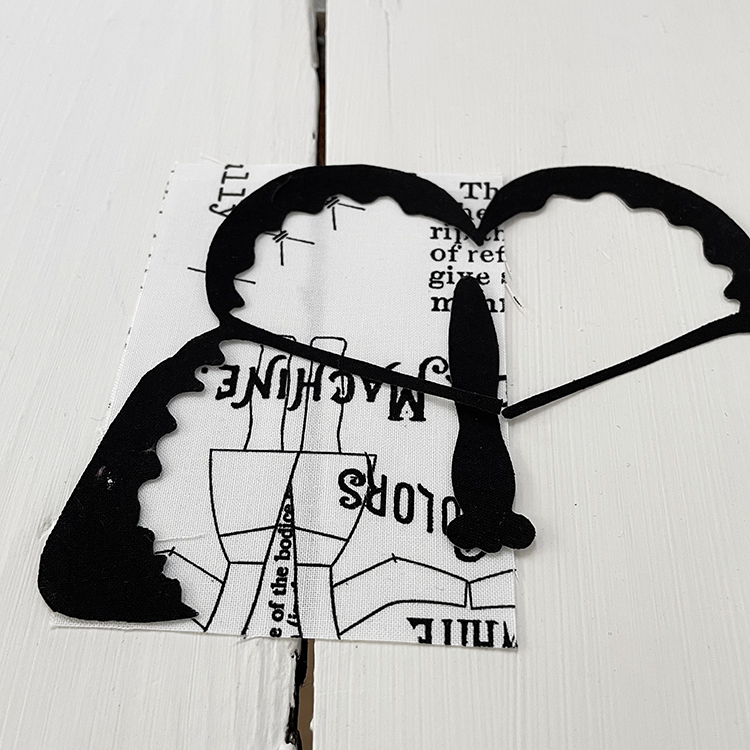
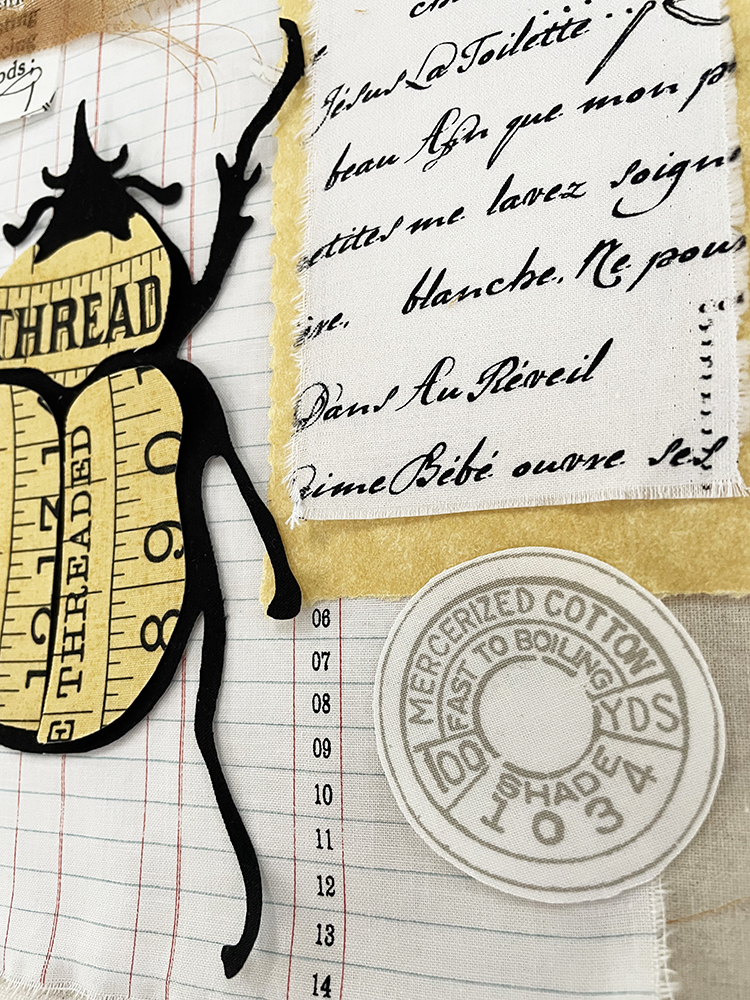
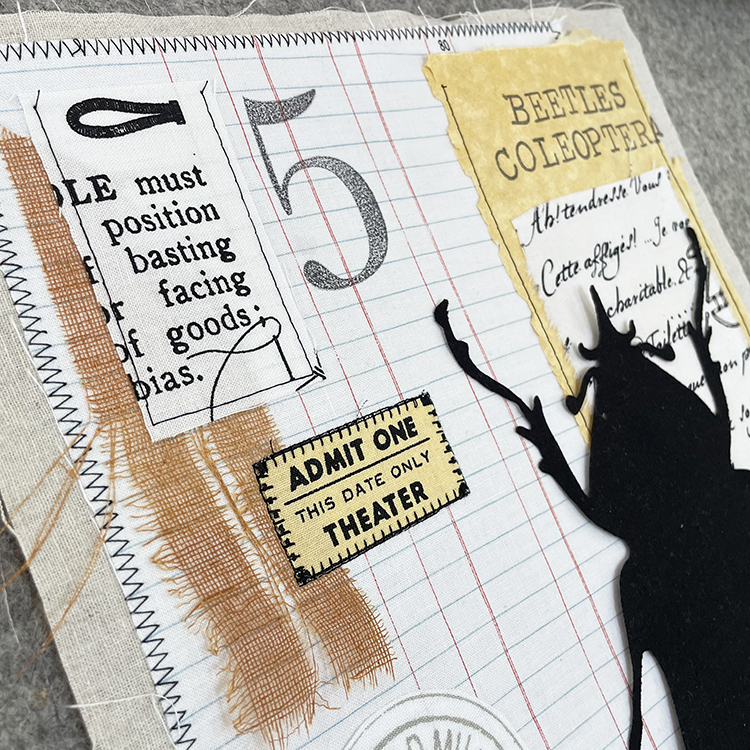
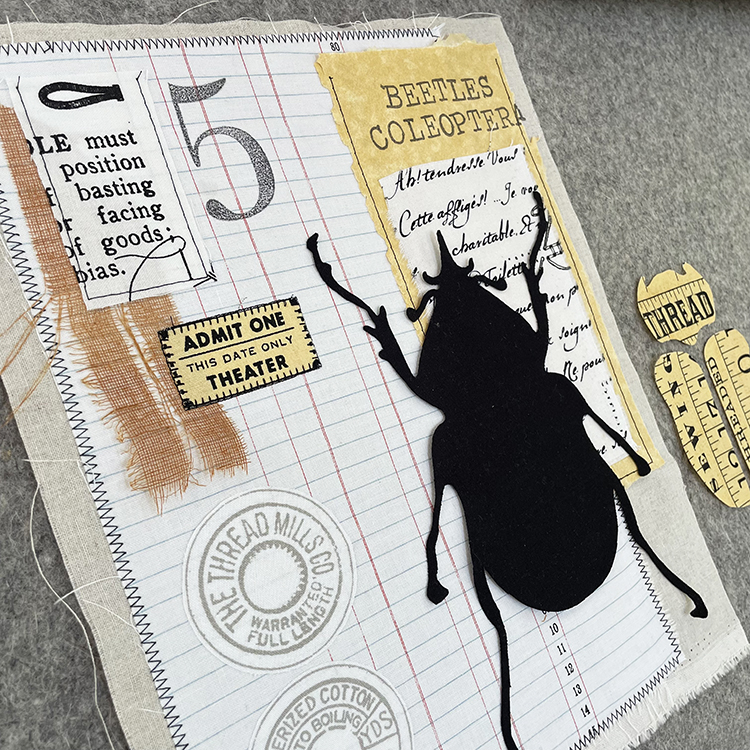
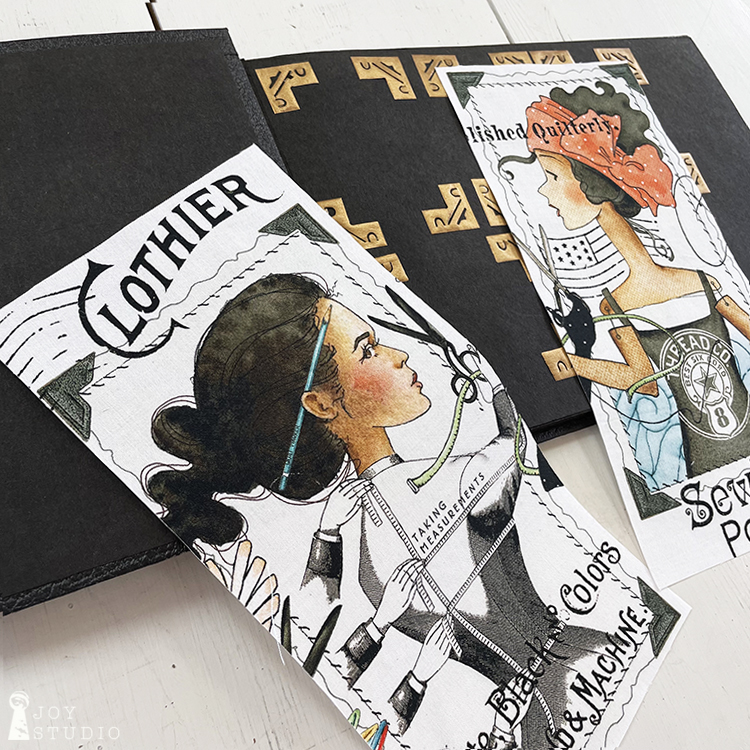
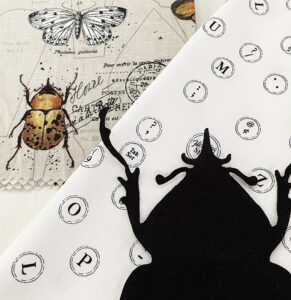
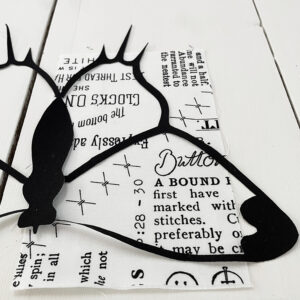
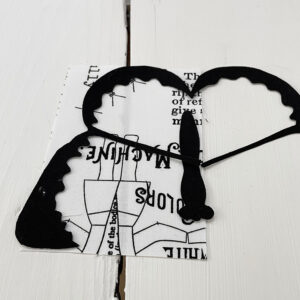
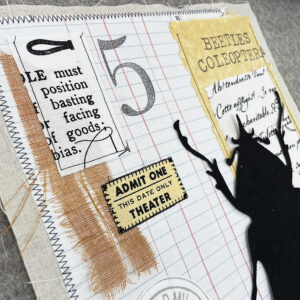
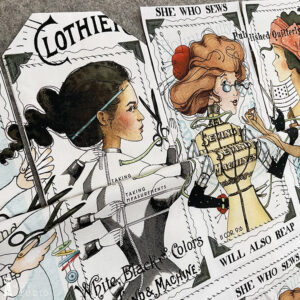
The second group of images were inspired by insects from our upcoming “Art Journal” fabric (above)! We are so eager to introduce this collection (February 2023 delivery) from Riley Blake Designs that we could not resist including a few early samples that were sent for color approval in our finished piece (below).
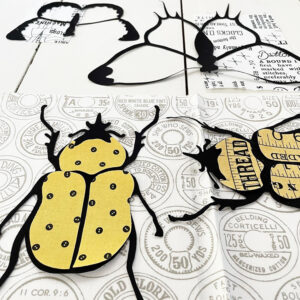
I asked Kate to design and cut out silhouettes in Riley Blake Black and then highlight with Best of She Who Sews measuring tapes and button dots. Once Kate had the black appliqué pieces cut out we auditioned a few of the Best of She Who Sews fabrics to see what to use for the beetle highlights and butterfly wings. Best of SWSs offers so many great options it’s difficult to choose!
•
•
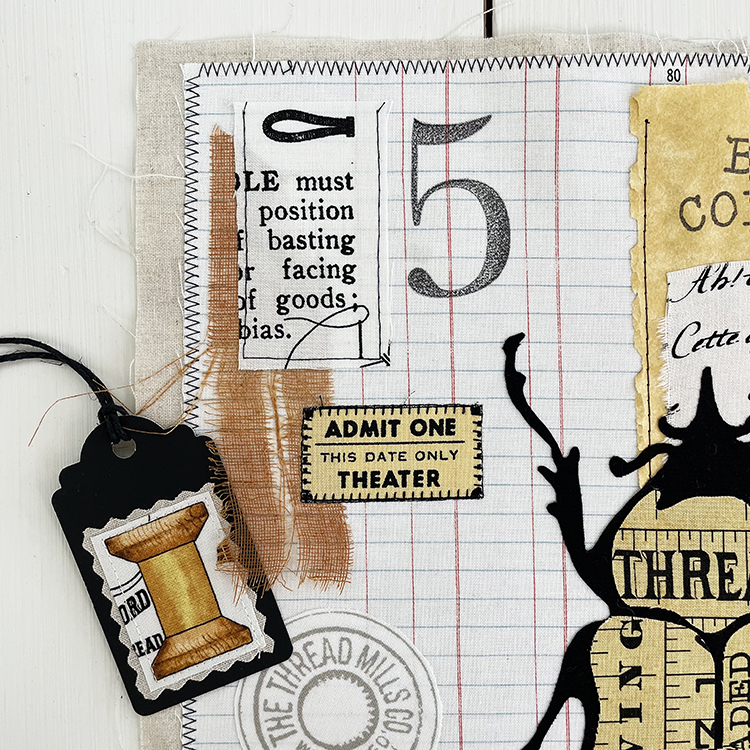
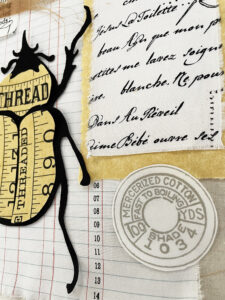
After fabrics were chosen, we prepped our base signature/page fabrics, Again we used RBD Natural Linen layered with Journal Basics Ledger Paper and assembled in place to fuse. I like fusing before sewing down to assure precise placement and this offers more stability to the signature/page. We added a little more stamping and plan to continue with the sew-y theme with vintage buttons and maybe some labels. Plus I have much more sewing details to try/add but see what you think so far! We will have these bug-y appliqué kits in our shop soon.
•


•
I’m saving the Baby Button Dots beetle for a small accent pillow! Stay tuned:
Great Joy Studio/J Wecker Frisch on Instagram and Facebook
by Great Joy Studio | Jul 14, 2022 | Quilting & Fabric

•
Hi and welcome!
This will be short and sweet so if your time is limited like mine this summer, you can still squeeze in a little TAG fun!
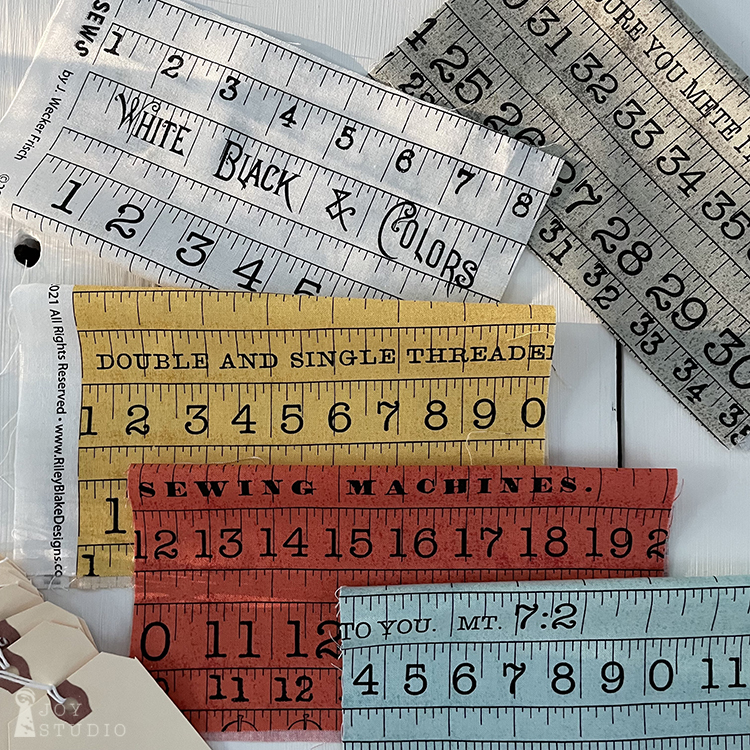
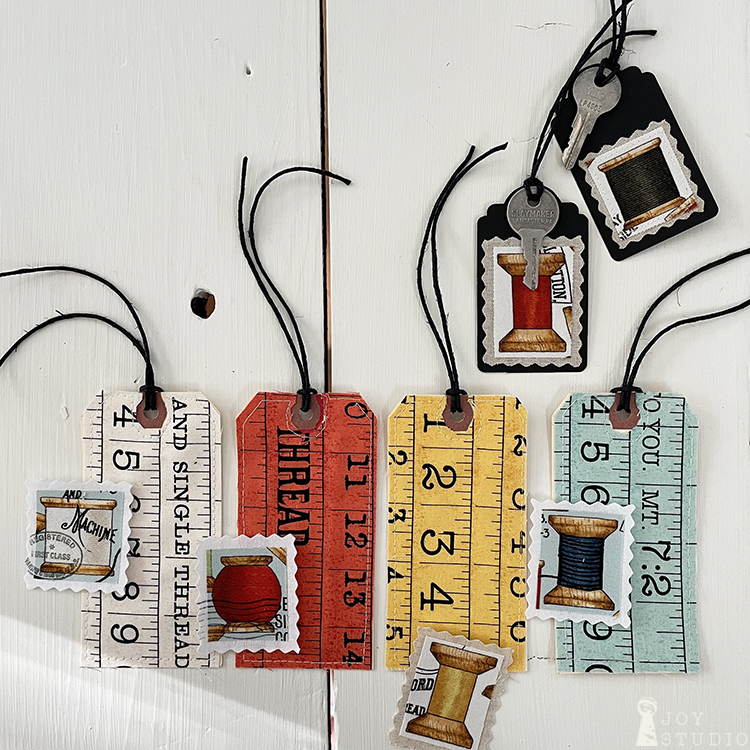
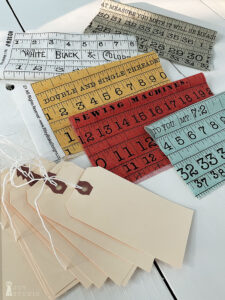
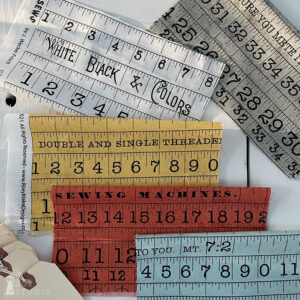
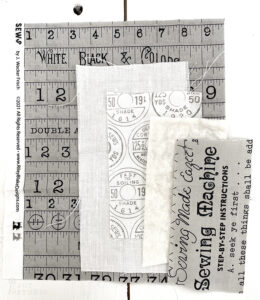
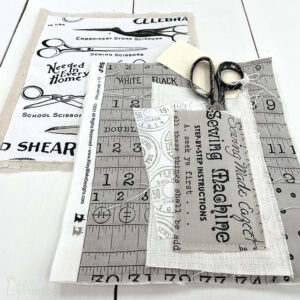
I tried a couple of new (to me) fabric tag making processes this week and it’s ongoing. The further I explore possibilities, the more ideas that evolve. Especially with so many fabric options. For these I used the Best of She Who Sews measuring tapes fabric from Riley Blake Designs. I love these text and color rich tapes and as always the scripture snippets!
•
•
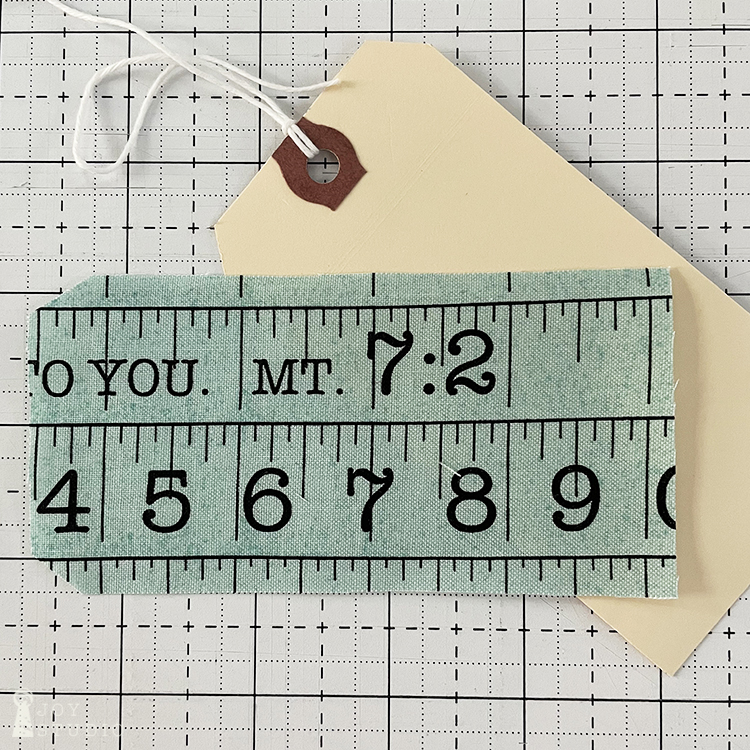
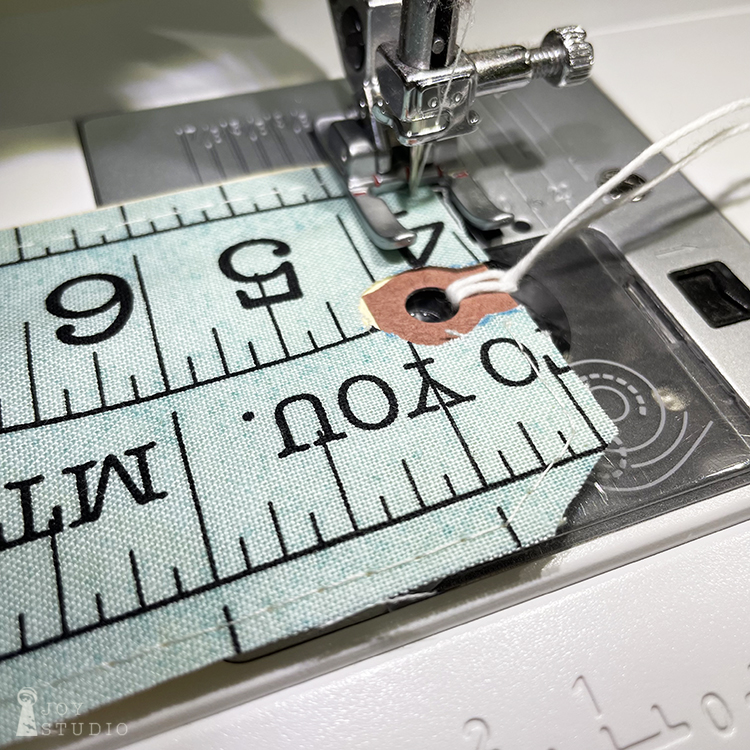
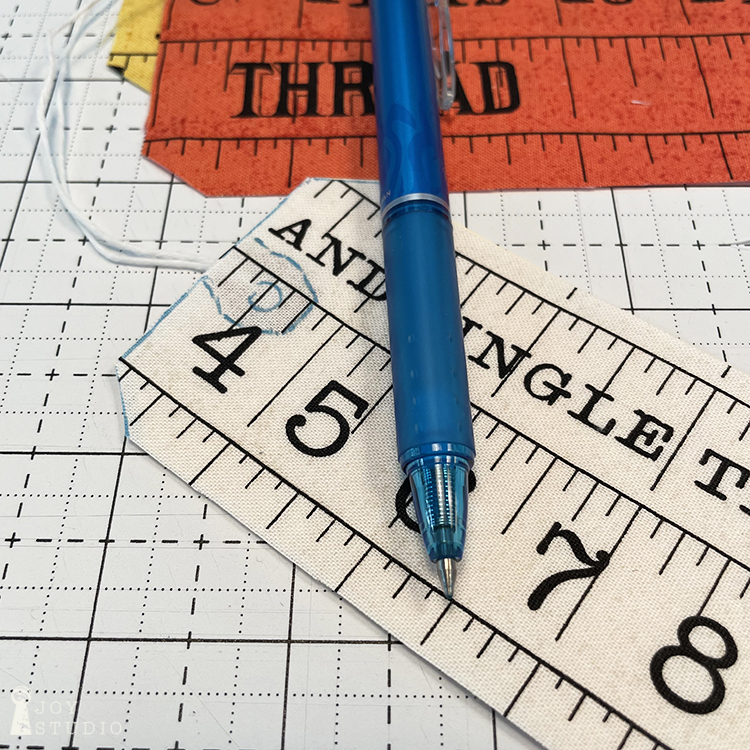
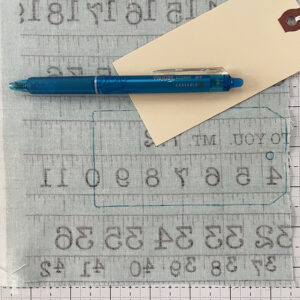
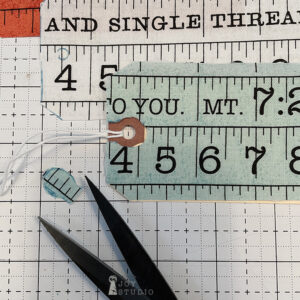
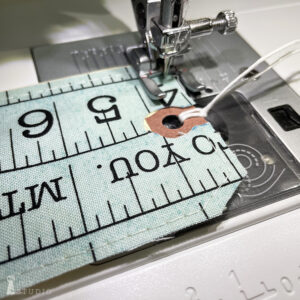
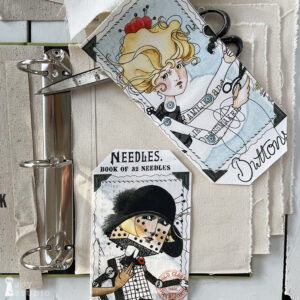
I’m sure many may have already done this with cargo tags however, I just happen to have a LARGE number of these manila paper tags so I decided to cover some with fabric. I like the stability that they offer as a base and also the look. The method I chose was the quick and easy trace, cut, sew! Here in these photos is how I did it.
•


•
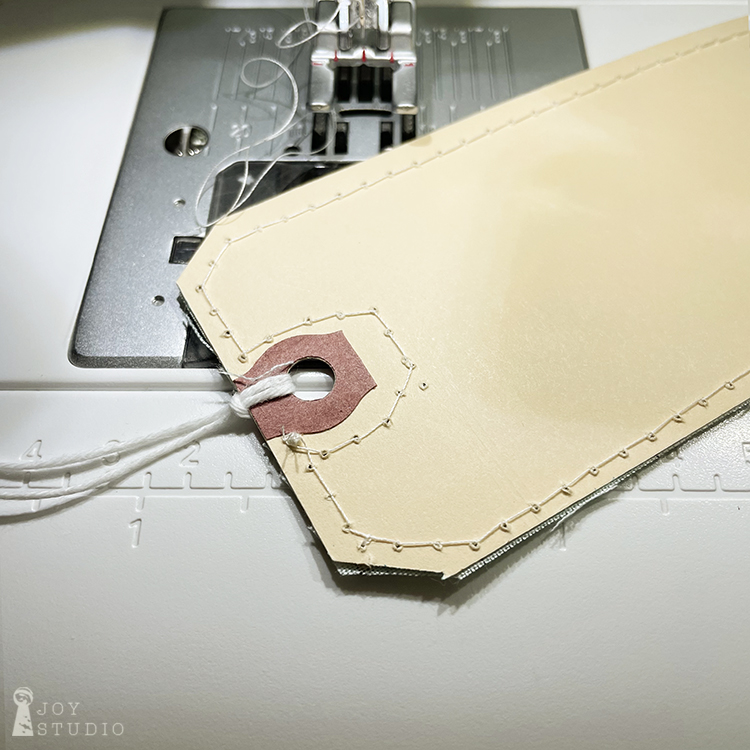
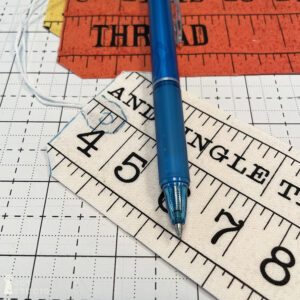
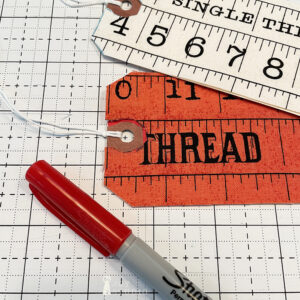
I used a Frixion Pen so the lines would disappear with heat from the iron and the red sharpy to hide my careless cutting. They are not perfect, not precise but that is the sketch-y, stitch-y, journal-y charm, I was told on IG. Then I decided to trade out the white strings that came on the cargo tags for some black hemp twine to compliment the tape text.
Now, I think we need to go a bit further by stamping the backs and attaching a few trinkets of ‘found’ objects that we ALL have in our growing stash and a little layering. To see this progress however, I invite you to tune in to my socials: Instagram or Facebook.
•


•
One other new development for me this week was discovering my concise purpose for this Fabric Journal as I build and contemplate. I stated initially that it would be for personal use and since I chose such a jumbo binder there might be room to store my entire fabric designing journey! Or at least bits of the most significant items.
Again bye, for now and I hope you enjoy some create time.
~Janet
by Great Joy Studio | Jul 7, 2022 | Quilting & Fabric
•
Hello Again!
I hope everyone enjoyed their 4th. We were quite busy building a porch on the Joy Studio, putting me behind on my Fabric Journal project! Hopefully I am not holding anyone up but if that ever happens, please move forward with yours at your own pace.
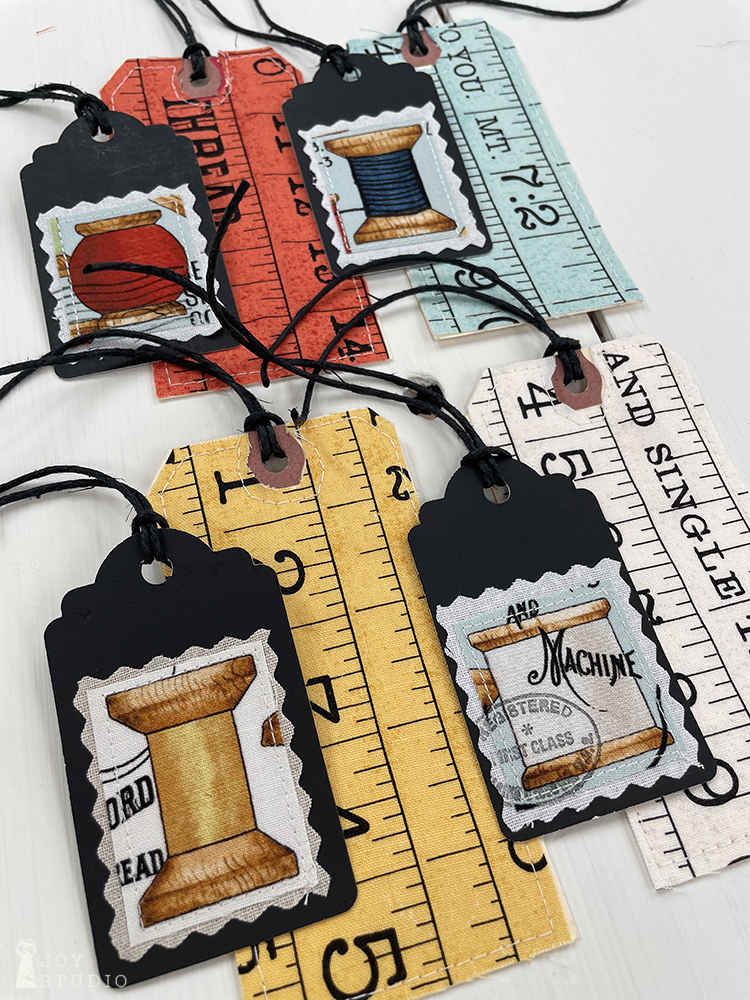
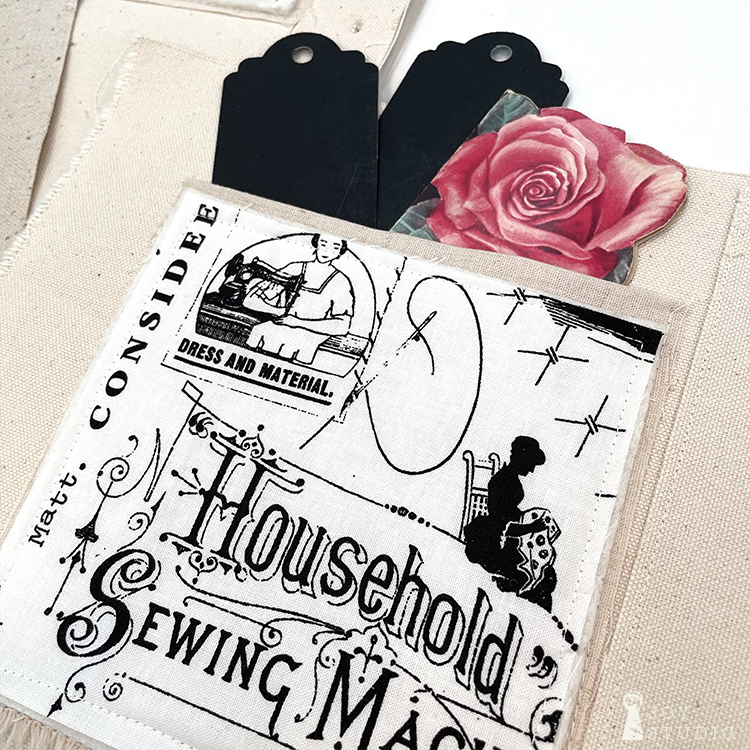
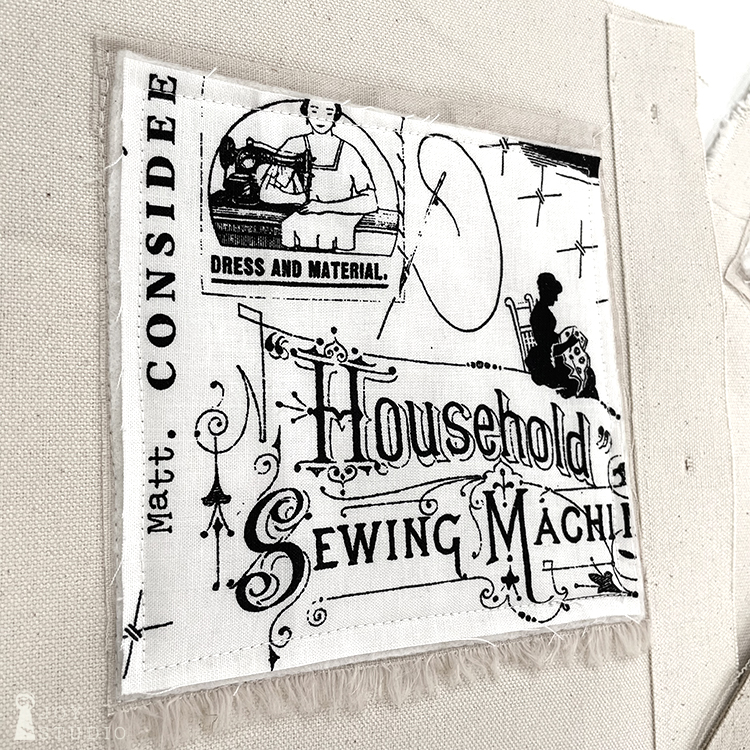
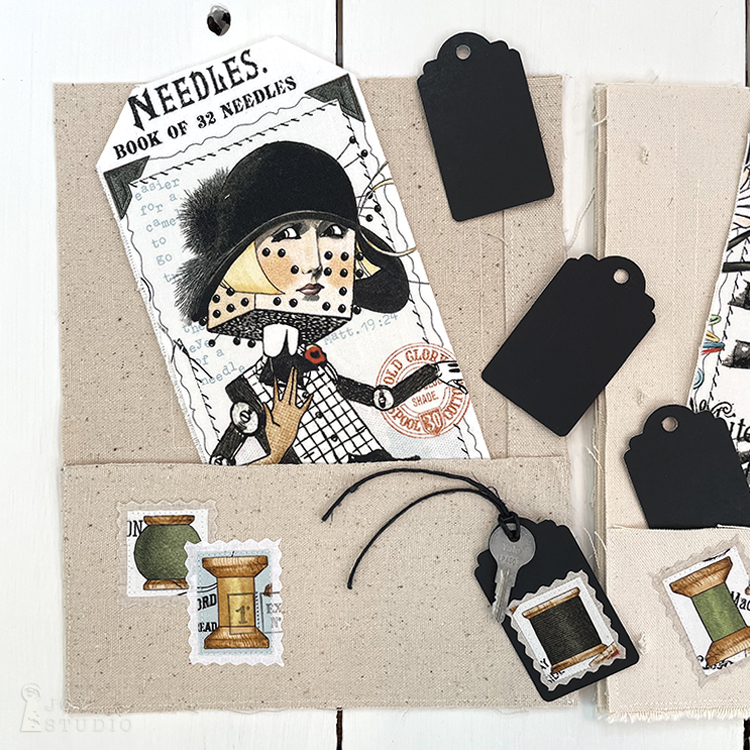
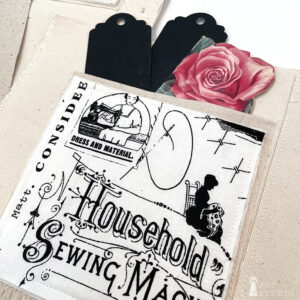
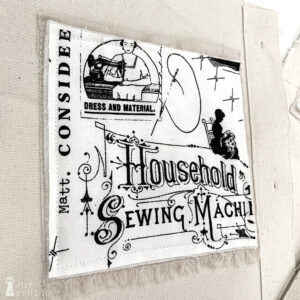
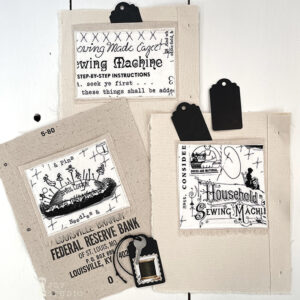
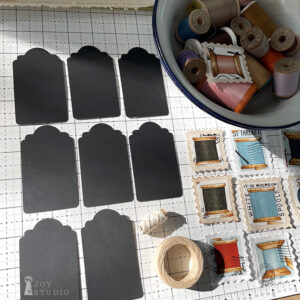
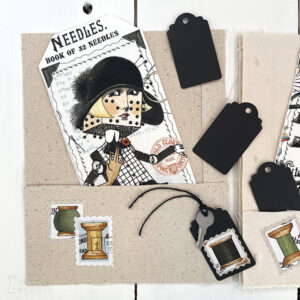
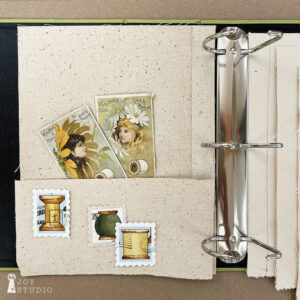
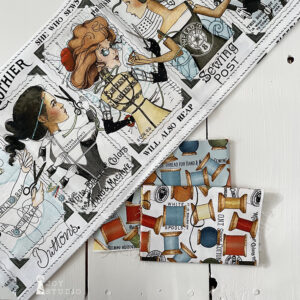
I continued making pockets this week and made some fun die cut tags. The fabric that I used of course is She Who Sews (Best of) from Riley Blake Designs black text on white and also gray. I fussy cut some of the really cool sew-y phrases from SWSs scraps that I had to fit a small size pocket. I then layered those on top of a little larger piece of Riley Blake Natural Linen and batting, leaving raw edges on three sides of the fabric and enough to turn the pocket tops. I then attached them to the back, top of my canvas pages made last week careful not to sew the larger pocket on the pages reverse side. I plan to do a lot more of these when time allows.
•
•
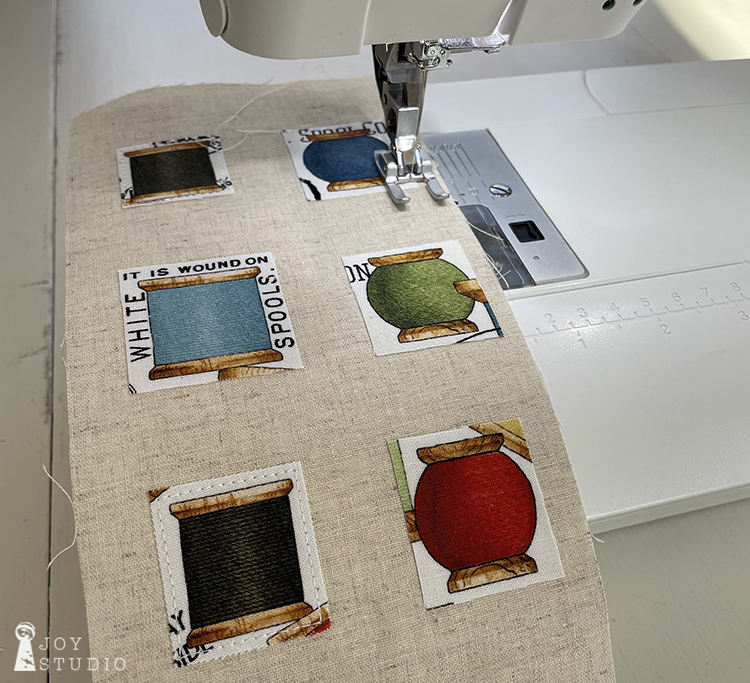
I also decided to cut some small tags out of black poster board scraps that I also had on hand using a large die cut punch. They happened to be the perfect size for adding a few of my spool stamps.
•

•
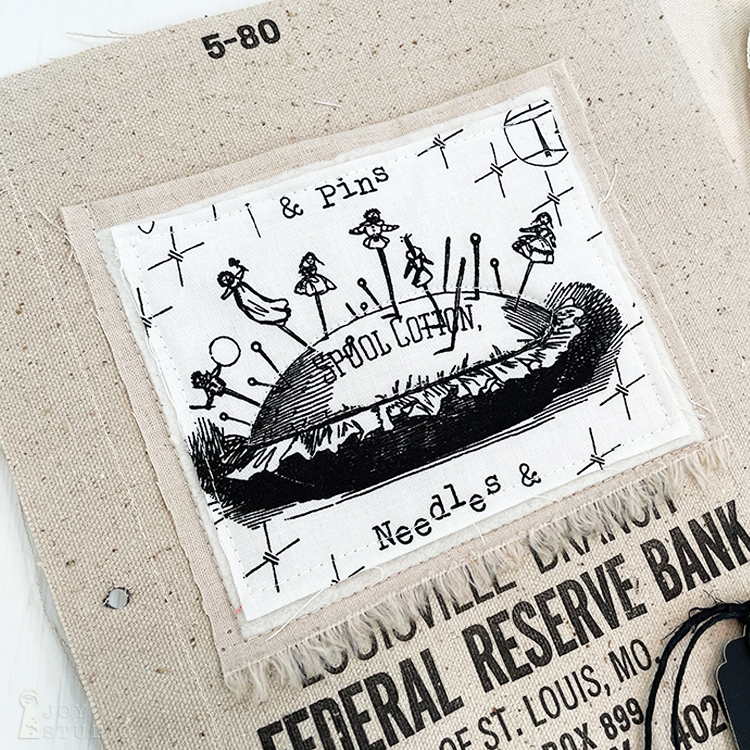
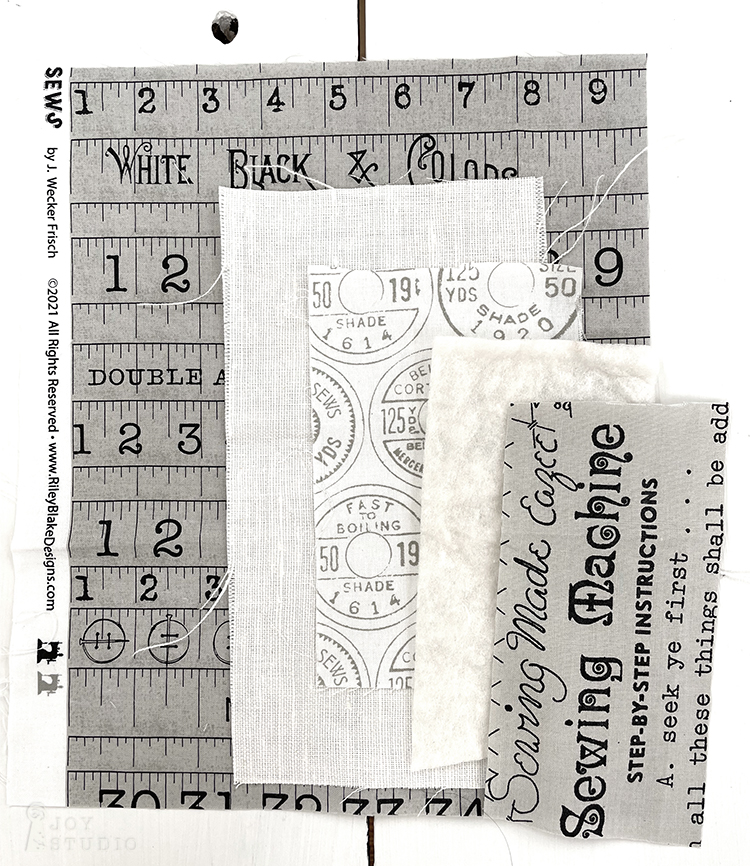
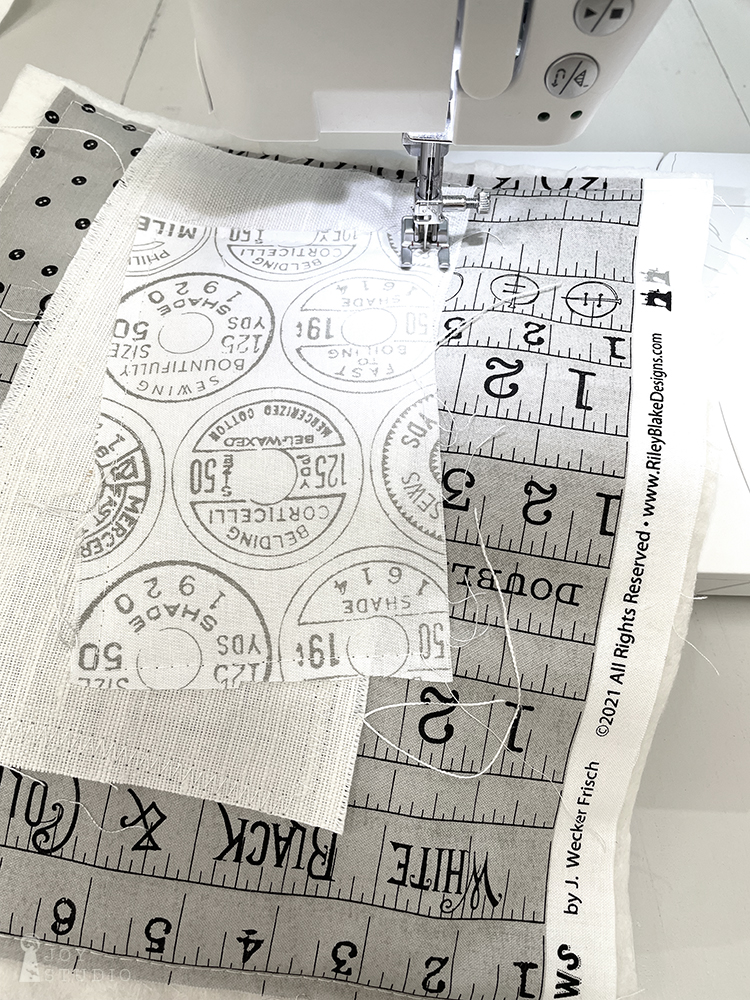
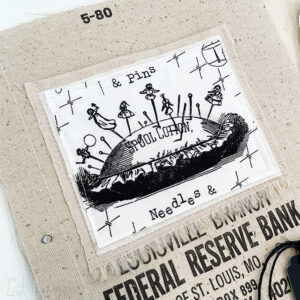
Since I am learning as I go with this fabric journal I decided to experiment with some scrappy layering of SWSs gray measuring tapes, a tiny bit of gray buttons, off white linen, vintage spool tops and Sew-y text, all raw edge scraps and again with batting. This will be one of my quilted pocket pages and who knows, maybe my first attempt at some free motion sewing if I feel brave?!!
•

•
Considering my pace on this project it is likely to be a summer long series!
Keep making and please share.
Thanks for visiting/following.
•
•
by Great Joy Studio | Jun 22, 2022 | Quilting & Fabric
•
Hello!
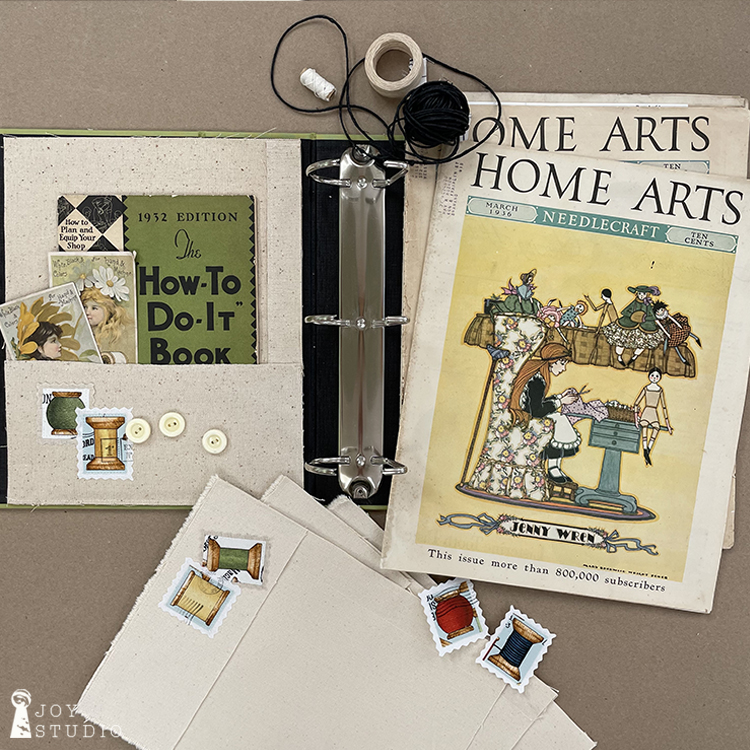
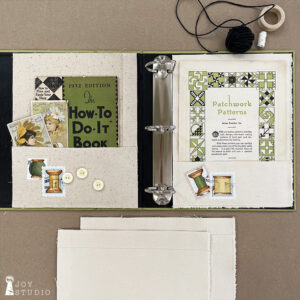
I hope that you enjoyed making tags and faux stamps along with gathering any vintage sewing inspired items that you want to incorporate into your journal. Moving along – This week I made a few heavy canvas pocket pages (signatures), to test and started on some quilted pages (signatures) as well.
The featured fabric throughout the project will be She Who Sews (Best of) and the She Who Sews Home Dec fabrics from Riley Blake Designs. SWSs Home are due to deliver in August. So, check with your quilt shop for availability. This fabric is sew pretty!
*
•
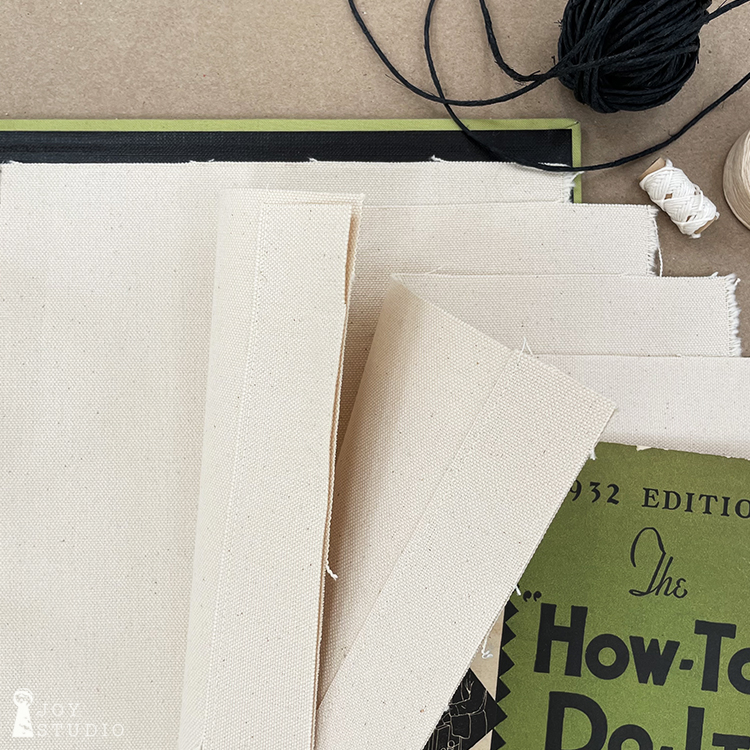
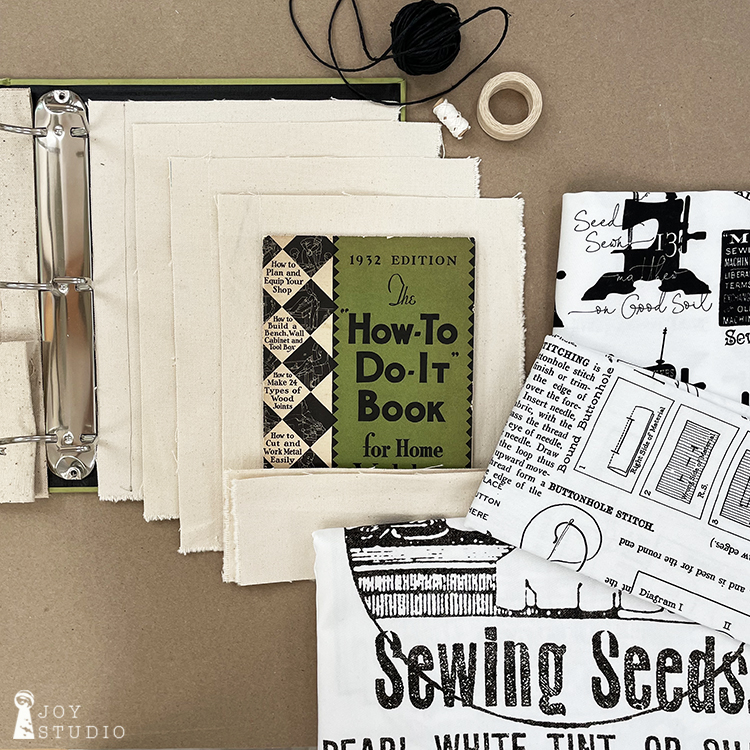
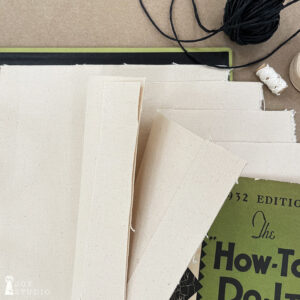
1) Blank canvas pages.
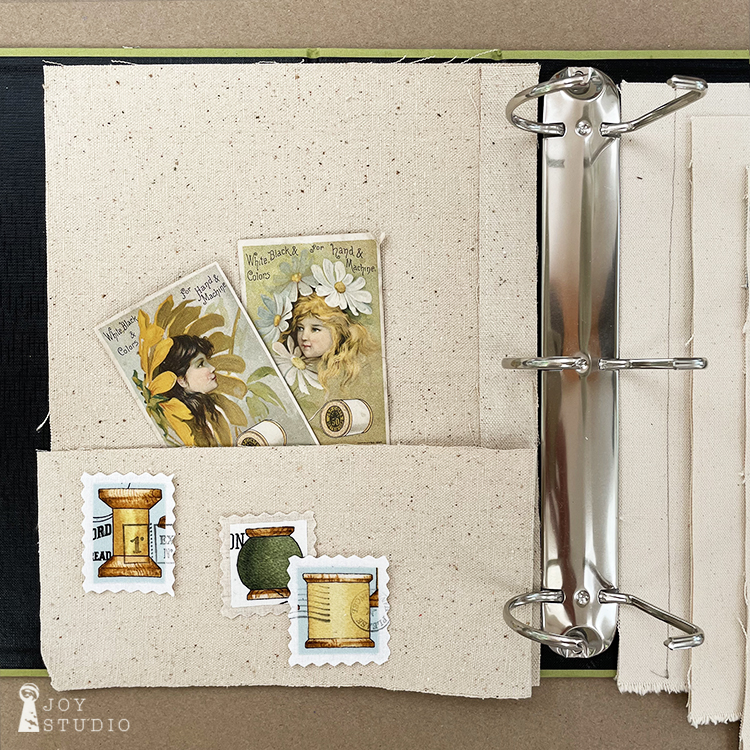
Again I had this canvas on hand and decided to begin with these first. I cut them using a rotary cutter and straight edge on two sides to fit my notebook but left the fringed edges for interest. I also reinforced the inside edges with a one inch strip that will be hole punched, just for extra support. I then used up the scraps for my pockets.
If you want to sew anything on your pockets, do before attaching them to your page. I added a few of the spool stamps and buttons but may decide to stamp or paint some details too.
•
•
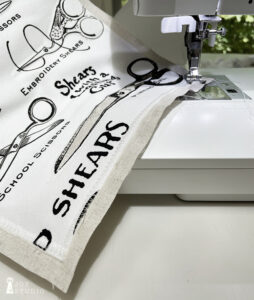
2) Quilted Pages with She Who Sews.
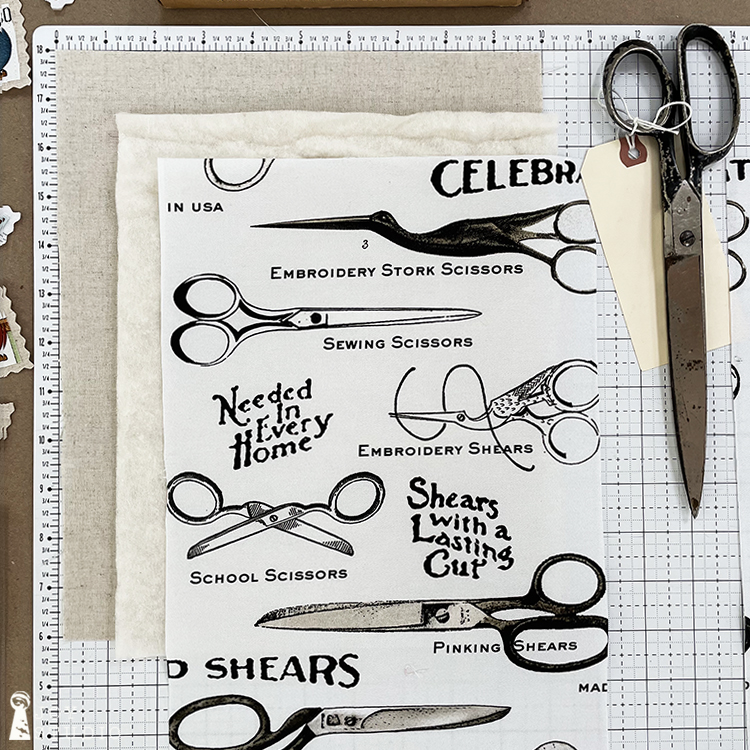
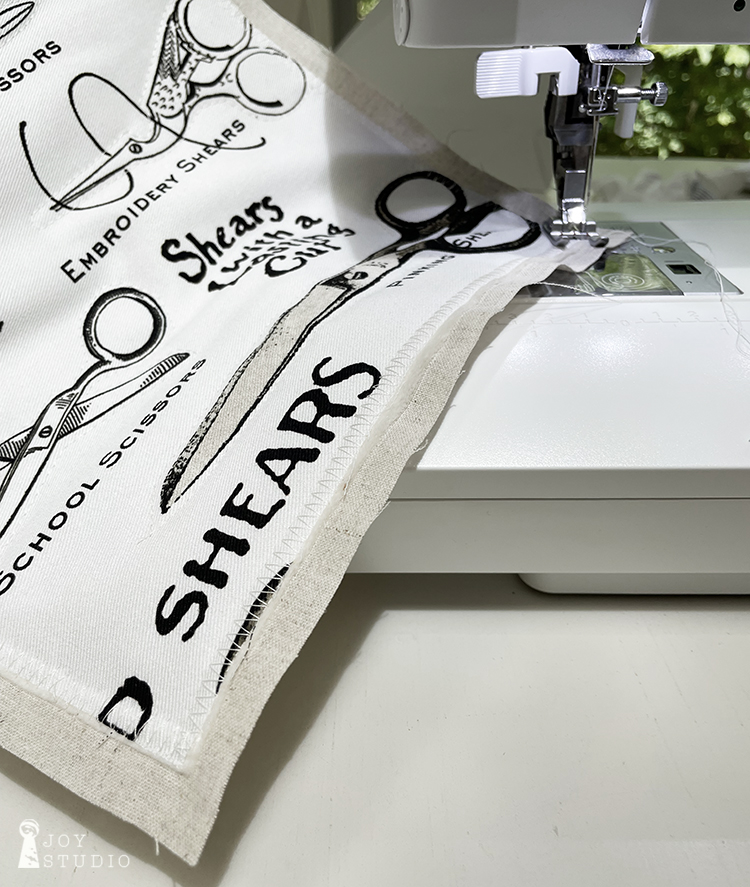
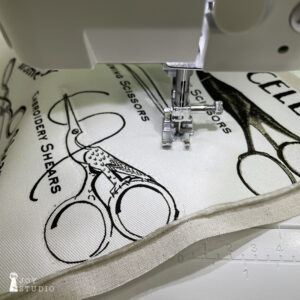
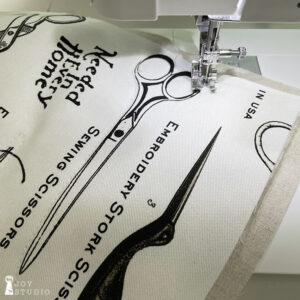
For my first quilted one I chose She Who Sews Home Dec shears fabric from Riley Blake Designs. This collection is full of vintage sew-y motifs which are perfect for a fabric/sew journal! It will deliver in August so check with your quilt shop for availability.
•


•
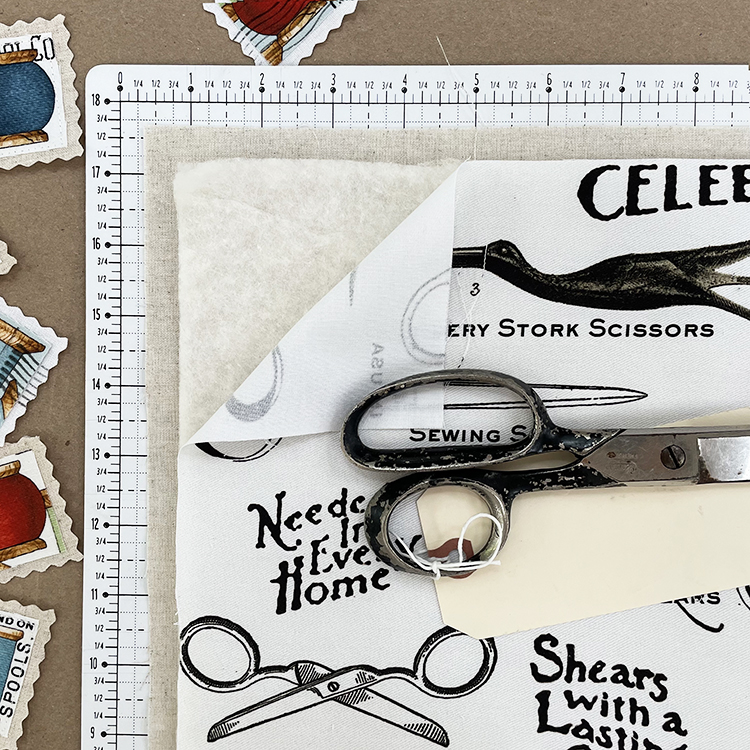
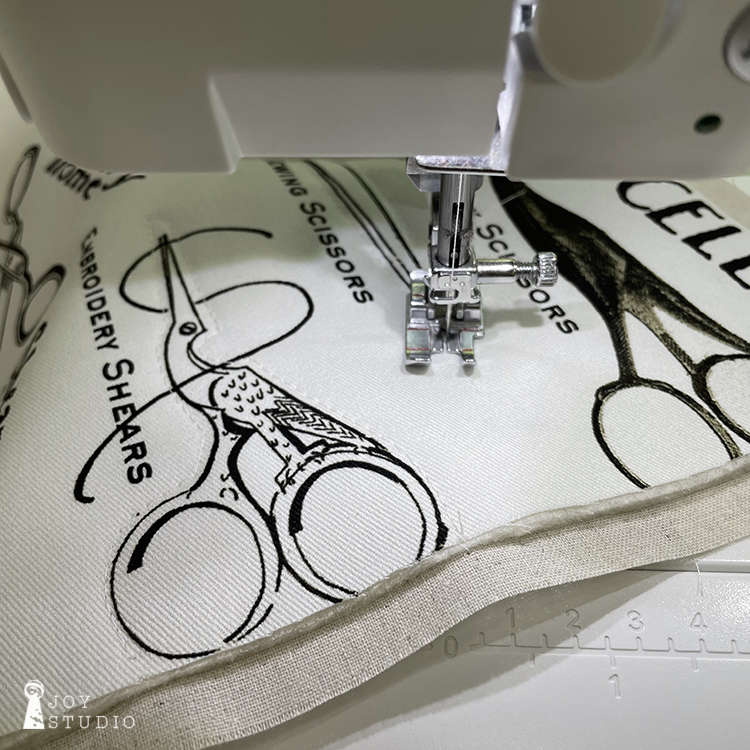
Page base is Natural Linen cut a half inch larger than your fusible batting and your top (shears) fabric, on all four sides. Sandwich the three layers in that order and pin in place if your batting is not fusible. I only gave a light press to adhere the fabrics where I wanted them to be and then began to quilt around each of the images.
•
•
I used an off white thread to blend into the fabric. After some light quilting I used a zigzag stitch on a fairly wide setting around the edges of the top fabric. I like the sketchy appearance of raw fabric edges and a variety of stitches but you could turn and top stitch if you prefer. I have not decided yet if I will fringe my linen edges or simply trim them. My pocket will be added just as the previous canvas pages. I am still deciding what fabric to use however, and how deep to make the pockets. Maybe matching the print would be nice. Any thoughts?
•

•
Continue making as many pocket pages as you think you’ll need. By next week I hope to have several and then we can really get creative! Sound good?!!
Meanwhile get daily updates on Instagram and Facebook.
Thanks for visiting, see you next week.
•
by Great Joy Studio | Jun 15, 2022 | Quilting & Fabric
Welcome!
I am so glad that you could join us for this She Who Sews ‘Fabric Journal’ intro.
Like most of you, I have been admiring the art of journal and book making for some time. Smash books, junk journals, for scrap, tags, pockets etc., always draw me in to take a closer look. So, I finally worked this topic into my design schedule and an inspiring NEW fabric collection!
Stay Tuned for, “Art Journal” from Riley Blake Designs.
Over the next few weeks I will be sharing the process that I followed for my version and first attempt at this favorite pastime. So far mine is going in a direction of vintage sewing keepsakes and collected items, BIG organizer notebook for personal use. My thought, to have everything in one easy to find, easy to store place, artfully and aesthetically pleasing.
•
•
For this project I will be using She Who Sews, Best of (in stores) and She Who Sews HOME (August delivery) as well as Linen from Riley Blake Designs.
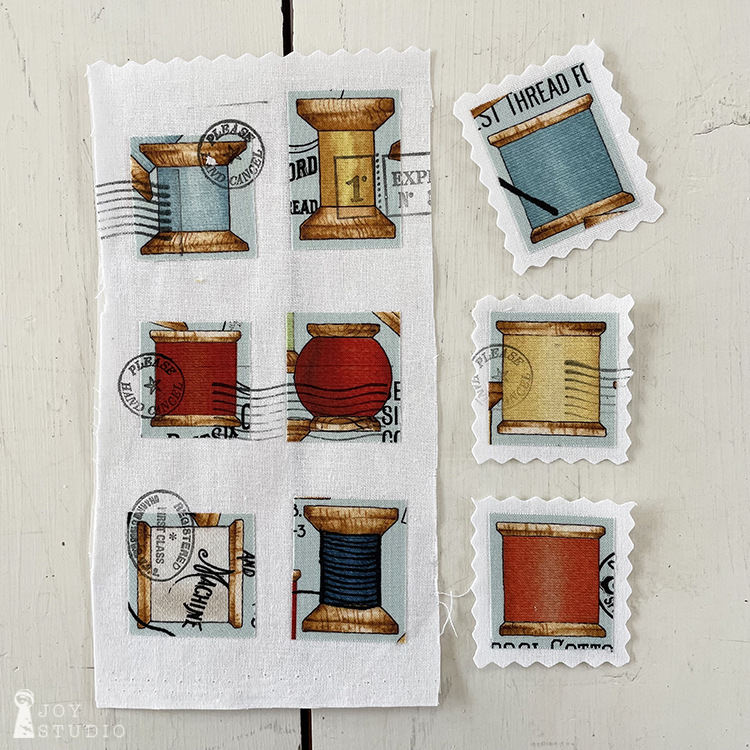
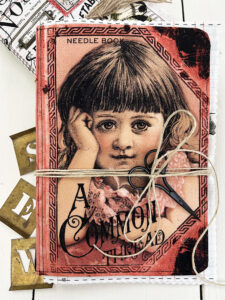
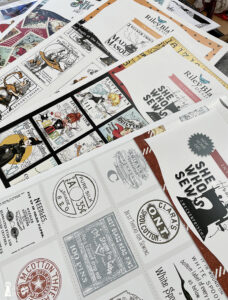
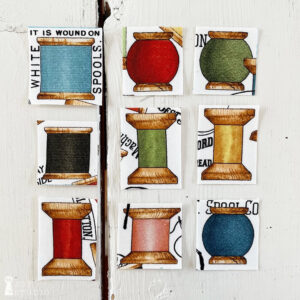
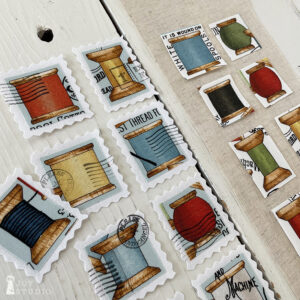
1) My first step was to dive into these cute fabrics! So making a few faux stamps and oversized cargo tags seemed an easy and fun way to get started for journal content. Spool stamps using the toss fabrics plus white and natural linen was the obvious choice. I fused the selected fabrics (for front) to some linen and scrap fabrics (for backing) on hand to give both a bit of weight. Once fused I fussy cut the spools apart. To achieve faux postage I then stamped them randomly. You could freehand the postal details using Micron permanent markers if you don’t have stamping supplies.
Next I fused the spool fabric to a larger size piece of backing fabric and trimmed with a pinked rotary blade. Pinking shears will work fine too. Stitching is another great touch to do at this stage or later directly to your journal page. Your choice.
•


•
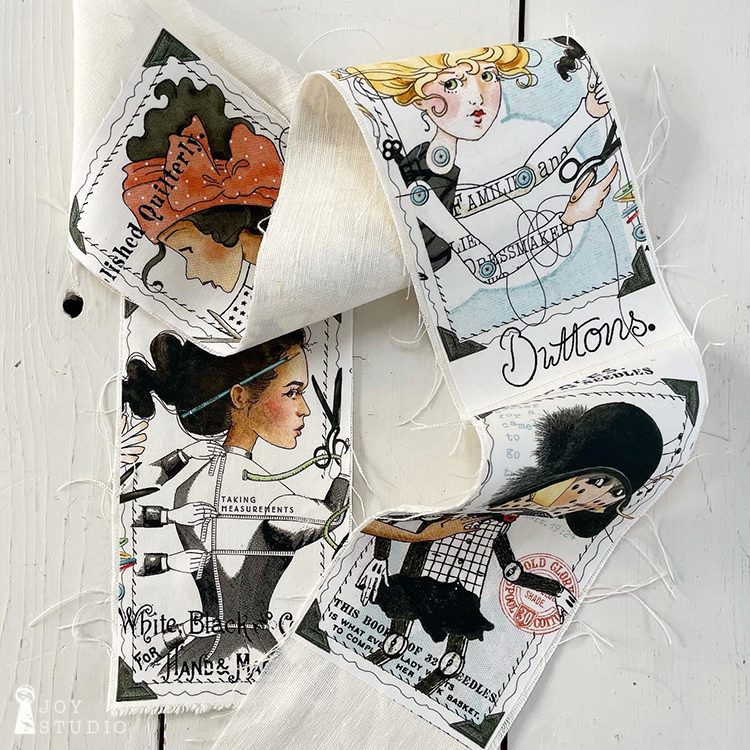
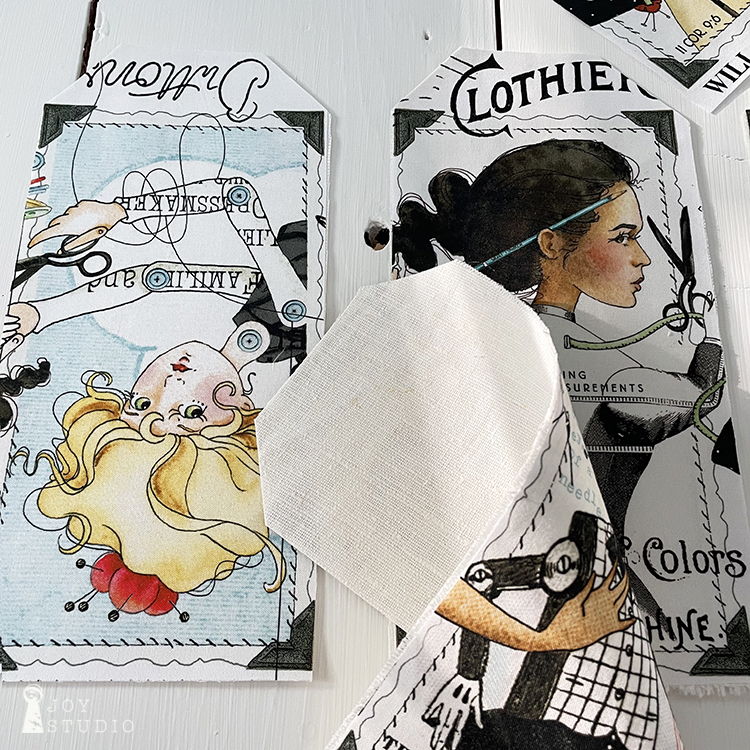
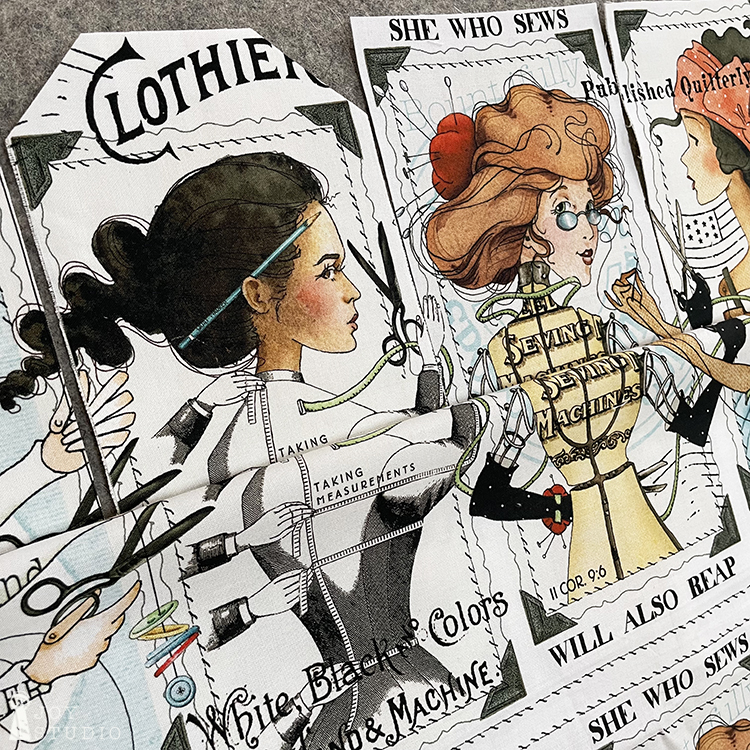
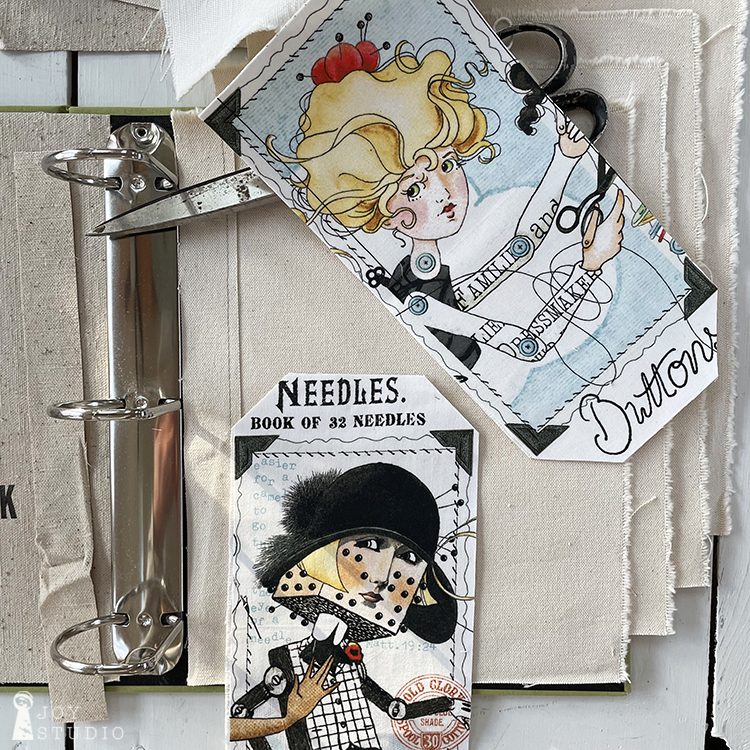
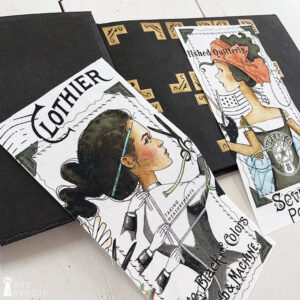
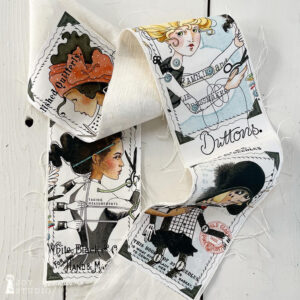
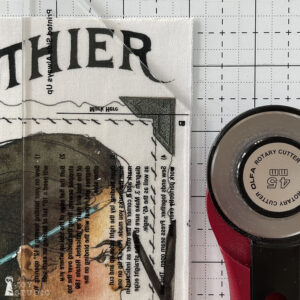
I used the She Who Sews Border Stripe characters to create some oversized (pocket) tags. I cut the characters apart in this case and fused to my long strips of linen scraps. A binding ruler was the perfect tool to cut the tag corners. I am still looking for the right tool to punch the top hole but will probably hand cut with sharp scissors or simply add a button.
Note: As you can see below my tags are a bit too flexible so sandwiching with an interfacing or heavier fusible product can offer a stiffer tag. I intended these to be pocket tags and did not want to add too many layers so, we’ll see how this will work out. This step depends on your desired result.
•

•
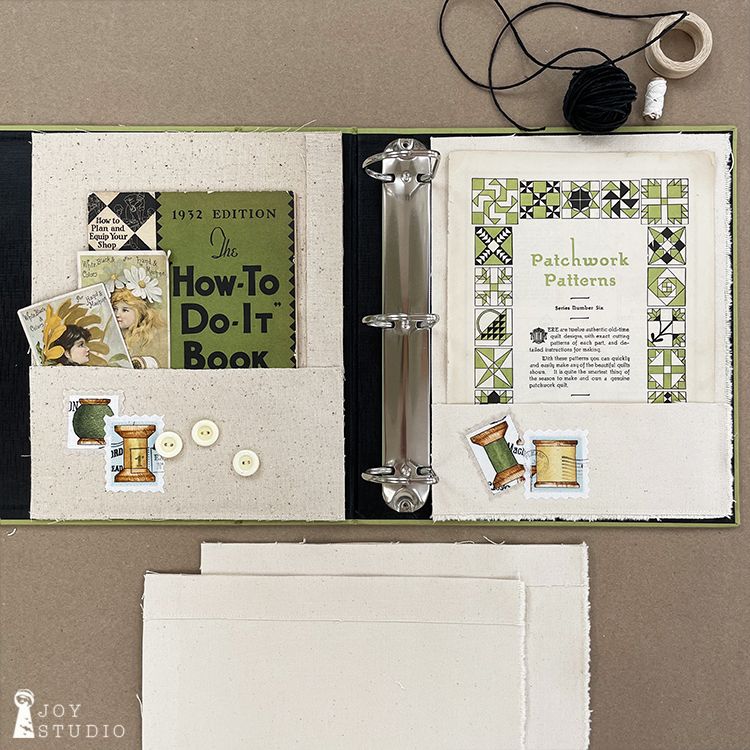
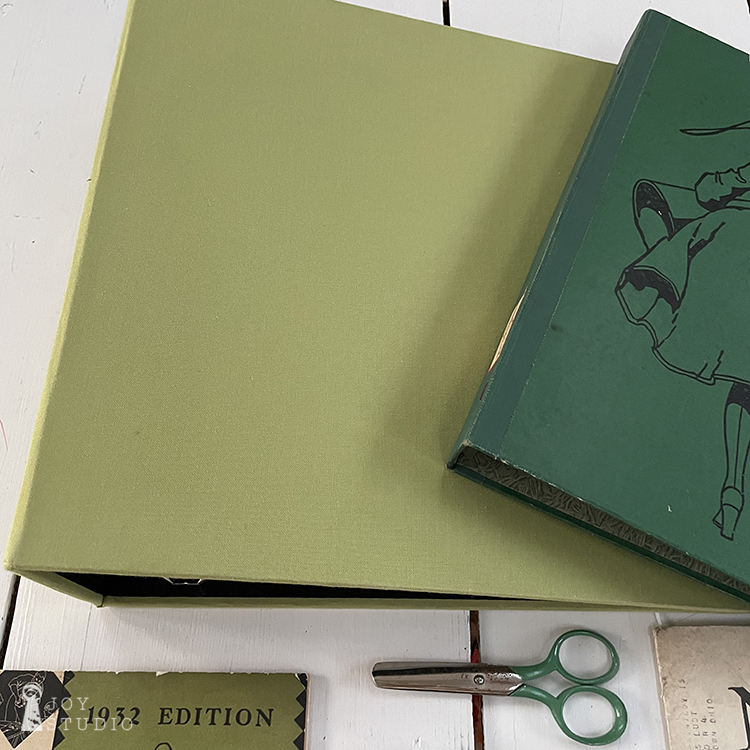
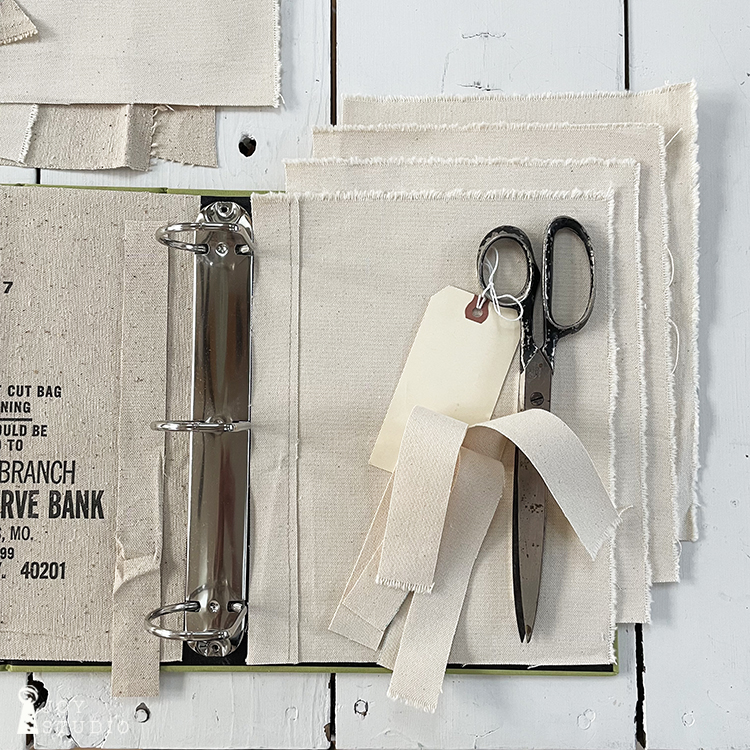
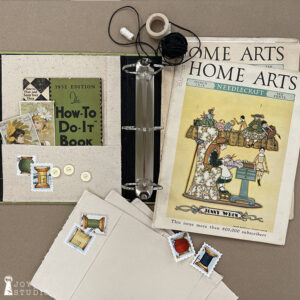
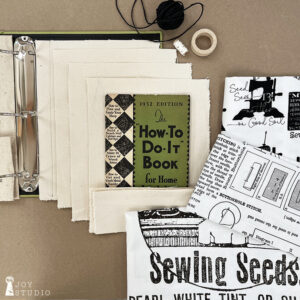
2) For my journal/book base, I decided to use something that I already had rather than to begin a cover from scratch. This saved time and besides that I had acquired so many cool old albums, purchased art journals and notebooks that it seamed a good idea to utilize at least one of them for this project. I chose this chunky green commercial three ring notebook and will concentrate on making my pages only. Eventually, personalizing the cover could be a good plan.
•


•
3) While gathering supplies from around the studio I was reminded of some heavy canvas (bank?!) bags that I purchased somewhere, years ago. These will be perfect as pocket pages to hold a lot of the goods. Anything will do for the page base and a blank canvas for adding the fun fabrics was my initial thought. Moving forward, I am realizing that this work in progress is sure to evolve but any variation of course, is the fun part!
•

•
A look back –
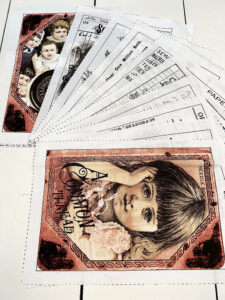
I first tried my hand at constructing a simple cloth style artful book with a few pages, pockets and added materials best I knew how and presented in our QM booth 2019. This Scary Book uses Costume Makers Ball fabric from Riley Blake Designs and was intended as a fun decoration for the Fall festivities and it was FUN to make! I really enjoyed but confess, was winging it all the way. I began another the following year using Goose Tales but have not yet completed. Time is my typical obstacle, then again the life interruption in 2020 took away the (Quilt Market) incentive which didn’t help my motivation.
However, I have NEW inspiration for fabric and mixed media journal making and will be sharing on
Instagram and Facebook.
Follow us there for the latest and meanwhile, keep making!!
See you next week.